Local Development with Stackery
One of the hardest adjustments to make when going from traditional app development to serverless app development is how to write and test your functions locally. Because functions will be interacting with cloud resources once they've been deployed, they need to interact with cloud resources in a local environment as well in order to accurately represent their infrastructure dependencies. To date, this has been a complicated process for developers, especially those new to serverless, and existing tooling has been limited.
As of version 2.6.0, the Stackery CLI allows for local development using cloudside resources. This guide will show you how to set up a local development environment with Stackery, and how to iterate on function code locally.
Overview
In order to locally develop against cloud resources, those resources need to be deployed into a cloudside environment. This guide will walk you through setting up a local development environment with the Stackery CLI and running the stackery local invoke command with different options.
Setting up for Local Development
Required Installations
You will need to install the following software before continuing on with this guide:
- The Stackery CLI
- The AWS CLI (make sure you have a
~/.aws/credentialsfile on the machine you'll be working on) - The AWS SAM CLI
- Docker Desktop Community Edition (Free Docker account required for download):
(Optional) Create your developer environment
If you already have a test environment in Stackery for deploying into, feel free to skip this step.
In the Stackery Dashboard, navigate to the Environments tab in the top navigation, then click the Add an Environment button. Select the AWS account and region for your environment, and name it (we'll be using the name test in our example).
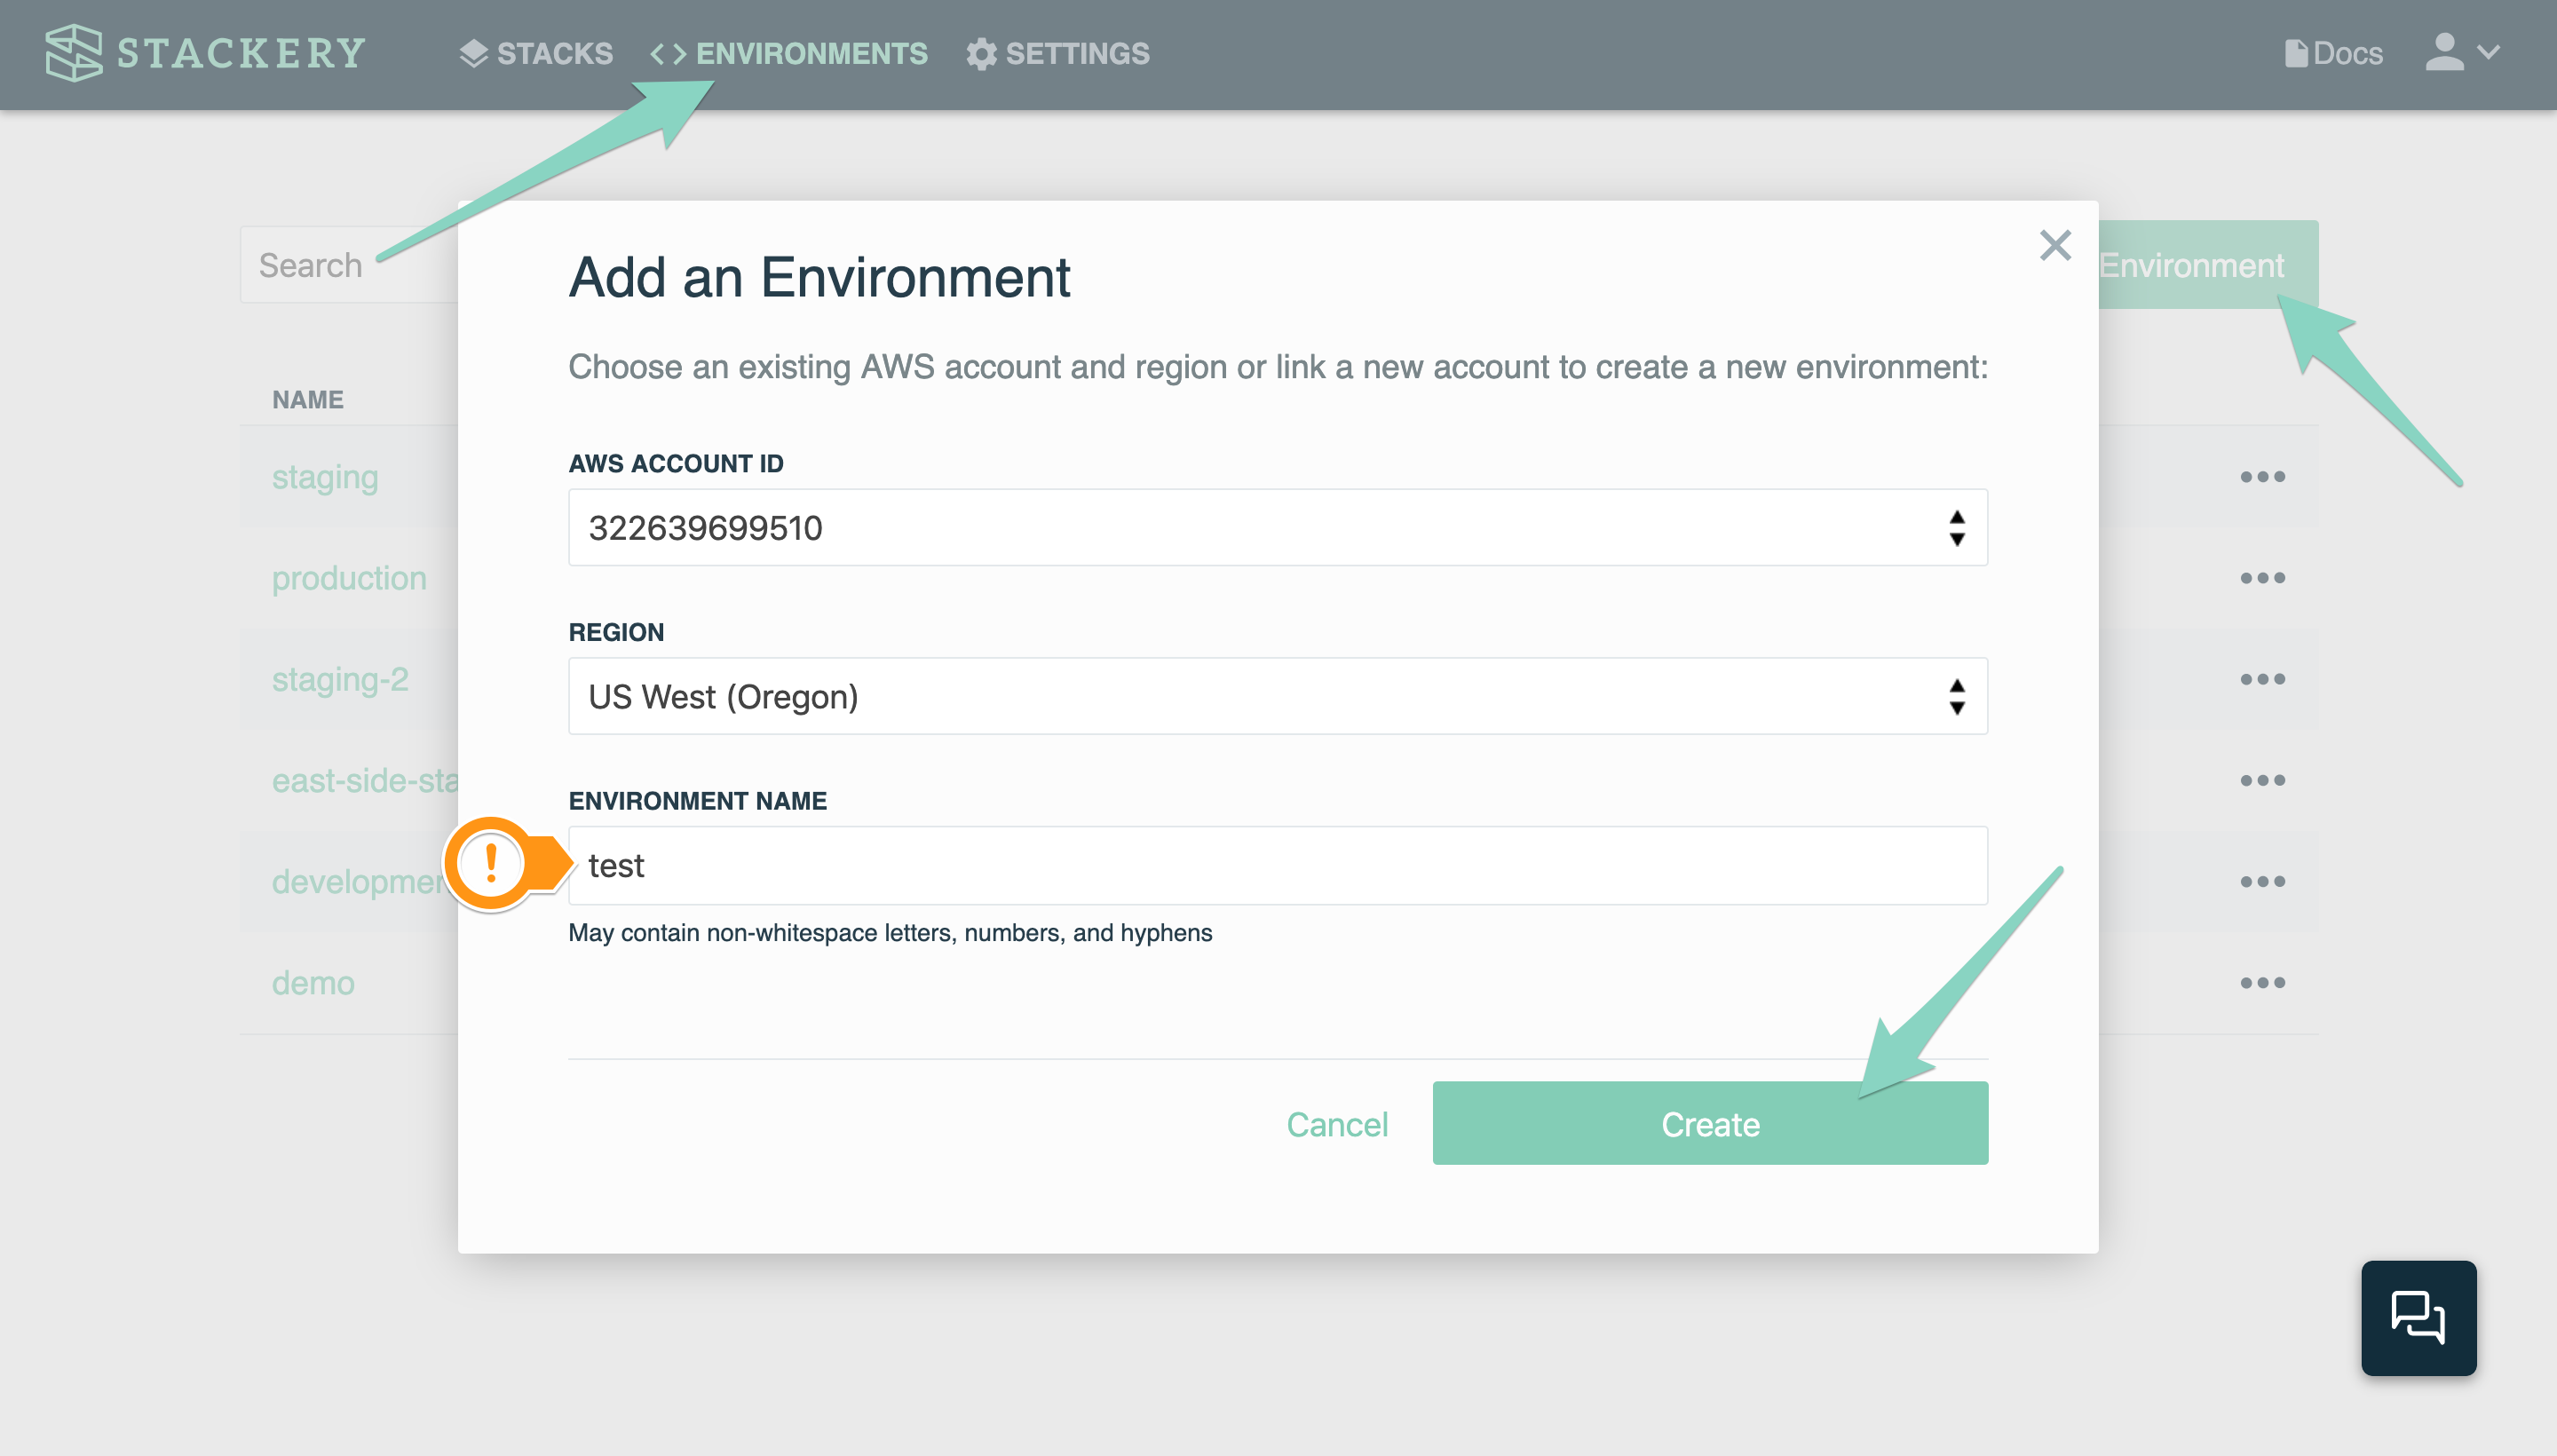
If your stack requires any environment parameters such as API keys, you can add those values in the Parameters tab of your new or existing test environment.
This step can also be completed with the CLI. The following command will create a new environment called test in a specified AWS account and region:
stackery env create --env-name test --aws-account-id 987654567890 --aws-region us-east-1
(Optional) Create a new stack
If you already have a deployed stack you would like to use for local development, feel free to skip to the Running Stackery Local step.
Once you have added an environment, create a new stack using stackery init or select an existing stack for local testing. We will be using a stack called local-demo in this example.
To create a new blank stack called local-demo in the CLI, enter:
stackery init --stack-name local-demo
Add stack resources
We will be building a simple demo stack in this example, but this guide can be followed with any real-world stack architecture that involves one or more Lambda functions.
In your terminal or shell, cd to the root of the local-demo directory that was created when you ran the stackery init command, and enter stackery edit. A browser window with a blank canvas will open (You may have to enter your Stackery credentials if you are not automatically logged in).
- Click the Add Resource button in the top right
- Select Rest Api and click or drag and drop it onto the canvas
- Select Function and click or drag and drop it onto the canvas
- Select Job Queue and click or drag and drop it onto the canvas
- Close the panel, double-click the Rest Api on the canvas to open the editing panel
- Enter
restApifor the Logical ID - Leave the other values as they are
- Click Save at the bottom to save your API
- Double-click the Function to open the editing panel
- Change the Logical ID to
getEvent - Change the Source Path to
src/getEvent - Leave the other values as they are
- Click Save at the bottom to save your function
- Double-click the Job Queue on the canvas to open the editing panel
- Enter
queuedJobsfor the Logical ID - Click Save at the bottom to save your Queue
- Drag an Integration Wire from the endpoint on the right side of the API's GET method to the endpoint on the left side of the Function
- Drag a Discovery Wire from the endpoint on the right side of the Function to the endpoint on the left side of the Job Queue
Your stack should now look like this:
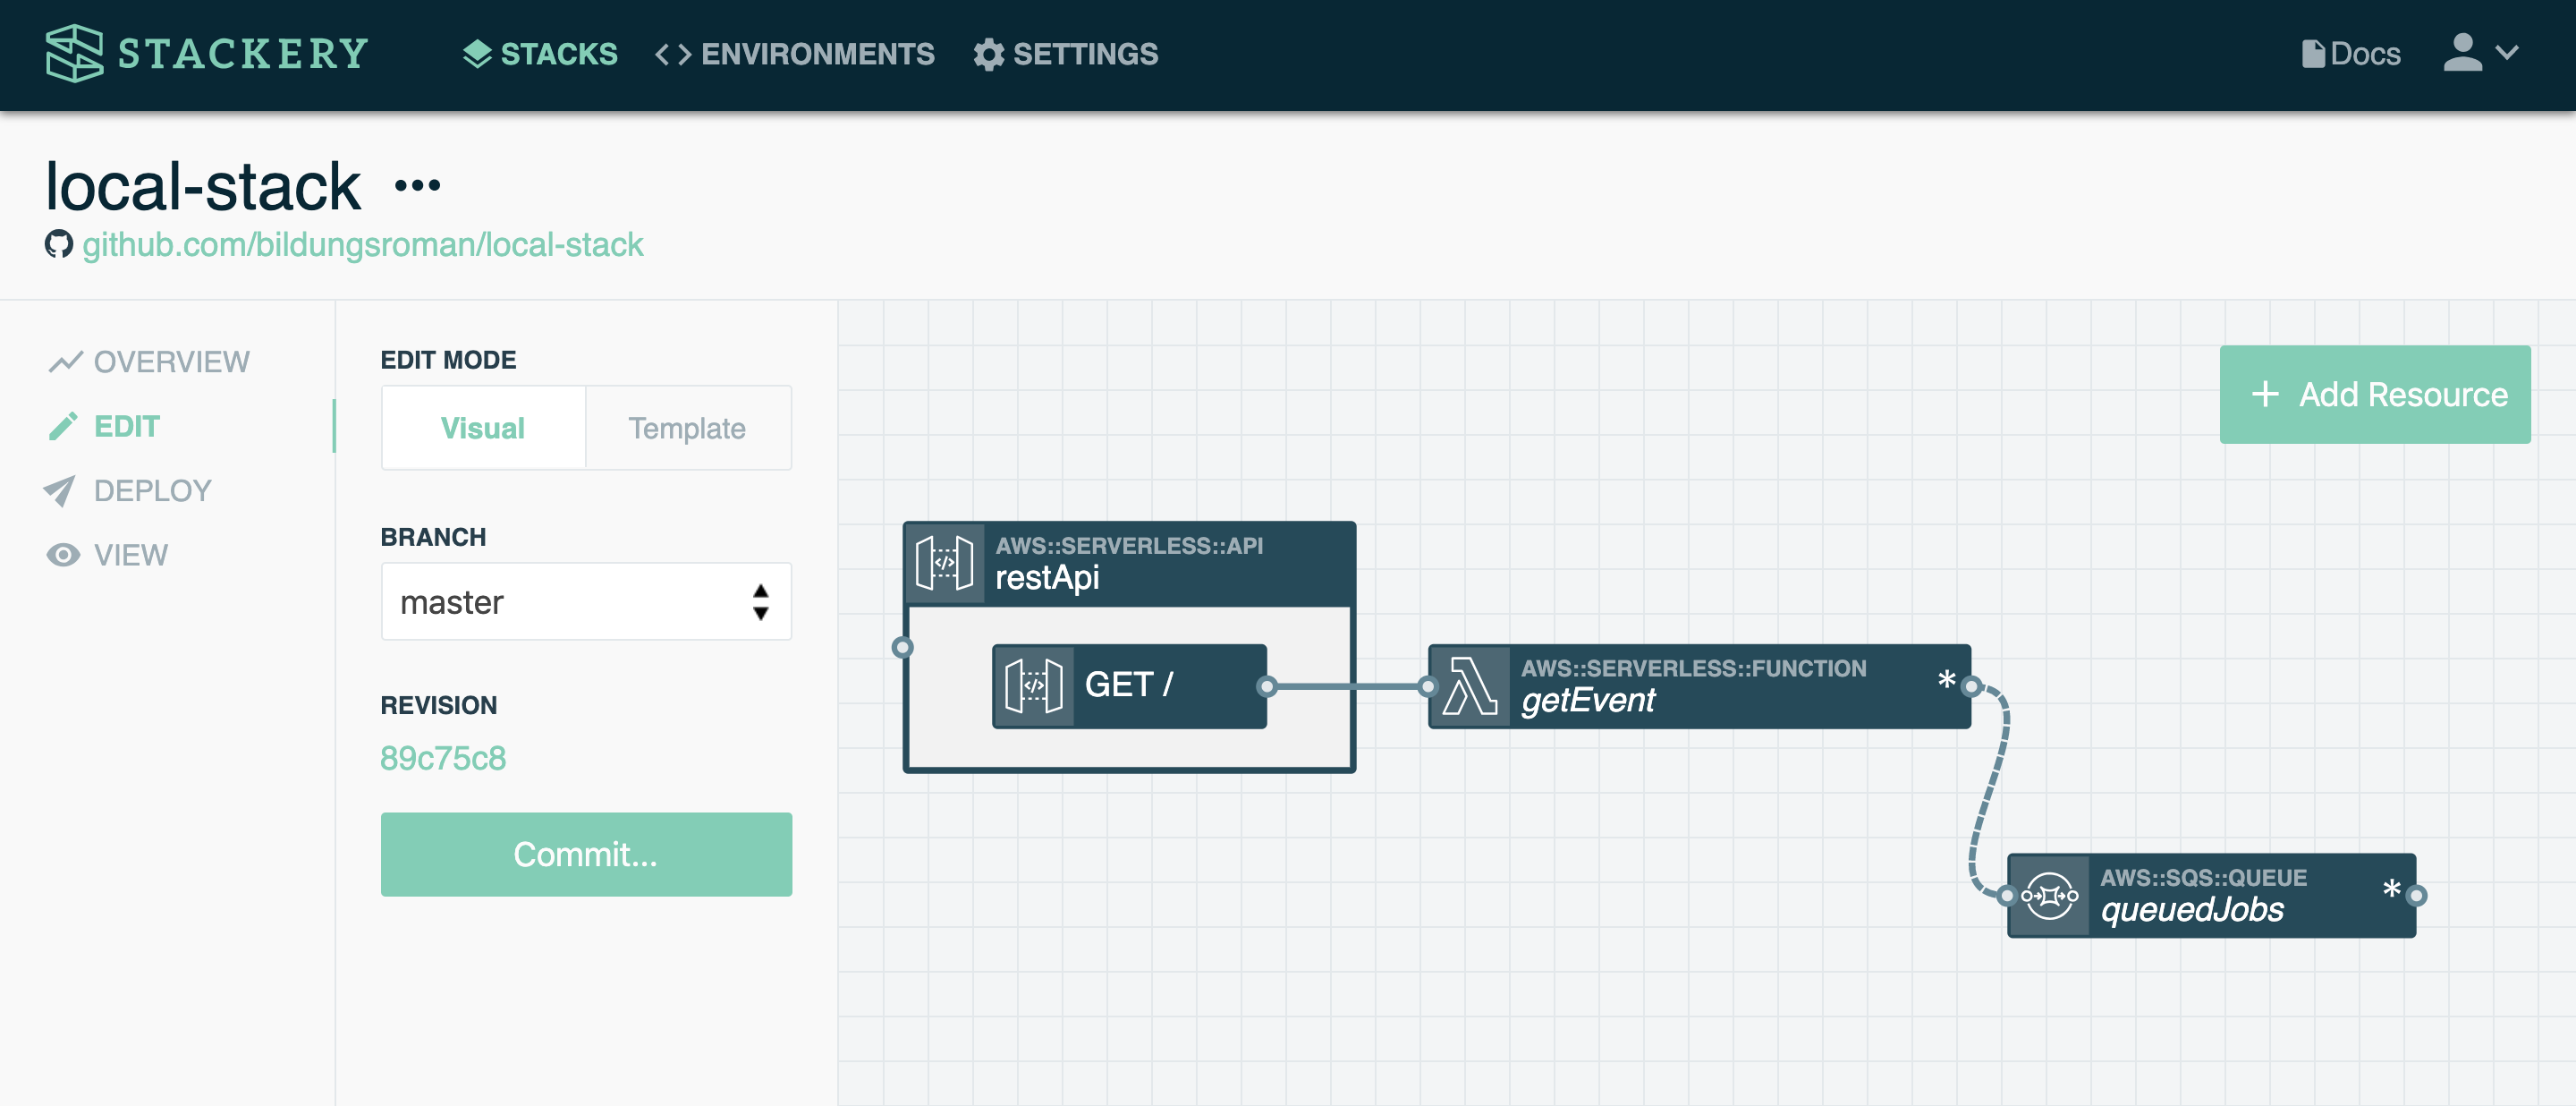
Once you have architected your stack, you should see that the template.yaml file at the root of your stack has been updated with new resources. A src/ directory was also created with boilerplate function source code.
Save the template file if it hasn't been saved. You can now close your editing browser tab and enter CTRL+C in the terminal to stop the local server.
Deploy your initial stack
In order to invoke a Lambda function locally, the resources it depends on must exist in the designated cloudside environment. This is why you first need to deploy your stack, even if your function is not doing anything yet.
The first time you deploy a new stack created with the stackery init command, your stack will be added to Stackery, and you can optionally create a new environment to deploy into. Deploy by running the following command:
stackery deploy
When prompted, choose the AWS profile for your
testenvironment if you have multiple AWS credentials on your local machine. You can alternatively create a new environment for deployment.
The deployment process will take a few minutes, and you should see a similar output when it's complete:
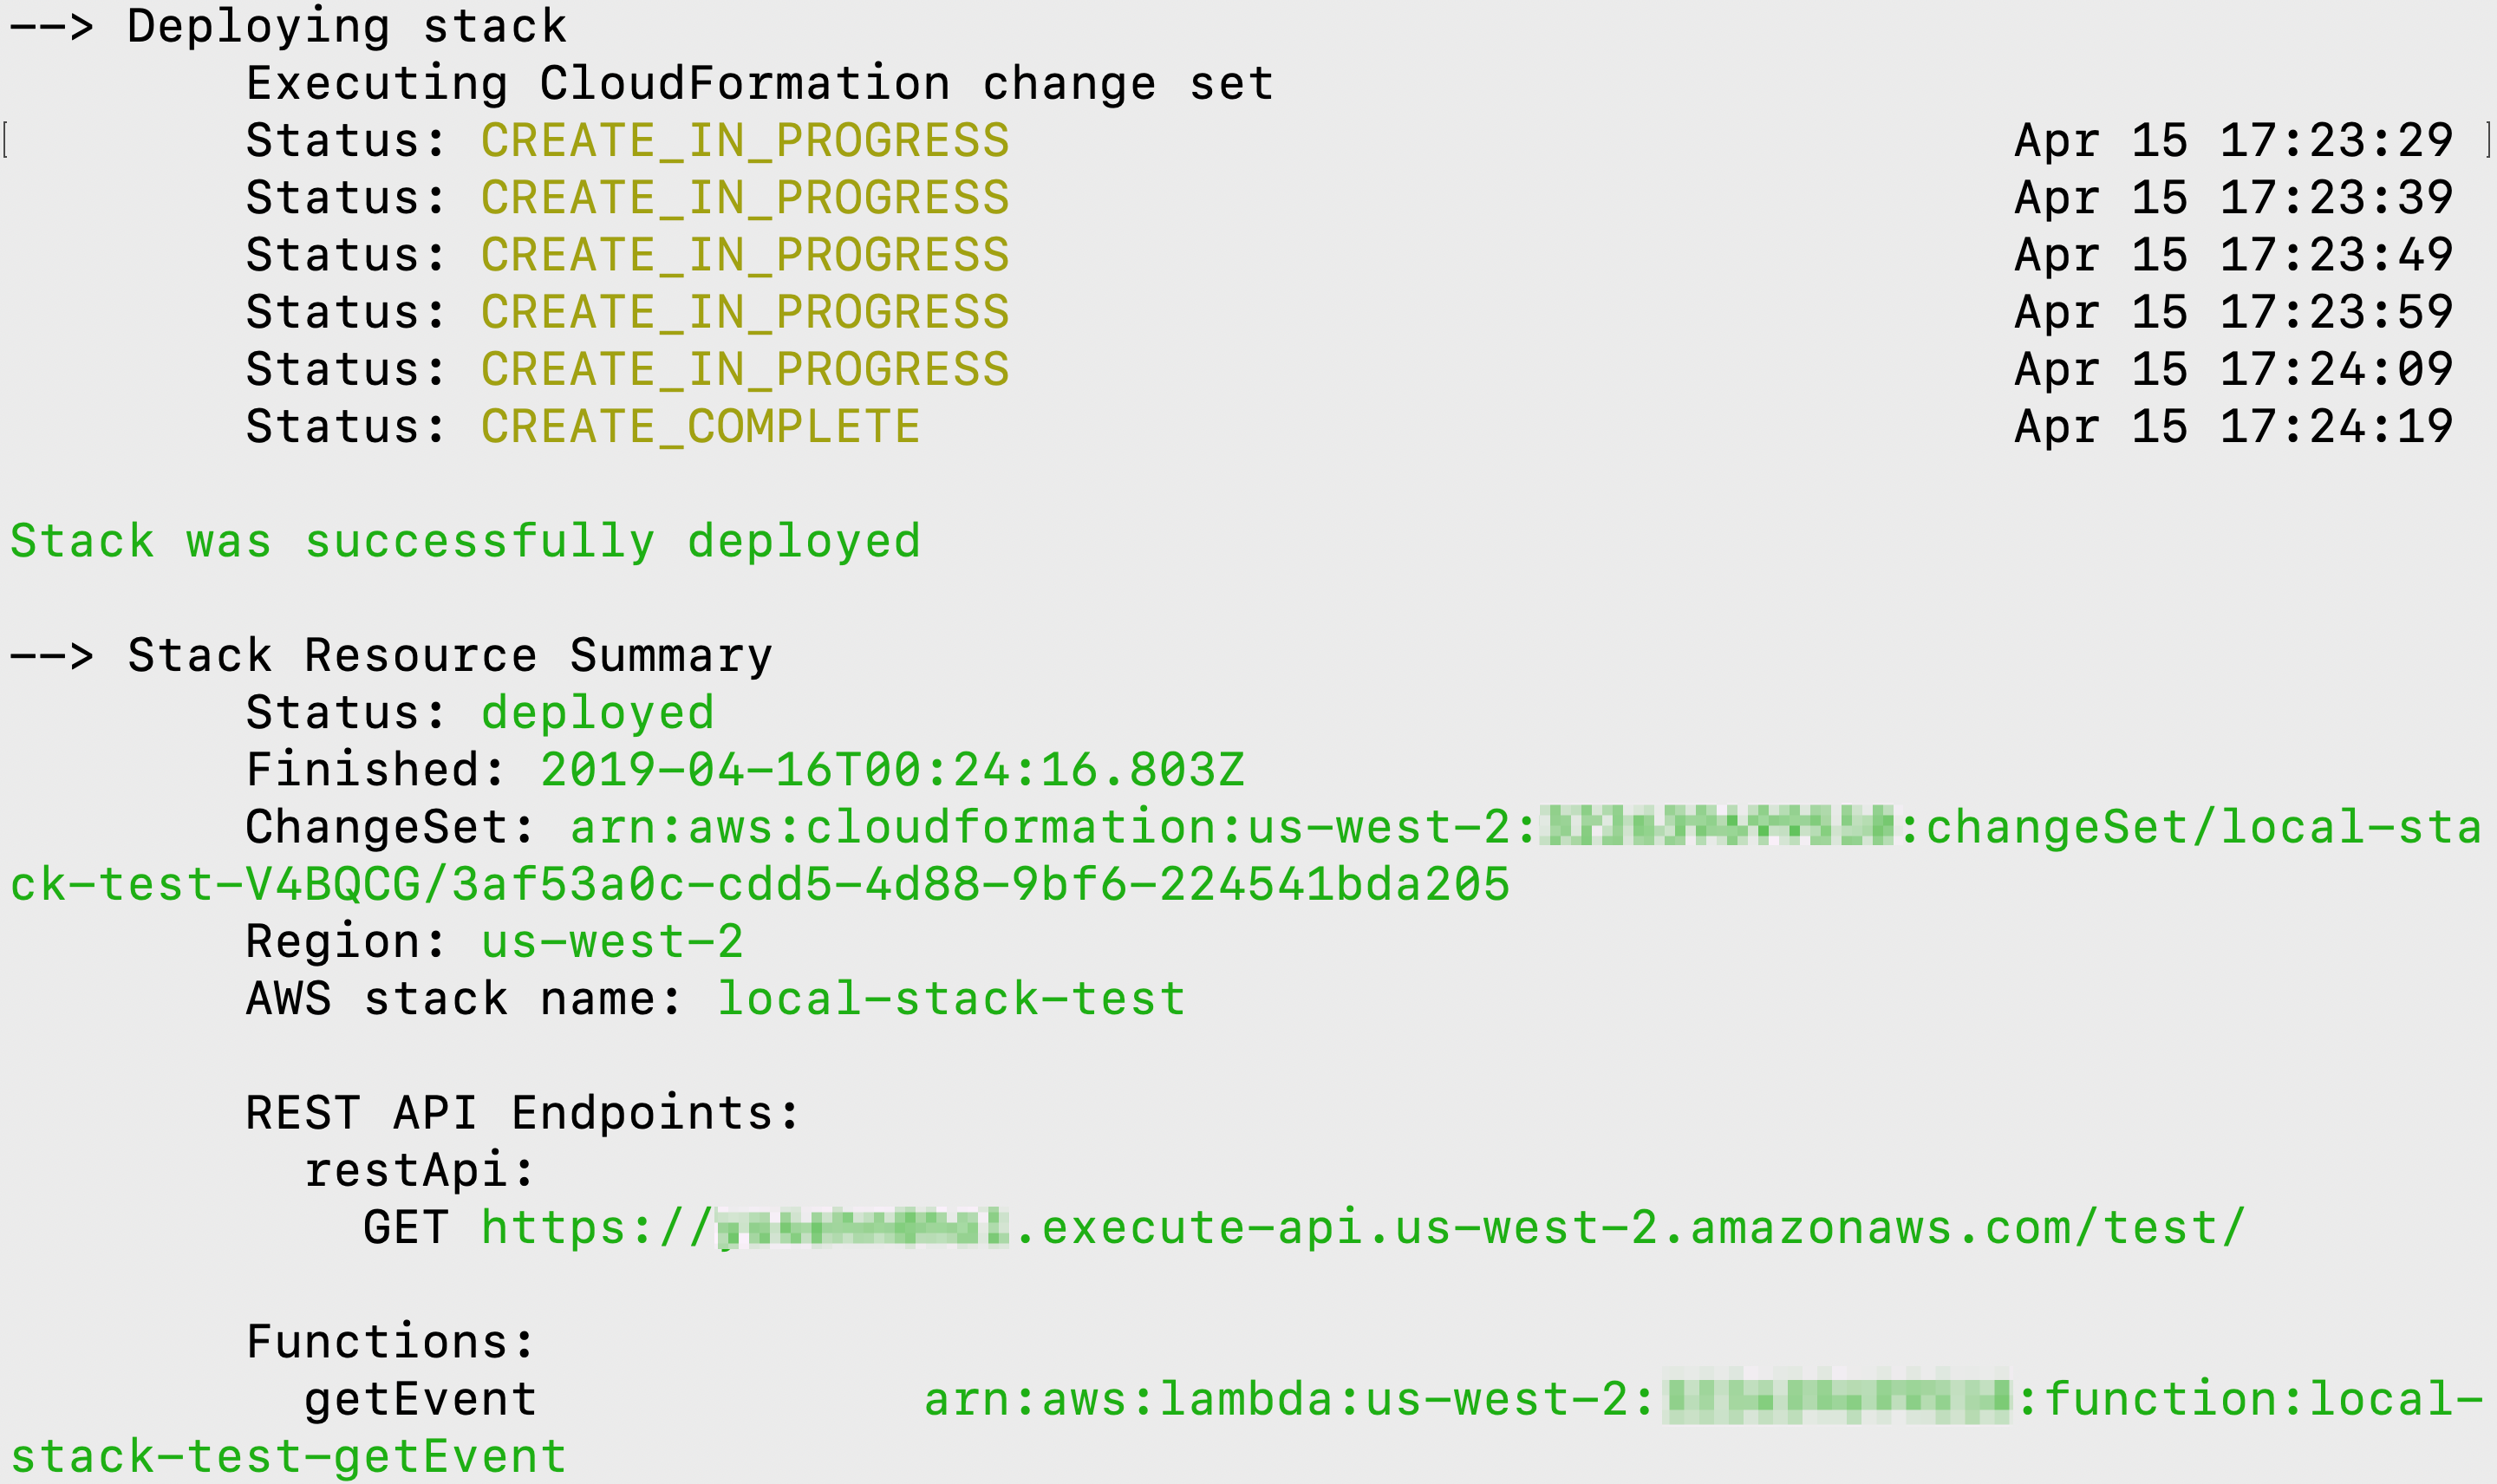
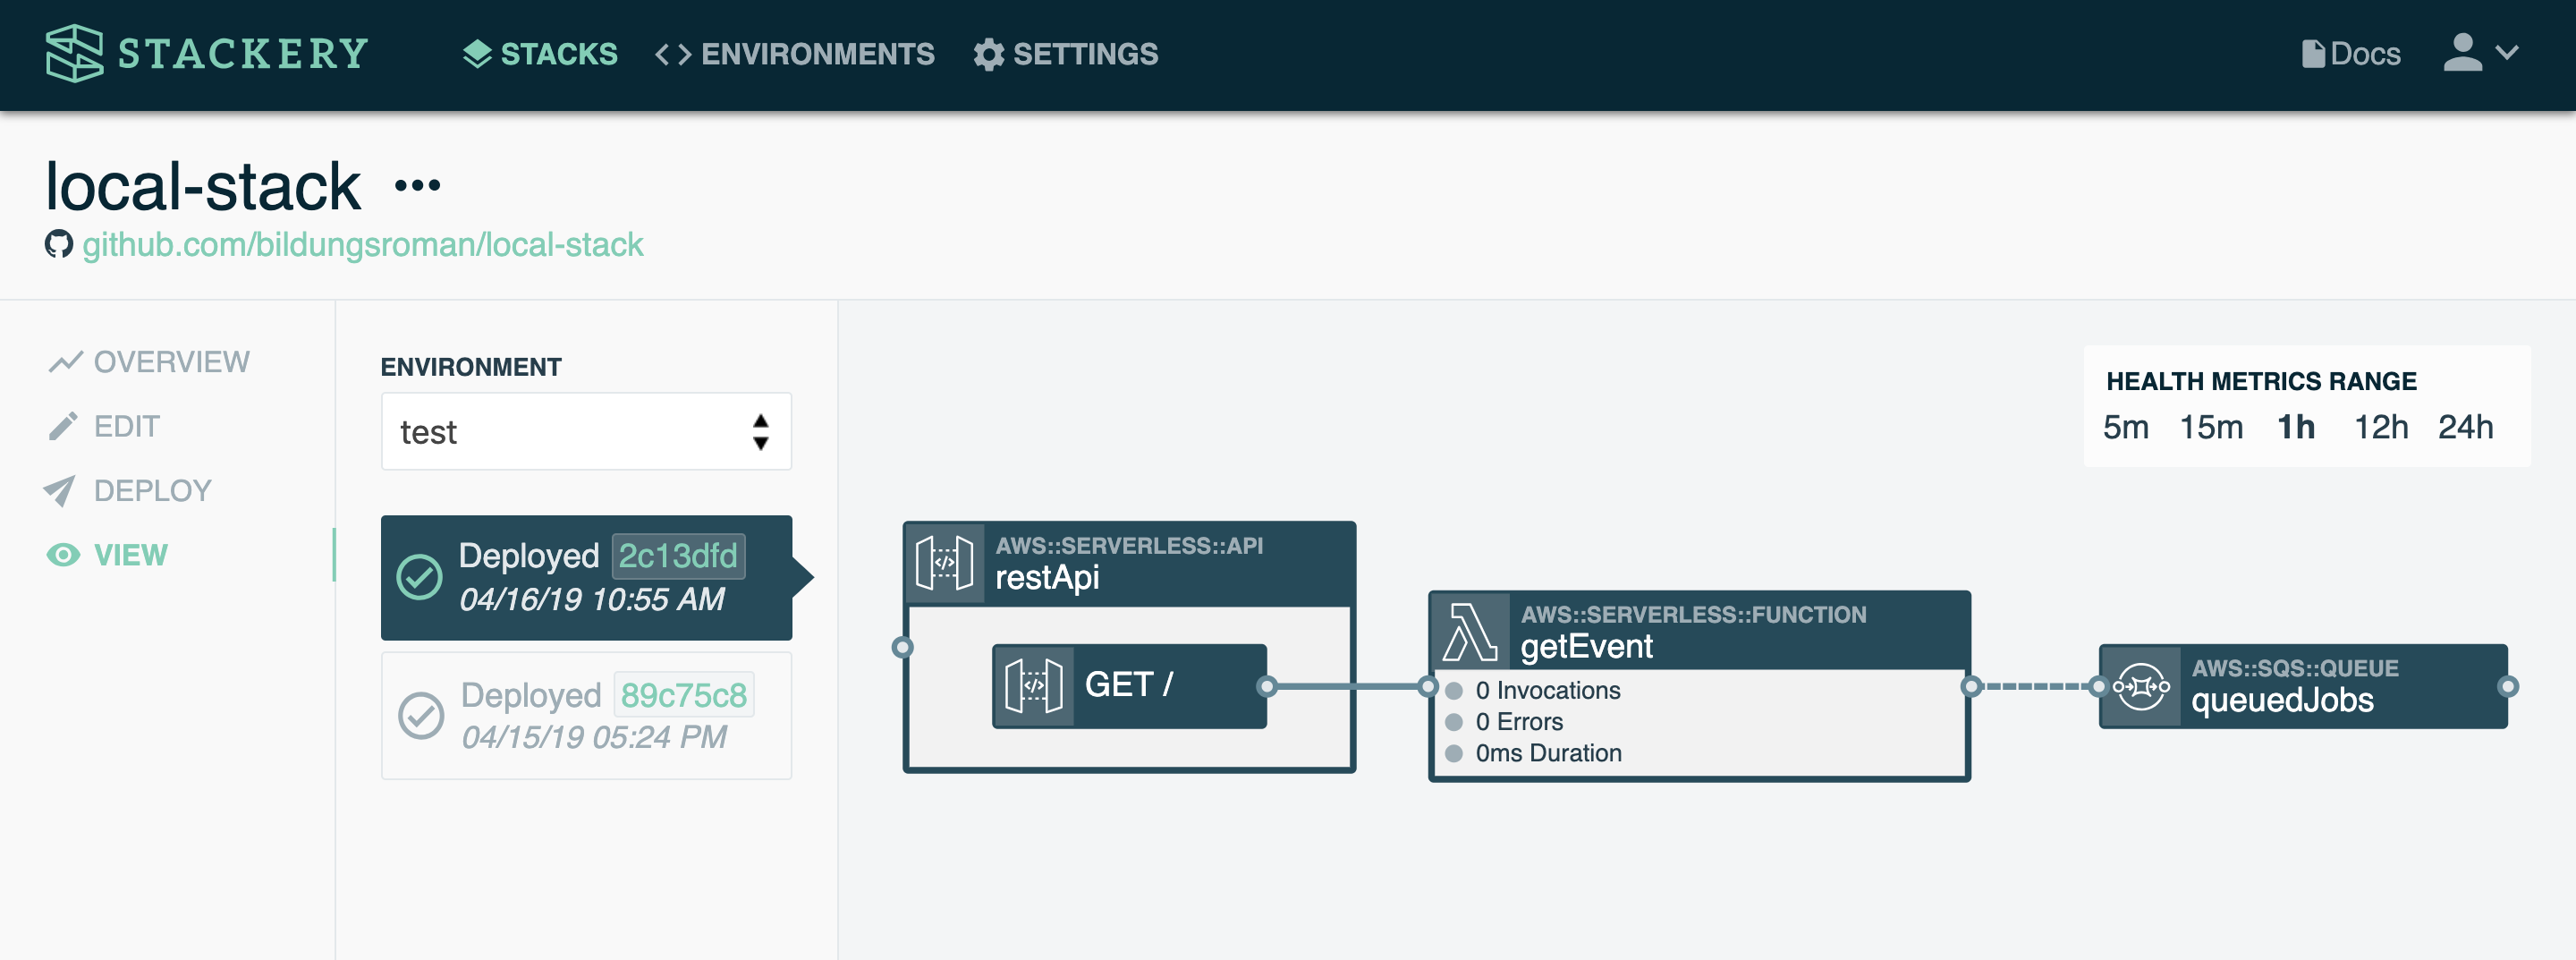
Navigate to the stack list in the Stackery Dashboard, select the newly-created local-demo stack, and navigate to its View tab. You will see your stack is now deployed in the test environment:
Running Stackery Local
Once a stack has been deployed, we can use its deployed resources for local development.
Run your function locally
The next steps will be done in your terminal or shell:
cdinto the directory of the function you want to invoke (in this example,local-demo/src/getEvent)- Enter the following to invoke your
getEventfunction:
stackery local invoke -e test --aws-profile <your aws profile name>
If you're using an compiled or transpiled language such as Go or Typescript, you'll need to add the
--buildflag. You can read more about the--buildflag below.
Your user-specific flags can also be set via environment variables in your bash profile:
STACKERY_ENV_NAME=test
STACKERY_AWS_PROFILE=<your aws profile name>
This enables you to just run stackery local invoke without flags to invoke that function.
Your output should look like this:

That's because we're just running the default Node function code, which looks like this:
exports.handler = async (event, context) => {
  // Log the event argument for debugging and for use in local development.
  console.log(JSON.stringify(event, undefined, 2));

  return {};
};
Try adding a new console.log() entry below the existing one, then run the above command again in your terminal or shell. You'll get a new output:

Now, let's add something useful and see how our function interacts with real cloud resources.
- Replace the code in
local-demo/src/getEvent/index.jswith the following:
const AWS = require('aws-sdk');
const sqs = new AWS.SQS();

exports.handler = async (event, context) => {
  console.log(event);

  const sqsParams = {
    MessageBody: `Entering the event queue`,
    QueueUrl: process.env.QUEUE_URL,
    DelaySeconds: 30

  };
  const response = await sqs.sendMessage(sqsParams).promise();
  console.log(response);

  return { status: 200, body: 'It worked!' };
};
- Save the function
Note that your function requires process.env.QUEUE_URL. This comes directly from the function's environment variables, which were created when you connected the getEvent function to the queuedJobs queue in Stackery:
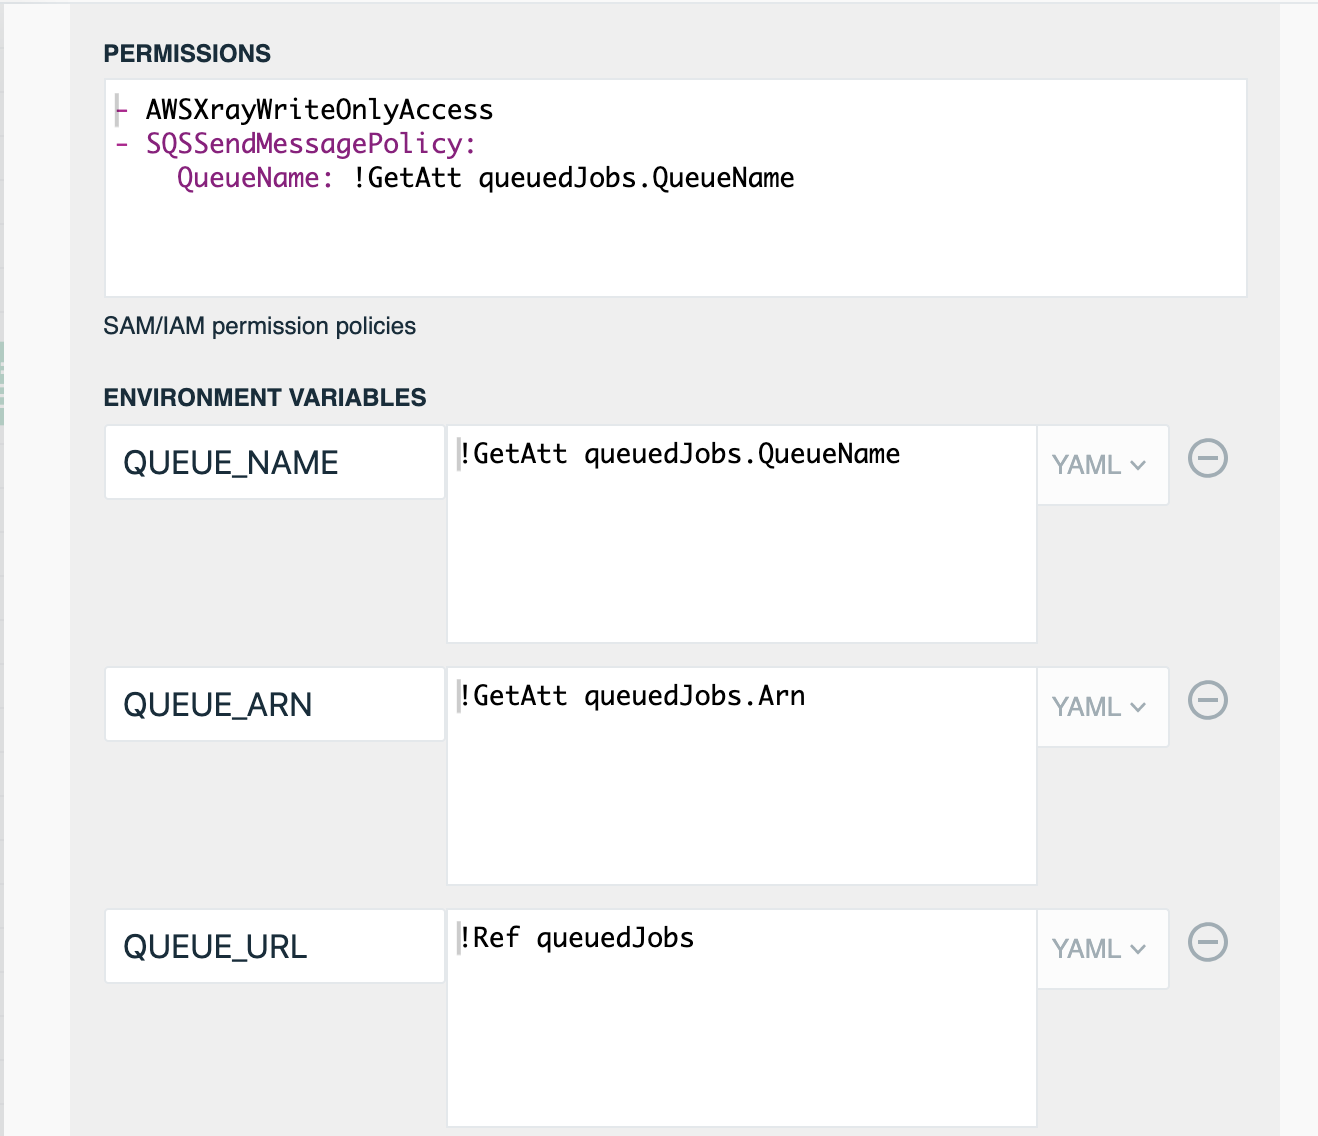
When your functions are invoked locally, they have access to the same environment variables they would in the cloud, and use the exact same permissions. You can try logging process.env in your local functions to see what comes through.
- Run
stackery local invokewith the same flags again
You should receive a success message with {"status":200,"body":"It worked!"}.
- In the Stackery Dashboard, in your stack's View tab, double-click the
queuedJobsnode - Click the View in AWS Console button:
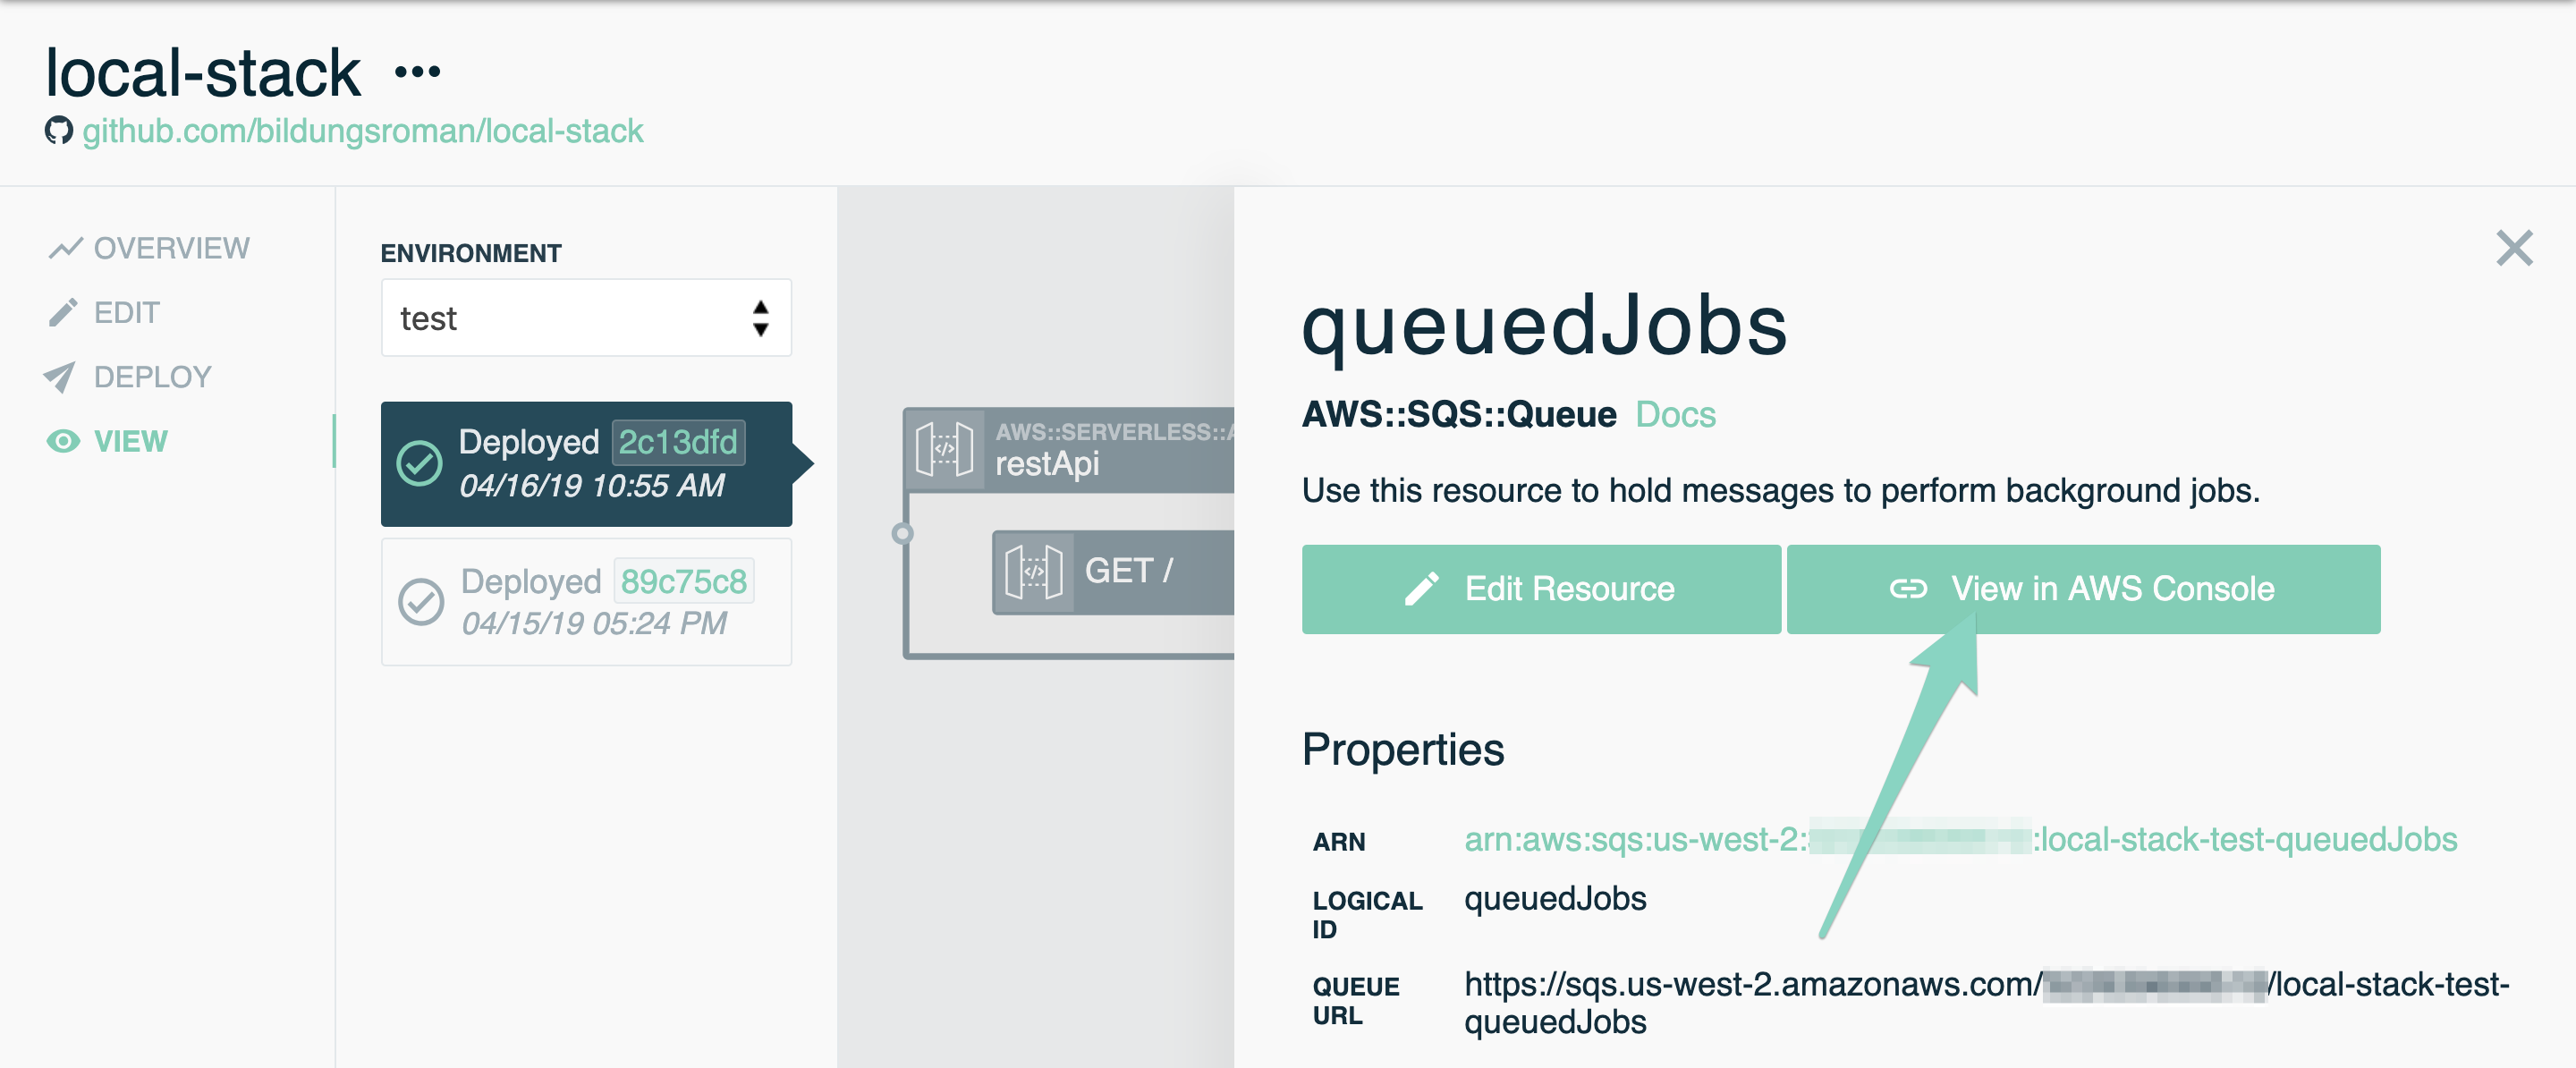
- In the AWS console, you should now have a message in your queue!

If you run stackery local invoke multiple times for that function, you'll see additional events added to your queue.
That's it! You are now able to iterate on your function locally while it interacts with your real cloudside resources. You can get started on local development with Stackery now, or keep reading for additional options when running locally, including processing events and hot reloading.
Stackery Local Options
Using the --watch flag
Adding the --watch flag is Stackery's version of 'hot reloading' for your function file. If you run the stackery local invoke command with the --watch flag attached, your function will continue to be invoked every time you save a change to your function code file.
See it live in this demo:
Using the --build flag
If your functions are in a compiled or transpiled language such as Go or Typescript, you'll need to add the --build flag when running local invoke. What this does is it runs any deploy hooks in the deployHooks directory before invoking the local version of the function.
Using an event input
See our doc on running locally with an event input.
Using dependencies
If your function requires dependencies or libraries, you can use them just as you would in a traditional local development environment. Before invoking your function locally, add your dependencies to a package.json or equivalent file, then run npm install, pip install -r requirements.txt -t ., etc. in your function directory. When you invoke your function locally, the dependencies will be available to your function.
Accessing resources behind a VPC
Accessing resources behind a VPC adds some complexity to local development. One way to interact with a resource that's behind a VPC is to run an SSH tunnel to the resource. This may require hard-coding your resource when testing locally rather than using the environment parameters as you would normally.
Local debugging
For debugging options, see our local debugging doc.
Setting a template path
If your template.yaml file is located in a different directory than the root folder, you can use the --template-path flag to set its path relative to the root directory. For example, if this is your folder structure:
.
├── src
|   └── getEvent
|       ├── index.js
|       ├── package.json
|       └── README.md
├── templates
|   └── template.yaml
├── .gitignore
└── README.md
you would run:
stackery local invoke --stack-name local-demo --env-name test --function-id getEvent --template-path templates/template.yaml
Configure the Stackery CLI
To configure default parameters on Stackery CLI commands like stackery local invoke, please refer to the Configuring the Stackery CLI docs.
All options
For complete documentation of the stackery local invoke command, please refer to the Stackery local invoke command docs.
Troubleshooting
Unknown command
If you see unknown command "local" for "stackery" when running stackery local invoke, your Stackery CLI is below version 2.6.0, which is the first version to support local development commands.
Run stackery update to update to the latest version.
Failed to assume role error
If you see the error Failed to assume role: Access Denied. This error is likely to be transient; maybe retry in several seconds., make sure you have chosen the correct AWS profile for the environment you are trying to use. Wait a few seconds and try running the invoke command again.
Template file not found at location
The error Error: Template file not found at /.../local-demo/src/getEvent/template.yaml sam local completed with error: exit status 1 means that you're trying to run the stackery local invoke command from a different directory than the root directory of your stack, or that your template file is not located in the root directory.
To solve this, run the command again from the root directory, using the --template-path string if needed to specify the path to the stack template relative to the current working directory, if it is not at the default root location.
Template file templatePath not found
Another possible error will look like this: The argument template file, 'template.yaml', does not match the stack settings template file, '.' or this: Failed to load template at '': filepath, open : no such file or directory. If you see either error, your template path is not set in your Stackery settings for that stack. You can remedy that by running the following in the CLI:
stackery settings -n <your-stack-name> --key templatePath --value template.yaml
Note: If your application is in a monorepo, your templatePath value would be a different value representing the relative path to your template.
Index file not found
If you receive the error Unable to import module 'index': Error, there is likely a problem with your function source path, especially if your template.yaml file is not located in your root directory.
Double-check your function's CodeUri path in your template.yaml and make sure it is relative to that file.
Too many open files error
If you're using the --watch flag when running stackery local invoke, you may hit an error such as this one:
error from filepath.Walk: too many open files
This has to do with the open file limit on macOS and Linux, which is set to 256 by default. To raise the limit temporarily, run:
ulimit -n 10000
You will have to run this command each terminal session. If you run ulimit -a you will get a printout of all of your system's limitations.
FAQs
Do you have a handy video on a video sharing site that demonstrates the local development workflow?
Why yes, thanks for asking! You can view our local development workflow video on YouTube.
Does stackery local invoke work with layers?
Yes! Just include your layer ARN in your function's configuration (or as an environment parameter) and it will be accessed as a cloudside resource like any other when running locally.
Read more about using Function layers.
What if something goes terribly wrong?
We don't envision stackery local invoke causing an apocalyptic event, but it's a fairly new feature and you may encounter the odd bug while running it. If that's the case, feel free to let us know using the chat widget in the Stackery App or by emailing us at support [at] stackery.io.
