Deploy a Frontend for the Quickstart
This tutorial will guide you through the process of deploying a simple frontend for the Backend API app created in the Quickstart.
If you have not completed the Quickstart, do that first! This tutorial builds on the backend API that was created in the Quickstart Tutorial.
By the end of the tutorial, you will have deployed into your AWS account:
- An AWS Lambda Function that populates your frontend content
- The Amazon S3 Bucket that will host your static frontend
Each step of the tutorial includes:
- A gif showing a preview of what you'll be doing in that step
- Step-by-step written instructions with code examples and screenshots
Tutorial Updates
As we continue to develop Stackery, there may be improvements made to the design of the application. You may notice some differences between current versions, and versions used to record our video guides. Rest assured, the overall functionality of Stackery remains the same.
For the most up-to-date visuals and instructions, please refer to the transcribed versions of the tutorial available below each video guide.
Setup
Project Repositories
The following repositories are referenced throughout this tutorial:
Required Installations
The following software is used in this tutorial:
Deploy Sample App
You can deploy the completed example into your own AWS account using these two Stackery CLI commands:
stackery create will initialize a new repo in your GitHub account, initializing it with the contents of the referenced blueprint repository.
stackery create --stack-name 'quickstart-frontend-nodejs' \
--git-provider 'github' \
--blueprint-git-url 'https://github.com/stackery/quickstart-frontend-nodejs'
stackery deploy will deploy the newly created stack into your AWS account.
stackery deploy --stack-name 'quickstart-frontend-nodejs' \
--env-name 'development' \
--git-ref 'master'
What We're Building
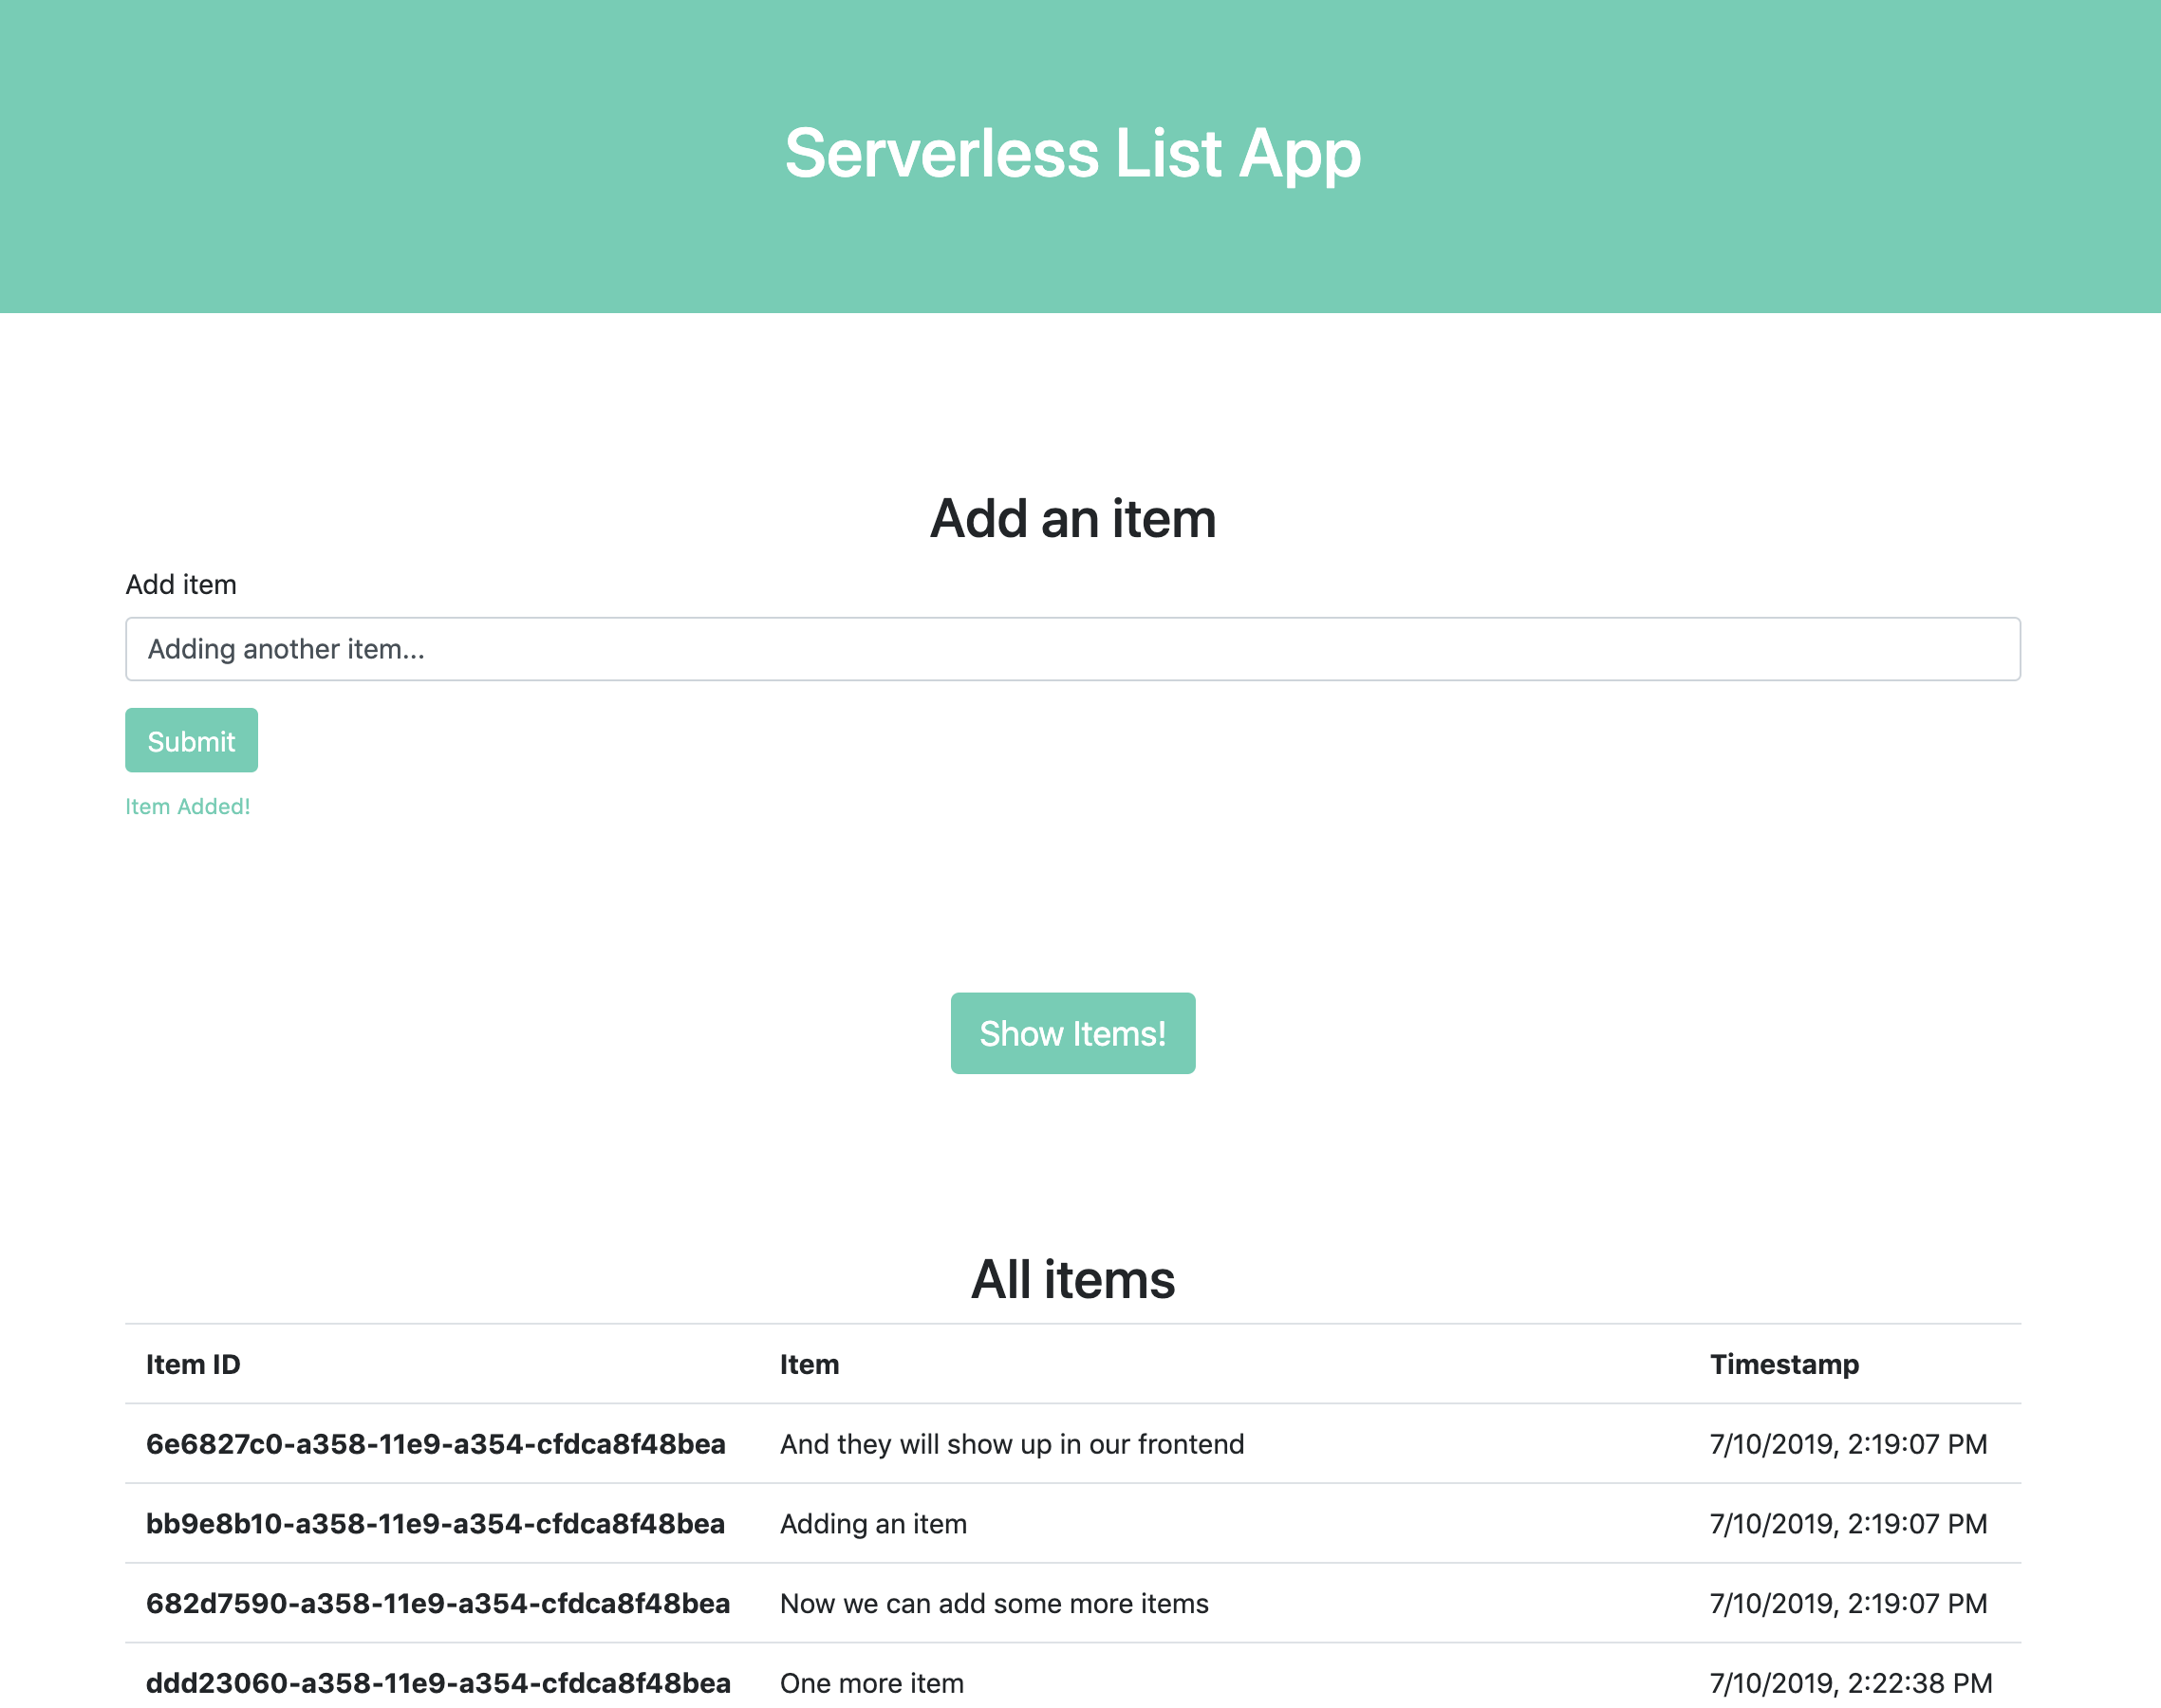
In the Quickstart, we created a simple backend API for a list app that allows users to create and fetch list items in a DynamoDB table. But what good is a backend that can only be accessed through the command line or the AWS Console? So in this tutorial, we'll add a very simple frontend that lets you add and view items in the browser. Here's what that will look like:
The finished stack will look like this in Stackery:
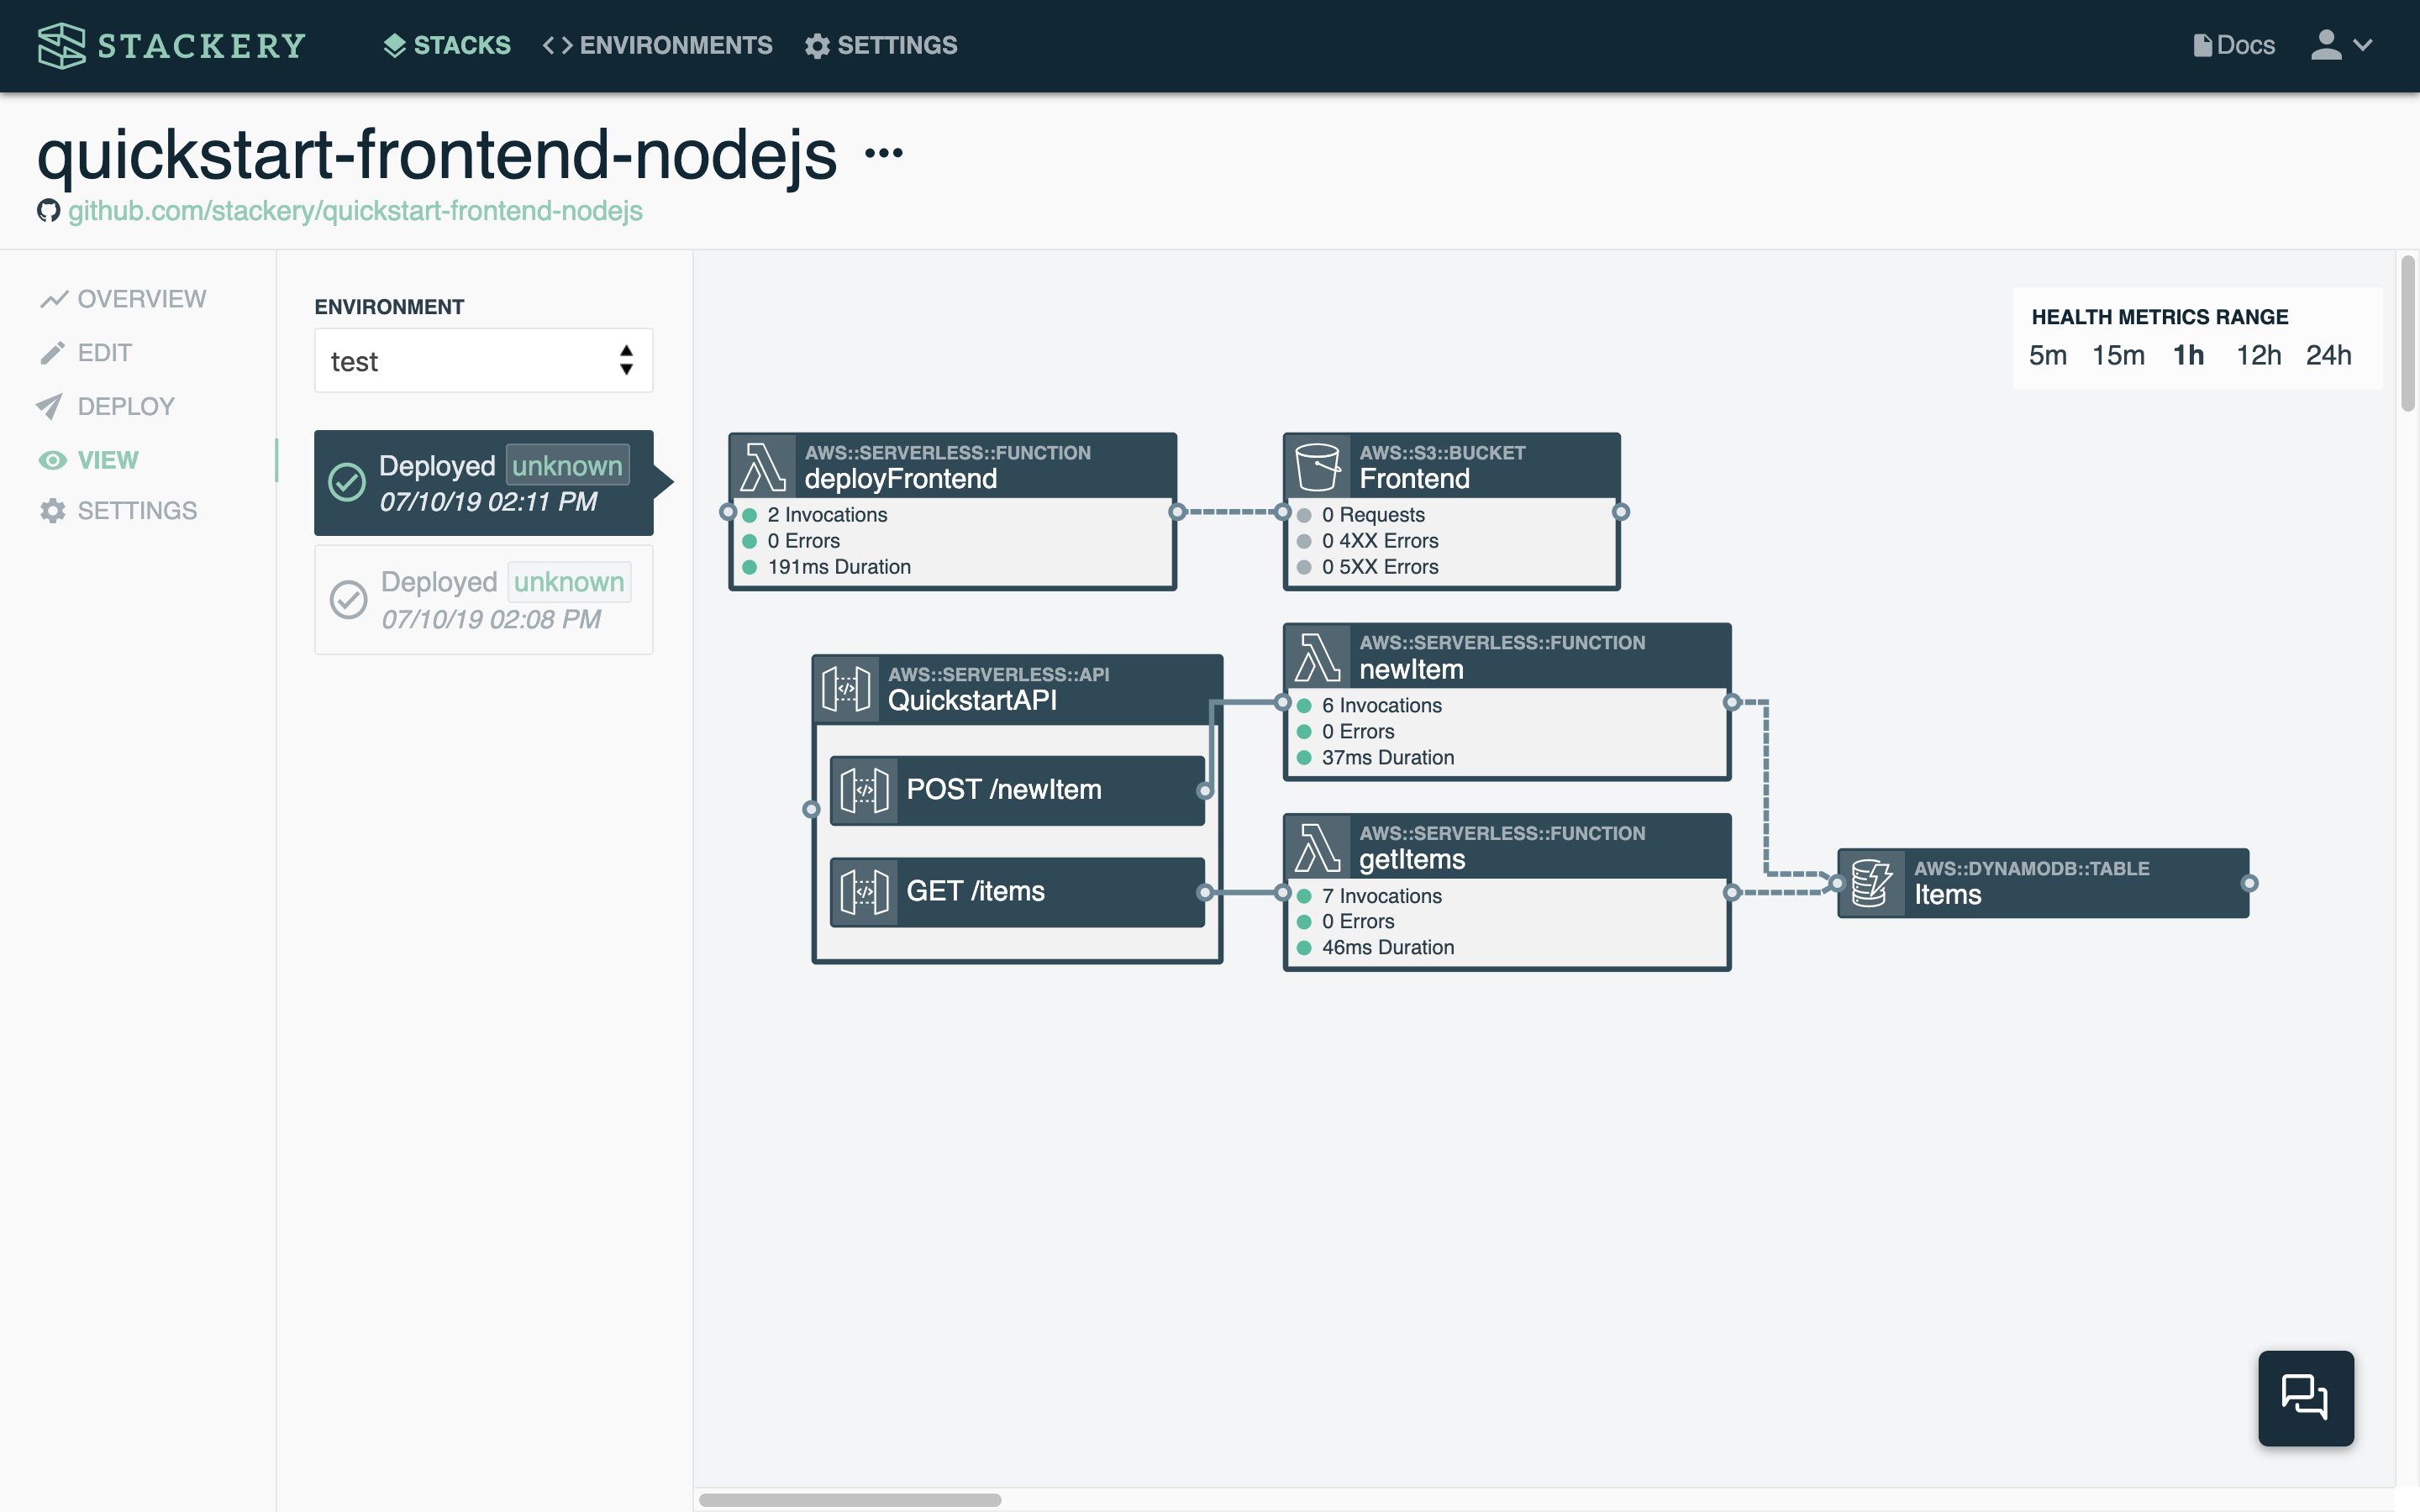
Finished stack
This is an example of the finished stack in the Stackery Editor. Feel free to play around:
Resources used
The following are descriptions of the Stackery resources we'll be working with:
Function : The Function deploys the static files that make up the frontend to an S3 bucket each time it is deployed.
Object Store : The S3 Bucket our Function will be publishing to. It will be configured to host a static website.
We'll get to configuring these resources in later parts, for now, we need to pull up our tutorial stack.
1. Adding to your stack
Using the stackery-quickstart stack
We'll be using the Stackery VS Code extension in this tutorial. Open a terminal, cd to the root directory of your stackery-quickstart repo, and enter:
code template.yaml
This will open your infrastructure-as-code template in VS Code. Luckily, with Stackery you (almost) never have to edit this file by hand. Instead, we'll open the visual editor in VS Code by clicking the Stackery icon in the top right:
![]()
Your stack will open in the visual editor (you may have to log in to your Stackery account first). It may be helpful to use the code editor's side-by-side view like so:
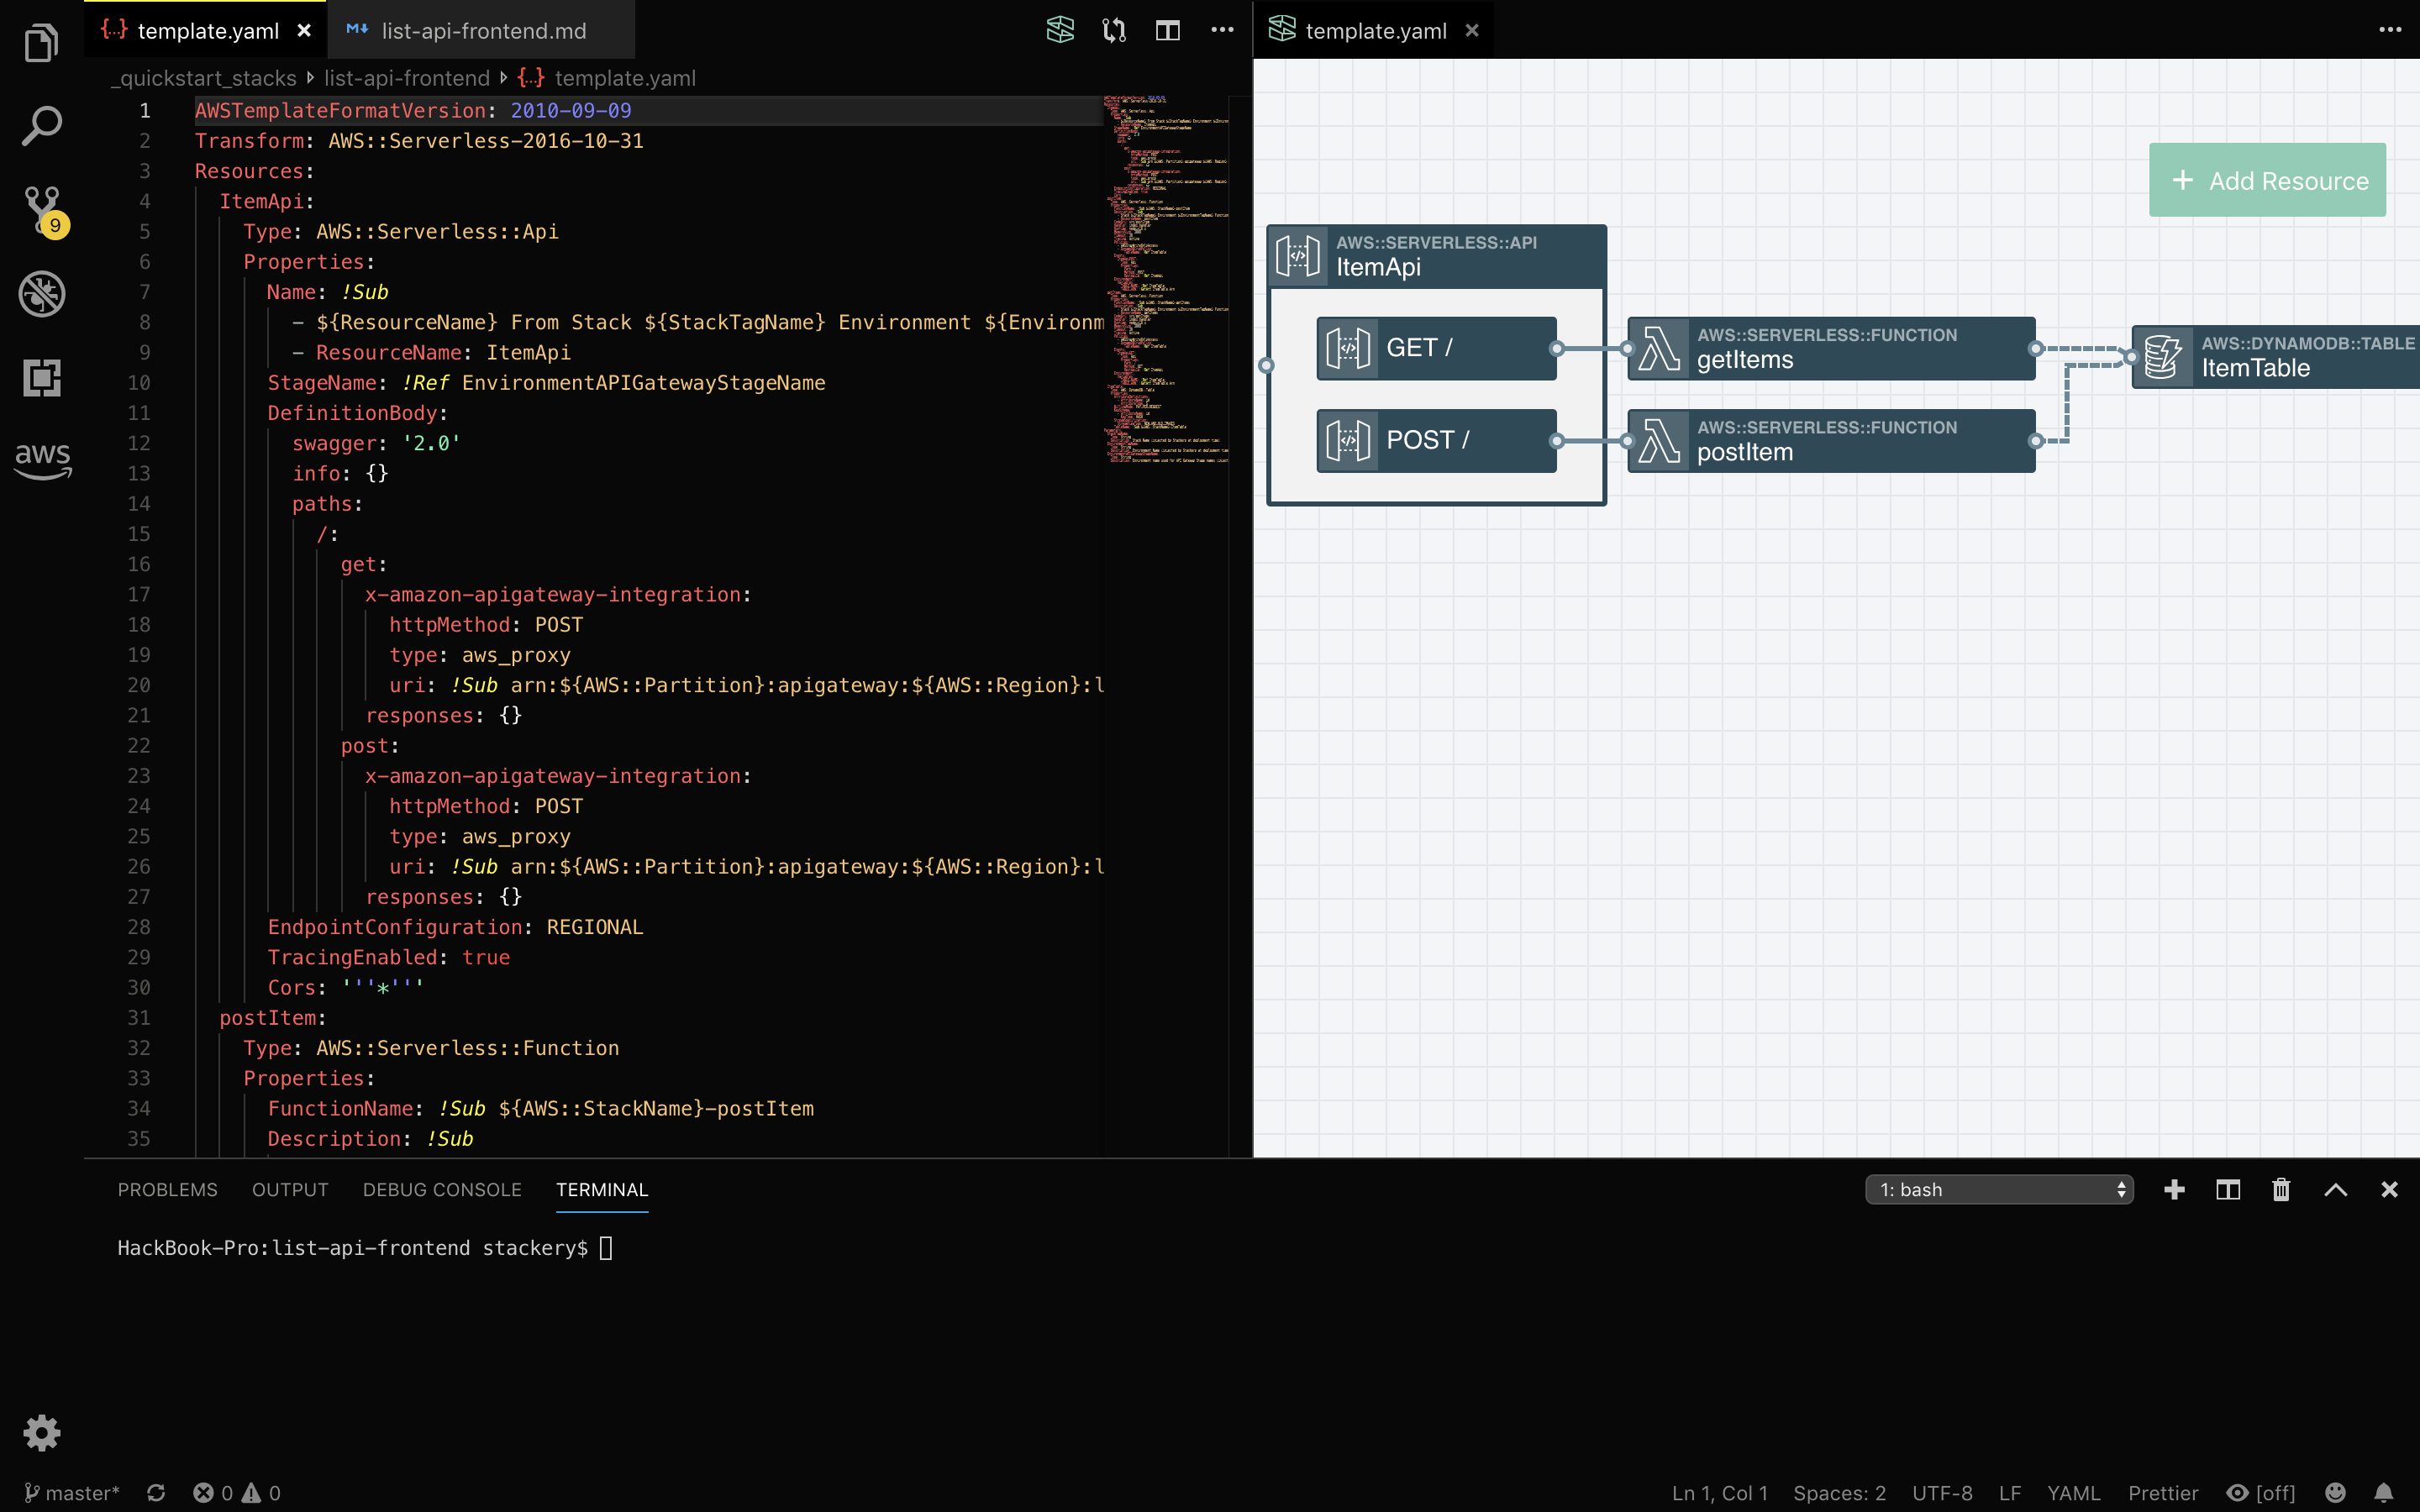
Add resources
Add an S3 bucket
Your app's frontend will be served from an S3 bucket. We'll use the visual editor to add that:
- Click the Add Resource button in the top right
- Select Object Store and click or drag and drop it onto the canvas
- Double-click the Object Store to open the editing panel
- Enter
Frontendfor the bucket's CloudFormation Logical ID - Click Enable Website Hosting
- Leave the other values as they are
- Click Save at the bottom to save your object store
Add a function
The S3 bucket will be populated by a third Lambda function that we'll add now:
- Click the Add Resource button in the top right
- Select Function and click or drag and drop it onto the canvas
- Double-click the first Function to open the editing panel
- Enter
deployFrontendfor the function Logical ID - Change the Source Path to
src/deployFrontend - Click Trigger on First Deploy
- Click Trigger on Every Deploy
- Leave the other values as they are
- Click Save at the bottom to save your function
- Draw a service discovery wire from the right side of the
deployFrontendfunction to the left side of theFrontendobject store
The reason we click Trigger on Every Deploy is because we want our function to run every time it's deployed in order to upload the latest frontend content to the object store. So every time you make updates to the frontend, you can re-deploy this stack and your new frontend will be live.
Your stack should now look like this:

Once you're done adding the new resources, you can close the visual editor, as now we'll be working on the function code.
Add function code
When you added the deployFrontend function, a new directory with function files was added to the src/ directory.
Open src/deployFrontend/index.js and replace the boilerplate code with the following:
const fs = require('fs');
const path = require('path');
const AWS = require('aws-sdk');
const cfnCR = require('cfn-custom-resource');
const mime = require('mime-types');
const recursiveReaddir = require('recursive-readdir');

const s3 = new AWS.S3();

exports.handler = async message => {
  try {
    await uploadStaticContent();

    // Send success signal back to CloudFormation
    await cfnCR.sendSuccess('deployFrontend', {}, message);

    console.log('Succeeded in uploading site content!')
  } catch (err) {
    console.error('Failed to upload site content:');
    console.error(err);

    // Send error message back to CloudFormation
    await cfnCR.sendFailure(err.message, message);

    // Re-throw error to ensure invocation is marked as a failure
    throw err;
  }
};

// Upload site content from 'static' directory
async function uploadStaticContent() {
  // List files in 'static' directory
  const files = await recursiveReaddir('static');

  // Upload files asynchronously to frontend content object store
  const promises = files.map(file => s3.putObject({
    Bucket: process.env.BUCKET_NAME,
    Key: path.relative('static', file),
    Body: fs.createReadStream(file),
    ContentType: mime.lookup(file) || 'application/octet-stream',
    ACL: 'public-read'
  }).promise());

  await Promise.all(promises);
}
The above code connects to the S3 Bucket you just created, and takes the files in a directory called static and copies each of the files found in it to that bucket. That means we need to create our static directory in order to have something to copy.
We recently released the Website Builder resource that can be used instead of this function to build your code and put it into an S3 Bucket. Check out the React Single Page App tutorial for an example.
Install dependencies
Now let's update the dependencies in the function's package.json file. Replace the contents of src/deployFrontend/package.json with the following:
{
  "name": "deployfrontend",
  "version": "1.0.0",
  "devDependencies": {
    "aws-sdk": "~2"
  },
  "dependencies": {
    "cfn-custom-resource": "^4.0.13",
    "fs": "0.0.1-security",
    "mime-types": "^2.1.24",
    "path": "^0.12.7",
    "recursive-readdir": "^2.2.2"
  }
}
Save the file.
Add static frontend
The easiest way to add the static files is to clone them from our version of this stack. Open your terminal and enter the following:
cd .. # make sure you're not in your stackery-quickstart directory but the one above that
git clone git@github.com:stackery/quickstart-frontend-nodejs.git
cp -R quickstart-frontend-nodejs/src/deployFrontend/static stackery-quickstart/src/deployFrontend
cd stackery-quickstart
You'll now have a src/deployFrontend/static directory with three files in it - that's your app frontend!
There's one more step before deploying: we need to add our live API endpoint to the static site's main.js file:
- Open
src/deployFrontend/static/main.js - In the terminal, make sure you are in your stack's root directory, then enter:
stackery describe -e test
You should see something like the following:
AWS stack name: stackery-quickstart-test

REST API Endpoints:
  QuickstartApi:
    GET https://1234567890.execute-api.us-west-2.amazonaws.com/test/items
    POST https://1234567890.execute-api.us-west-2.amazonaws.com/test/newItem
- On line 2 of
src/deployFrontend/static/main.js, replace the value forAPI_ENDPOINTwith the endpoint given to you for theQuickstartApi(minus the/itemsor/newItemroute). In the example above, it would be:
// Add your API endpoint
const API_ENDPOINT = "https://1234567890.execute-api.us-west-2.amazonaws.com";
const time = new Date();
...
UP NEXT: Deploy your app to see your frontend
2. Deploy the Initial Stack
Deploy with the CLI
Once you have saved (and optionally committed) your new function code and static files, it's time to deploy.
Make sure you're in the root directory of your stack, and enter the following in your terminal:
stackery deploy -e test --strategy local --aws-profile <your-aws-profile-name>
This will take a few minutes. Once it's deployed, open your stack in the Stackery app, navigate to Stacks and click on your stackery-quickstart stack. It should open to the Overview tab:
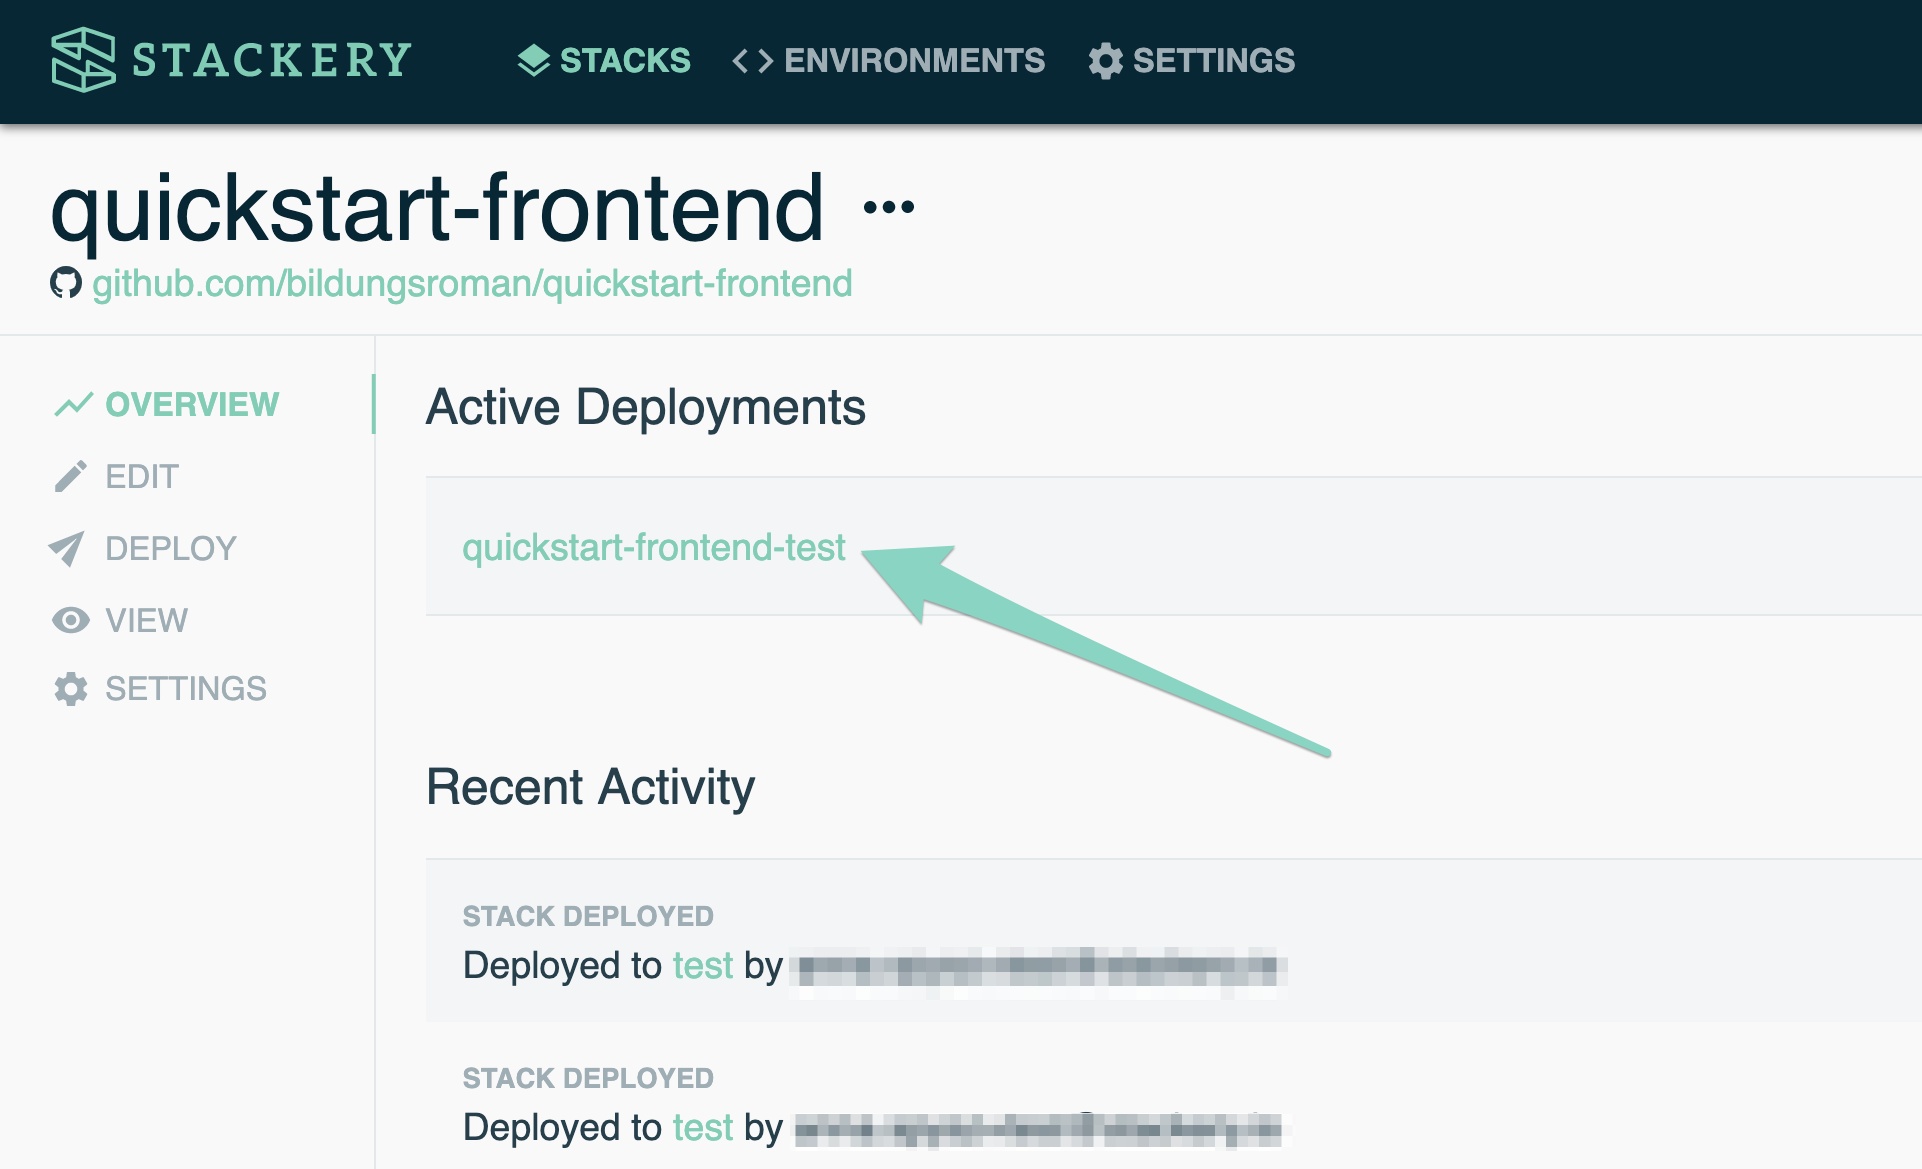
At the top, you'll see your Active Deployments. Click on the link and you'll be taken to the View tab:

Double-click the Frontend bucket.
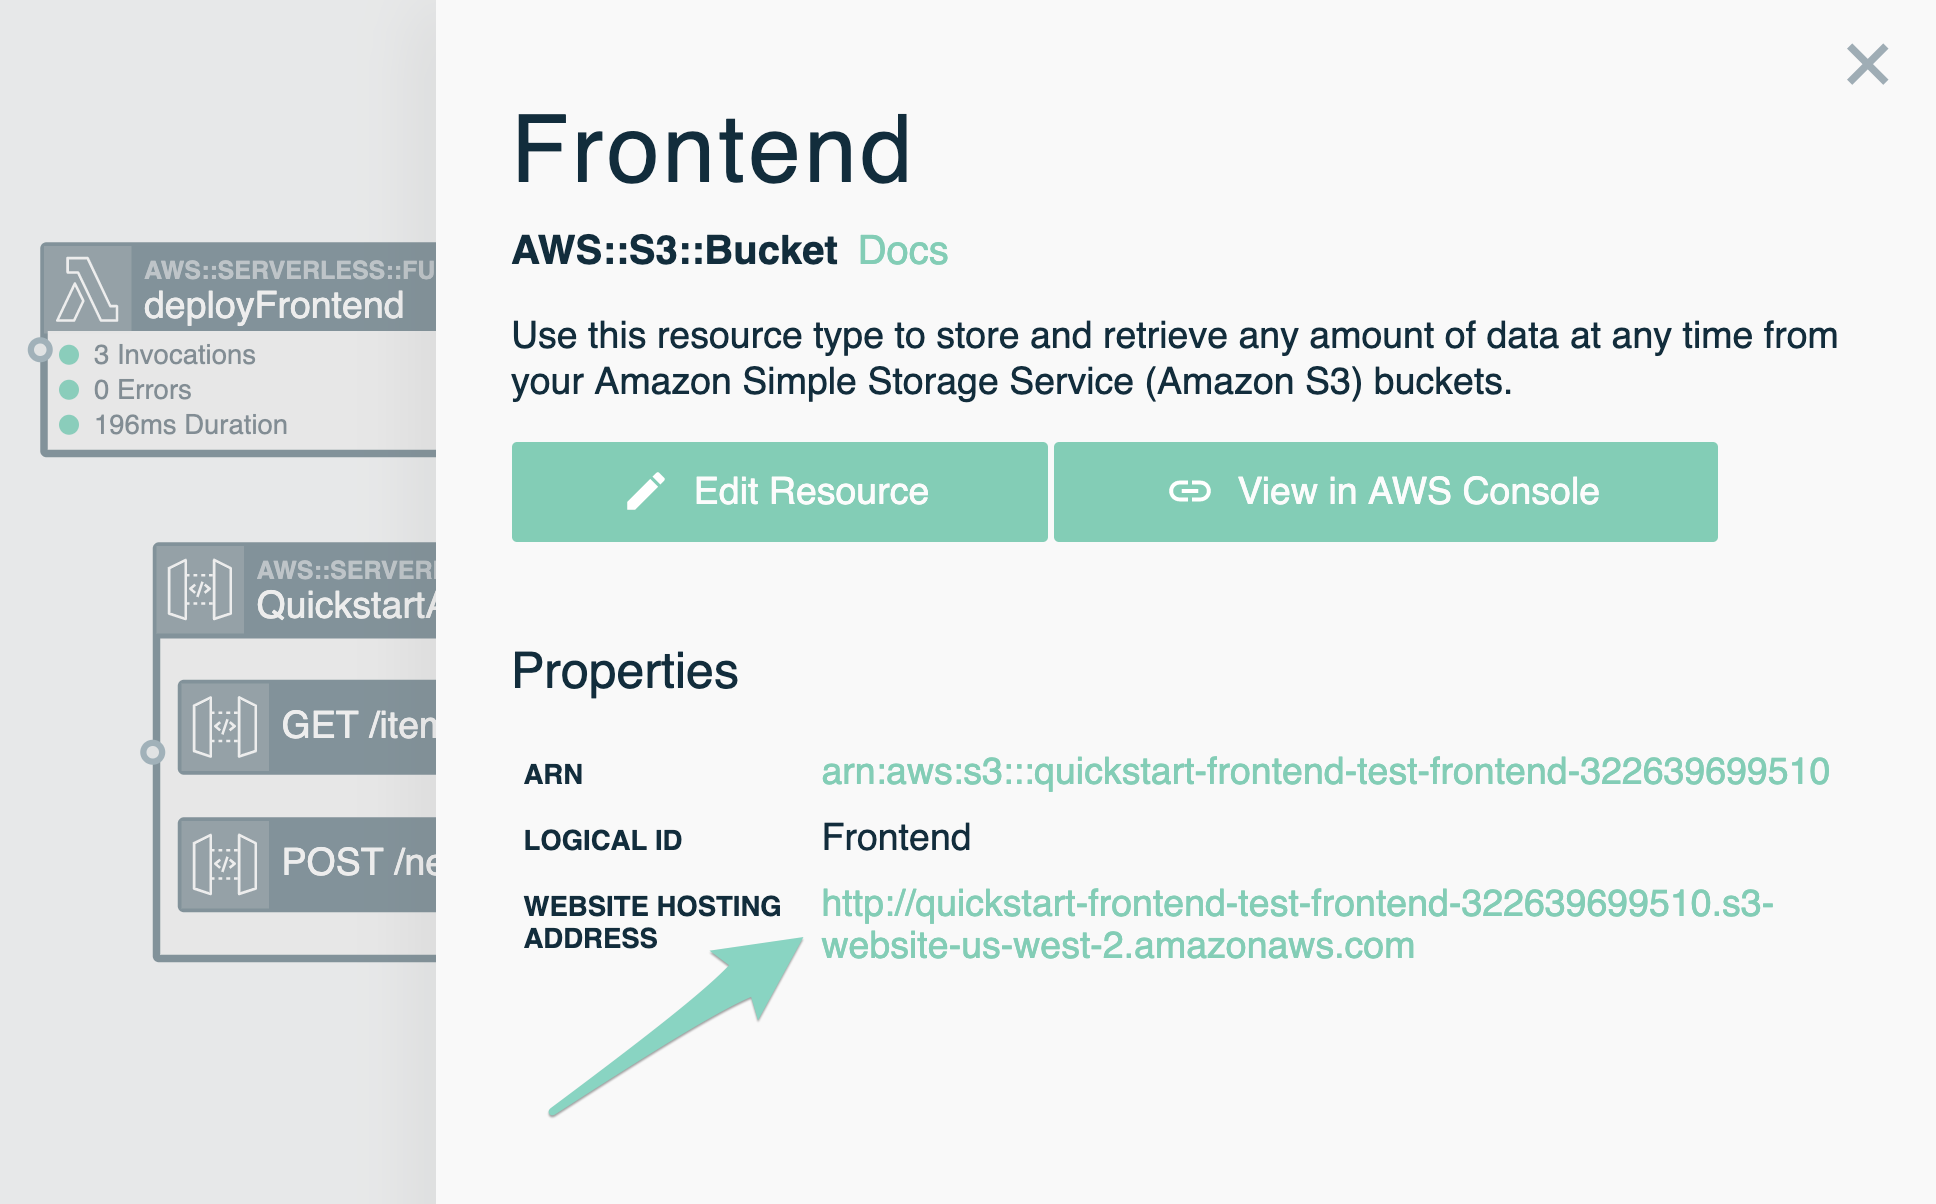
You'll see a staging link that takes you to the following page:
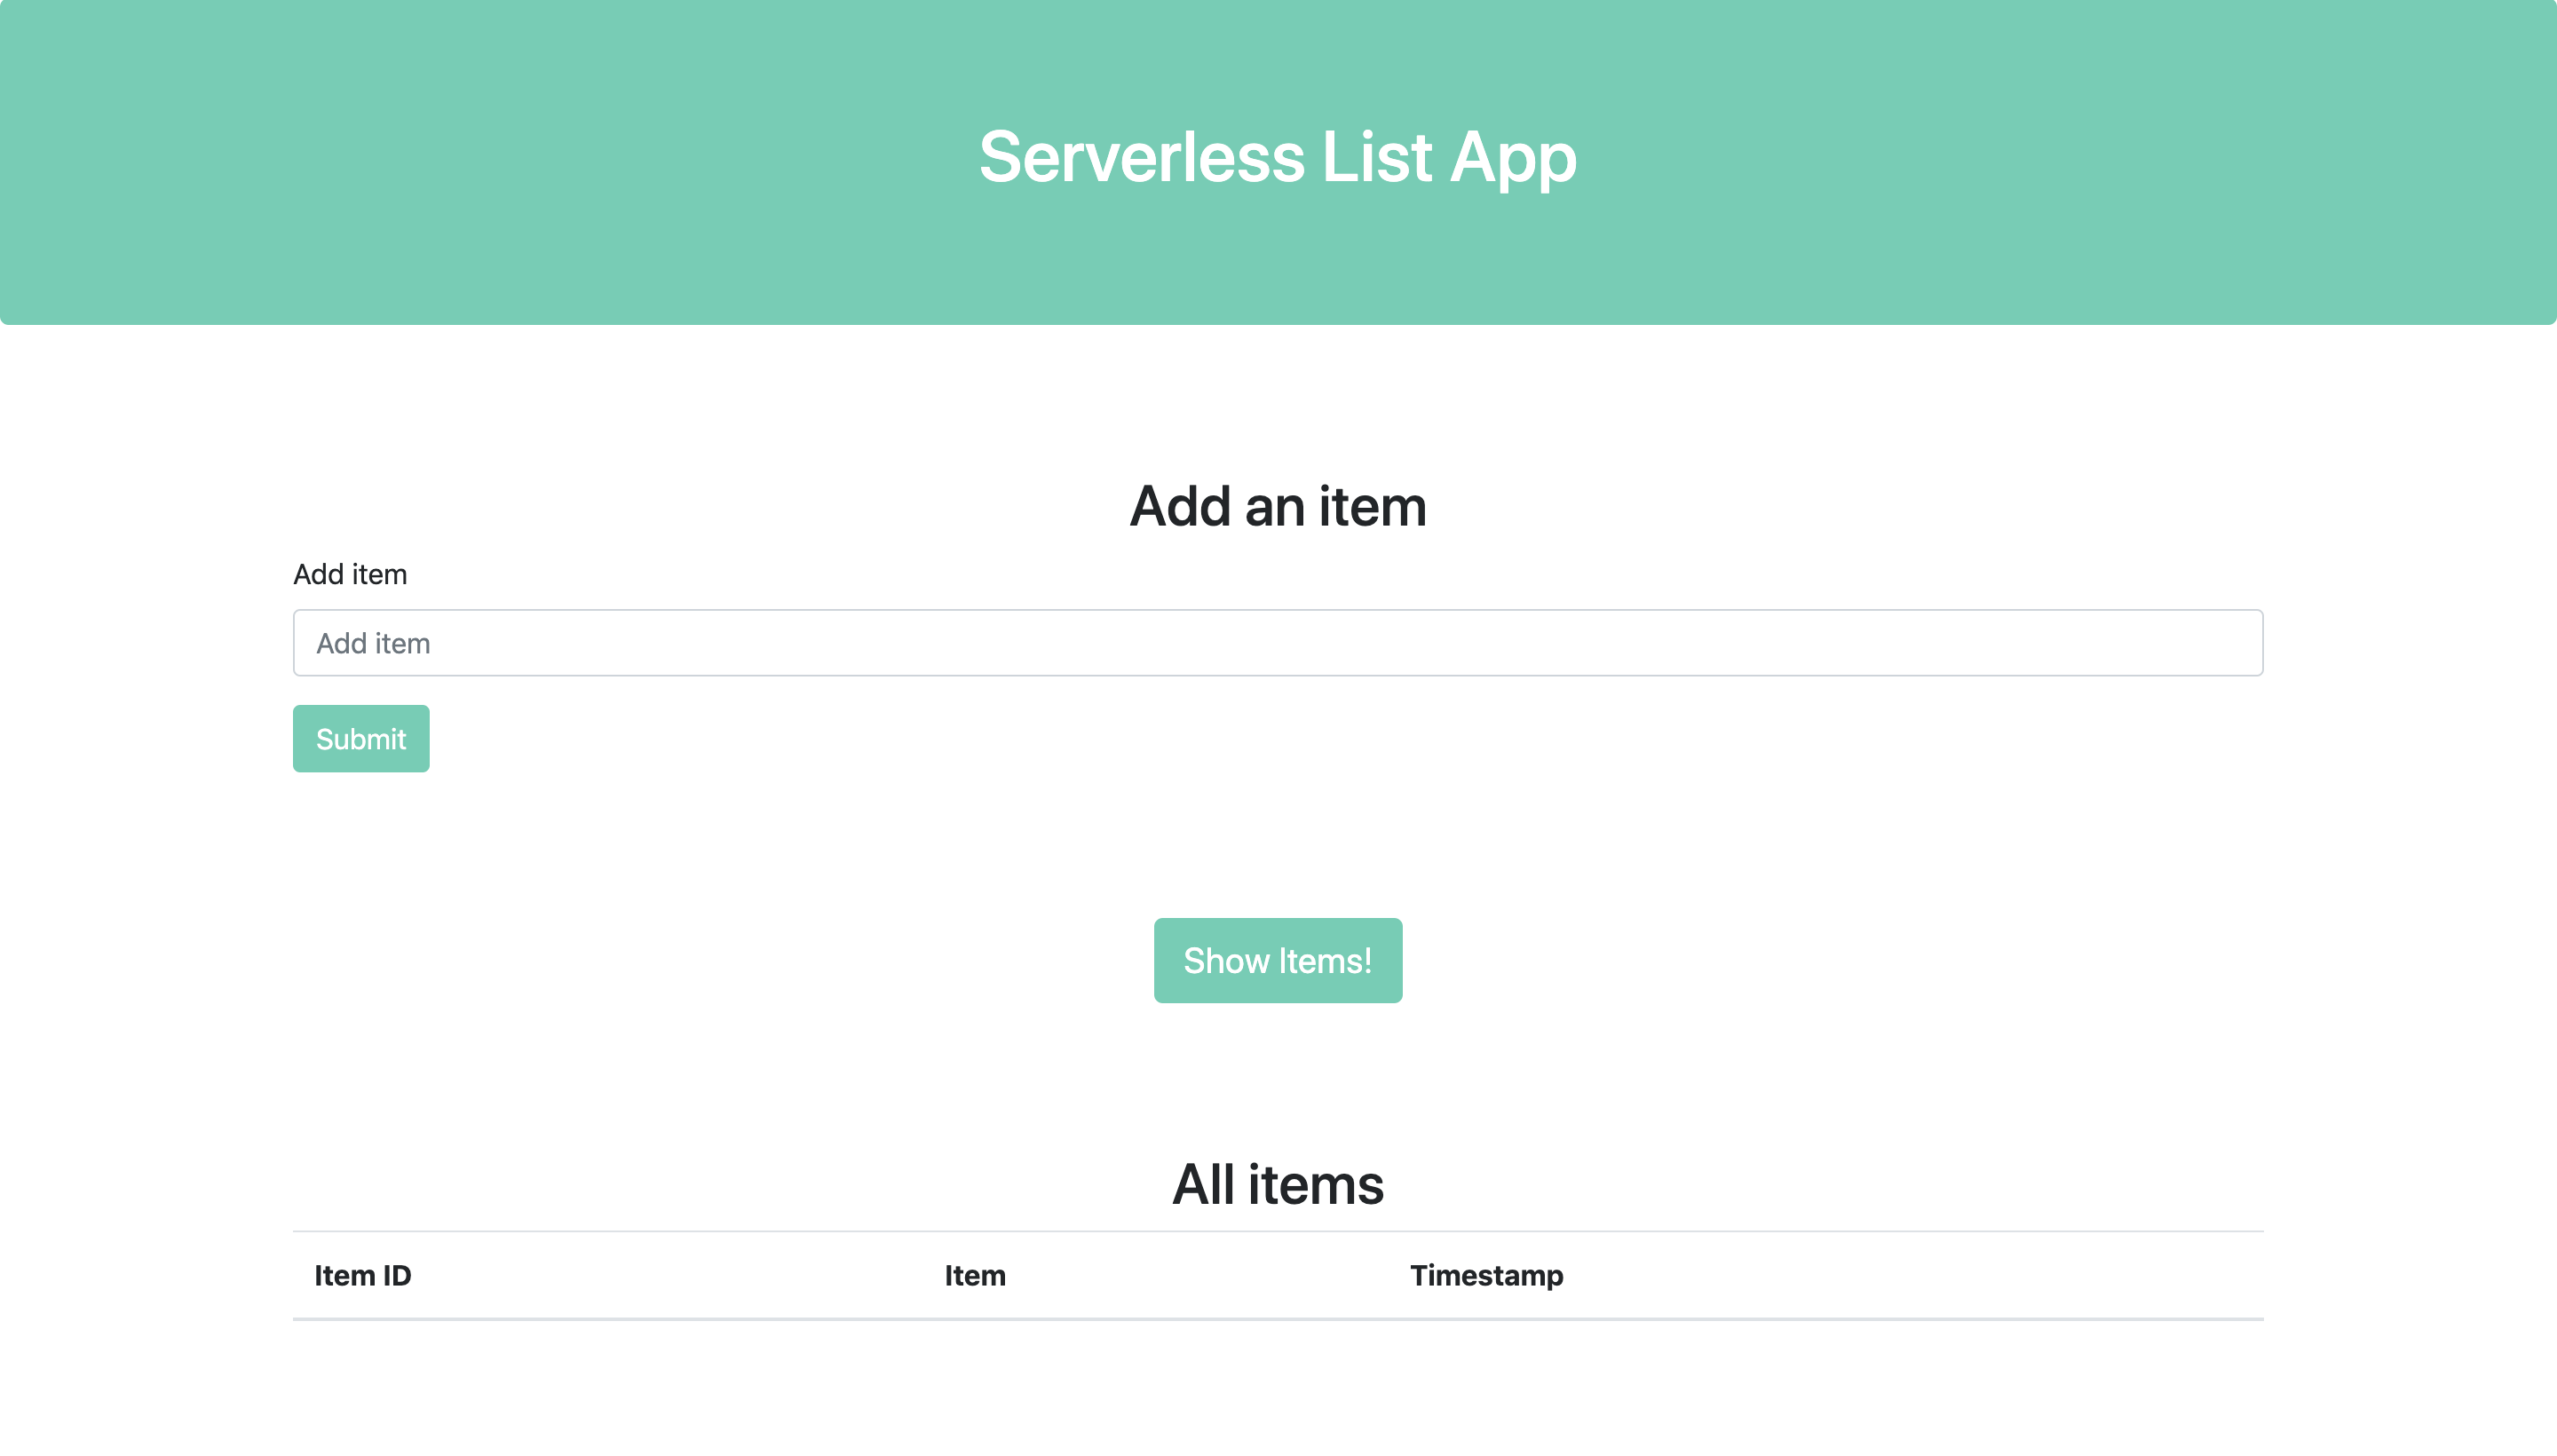
There's our frontend! Unfortunately it doesn't do much of anything yet. You can try to add items but they won't persist, as our backend is not yet set up to interact with the frontend.
UP NEXT: Iterating on the getItems and newItem functions
3. Update Existing Functions
The Quickstart functions only logged the table data to the console as we were iterating locally. Now, we want the functions to get data from and send data to our frontend, so we'll modify their code to do so.
Update newItem function code
When we add an item in the frontend web form, we want it to persist in our DynamoDB table in the backend. We'll update the code in the newItem function to do so:
- Open
src/newItem/index.js - Replace the existing code with the following:
const AWS = require('aws-sdk');
const uuid = require('node-uuid');

exports.handler = async event => {
  const dynamodb = new AWS.DynamoDB.DocumentClient();
  const newEntry = JSON.parse(event.body);
  const params = {
    TableName: process.env.TABLE_NAME, // get the table name from the automatically populated environment variables
    Item: {
      id: uuid.v1(),
      content: newEntry.content,
      timestamp: newEntry.timestamp
    },
    ConditionExpression: 'attribute_not_exists(id)', // do not overwrite existing entries
    ReturnConsumedCapacity: 'TOTAL'
  };

  try {
    // Write a new item to the Item table
    await dynamodb.put(params).promise();
    console.log(`Writing item ${params.Item.id} to table ${process.env.TABLE_NAME}.`);
  } catch (error) {
    console.log(`Error writing to table ${process.env.TABLE_NAME}. Make sure this function is running in the same environment as the table.`);
    throw new Error(error); // stop execution if dynamodb is not available
  }

  // Return a 200 response if no errors
  const response = {
    statusCode: "200",
    headers: {
      "Content-Type": "application/json",
      "Access-Control-Allow-Origin": "*"
    },
    body: "Success",
    isBase64Encoded: false
  }
  return response;
};
- Save the function
As you can see above, we added the node-uuid library to our function. We'll need to update dependencies so it'll work. You can either use npm or yarn to install and save the dependency, or just replace the contents of src/newItem/package.json with:
{
  "name": "newitem",
  "version": "1.0.0",
  "devDependencies": {
    "aws-sdk": "~2"
  },
  "dependencies": {
    "node-uuid": "^1.4.8"
  }
}
Save (and optionally commit) both files.
Update getItems function code
Now we need to update the getItems function to display the items the right way when called from the frontend.
- Open
src/getItems/index.js - Replace the existing code with the following:
const AWS = require('aws-sdk');

exports.handler = async () => {
  // Use dynamodb to get items from the Item table
  const dynamodb = new AWS.DynamoDB.DocumentClient();
  const params = {
    TableName: process.env.TABLE_NAME
  };

  let allItems = [];

  try {
    console.log(`Getting data from table ${process.env.TABLE_NAME}.`);
    items = await dynamodb.scan(params).promise(); // get items from DynamoDB
    items.Items.forEach((item) => allItems.push(item)); // put contents in an array for easier parsing
  } catch (error) {
    console.log(`Error getting data from table ${process.env.TABLE_NAME}. Make sure this function is running in the same environment as the table.`);
    throw new Error(error); // stop execution if data from dynamodb not available
  }

  const response = {
    statusCode: "200",
    headers: {
      "Content-Type": "application/json",
      "Access-Control-Allow-Origin": "*"
    },
    body: JSON.stringify(allItems),
    isBase64Encoded: false
  }
  return response;
};
Note the response. This is the format required by Lambda when responding to an API call.
UP NEXT: Deploy the final version to CloudFormation
4. Final Deploy
Deploy with the CLI
Make sure all of your changes have been saved, then from your stack's root directory, enter the following:
stackery deploy -e test --strategy local --aws-profile <your-aws-profile-name>
This will again take a few minutes, but should be faster than the initial deploy.
UP NEXT: Testing out our frontend
5. Testing in the Browser
View the new frontend
Once your stack has successfully deployed, head back to your browser and navigate to your stackery-quickstart stack, and click on the latest active deployment in the Overview tab.
Once again, double-click the Frontend object store resource, and click the Website Hosting Address link:

You now have a frontend that can interact with your backend API to POST and GET data! Try adding a few items, then click the Show Items! button to see them.

Next Steps
Now that your frontend can talk to your backend, the possibilities are endless!
You can add PUT and DELETE routes to your backend API and make it a true CRUD, use a frontend framework such as React to make a serverless React app, or add a Cognito resource for user authentication!
Troubleshooting
Create/Update Custom Resource takes more than 15 minutes
If a Function resource in your stack has Trigger on First Deploy and/or Trigger on Every Deploy, Stackery will create a custom resource responsible for triggering your Lambda function. While working through this tutorial, if a stack deployment is taking longer than 10-15 minutes and maintains the CREATE_IN_PROGRESS event for Custom::FunctionDeployTrigger, it may be due to a Lambda function timeout/failure.
You can confirm this by accessing the CloudWatch logs for your Lambda function.
CloudFormation will continue this deployment waiting for a success response from the custom resource indicating that the Lambda function has been triggered. If a success response is not received after 60 minutes, it will fail to create the resource and begin a DELETE_IN_PROGRESS event that may take an additional 60 minutes to complete. This resulting delete event for the custom resource could also fail, and CloudFormation will retry this deletion up to two more times.
Use the following to "escape" this process by running a curl response indicating a SUCCESS while the custom resource is in the CREATE_IN_PROGRESS event.
In the AWS Console, navigate to your Lambda function's CloudWatch Logs
Access the most recent Log Stream
Locate the log with a message that consists of
STARTThe log directly below it holds the values we need for our curl request (message will have RequestType, ServiceToken, etc)
Copy and save the following values from this log
ResponseURLStackIdRequestIdLogicalResourceIdUse the following to construct the curl command by replacing the placeholders with the values from your CloudWatch log
curl -X PUT '{RESPONSE_URL}' -H 'Content-Type:' -d '{"Status":"SUCCESS","Reason":"Manual Success","PhysicalResourceId":"resource","RequestId":"{REQUEST_ID}","LogicalResourceId":"{LOGICAL_RESOURCE_ID}","StackId":"{STACK_ID}"}'
- Run your curl command in a terminal window
- Head back to your stack's CloudFormation console to verify the success message has been received and a CREATE_COMPLETE event displays for
Custom::FunctionDeployTrigger
