Serverless Webhooks Tutorial
This tutorial will teach you to connect a GitHub webhook to a serverless function that responds to your GitHub activity.
By the end of the tutorial, you will have deployed into your AWS account:
- An AWS API Gateway that listens for a POST event from GitHub
- An AWS Lambda Function that is activated by changes to a designated GitHub repository
Each step of the tutorial includes:
- A gif showing a preview of what you'll be doing in that step
- Step-by-step written instructions with code examples and screenshots
Tutorial Updates
As we continue to develop Stackery, there may be improvements made to the design of the application. You may notice some differences between the current version and versions used to record our video guides. Rest assured, the overall functionality of Stackery remains the same.
For the most up-to-date visuals and instructions, please refer to the written versions of the tutorial available below each video.
Setup
Project Repositories
The following repository is referenced throughout this tutorial:
Required Installations
The following software or services are used in this tutorial:
Deploy Sample App
You can deploy the completed example into your own AWS account using these two Stackery CLI commands:
stackery create will initialize a new repo in your GitHub account, initializing it with the contents of the referenced blueprint repository.
stackery create --stack-name 'serverless-webhooks' \
--git-provider 'github' \
--blueprint-git-url 'https://github.com/stackery/serverless-webhooks'
stackery deploy will deploy the newly created stack into your AWS account.
stackery deploy --stack-name 'serverless-webhooks' \
--env-name 'development' \
--git-ref 'master'
What We're Building
GitHub webhooks are an ideal use case for serverless, as they can be linked to a Lambda function through an API Gateway, and that function is only triggered when the specified activity occurs.
Read more about GitHub webhooks.
In this tutorial, we will create a new serverless stack in Stackery that listens for events in a specified GitHub repository, and prints those events to the console. The function we will deploy can then be expanded on in numerous ways: pushing GitHub activity to a Slack channel, notifying subscribers when a PR is opened or merged by email, or even automating serverless deployments when commits are pushed to a designated branch.
It's up to you to expand on this tutorial however you'd like - now let's get started!
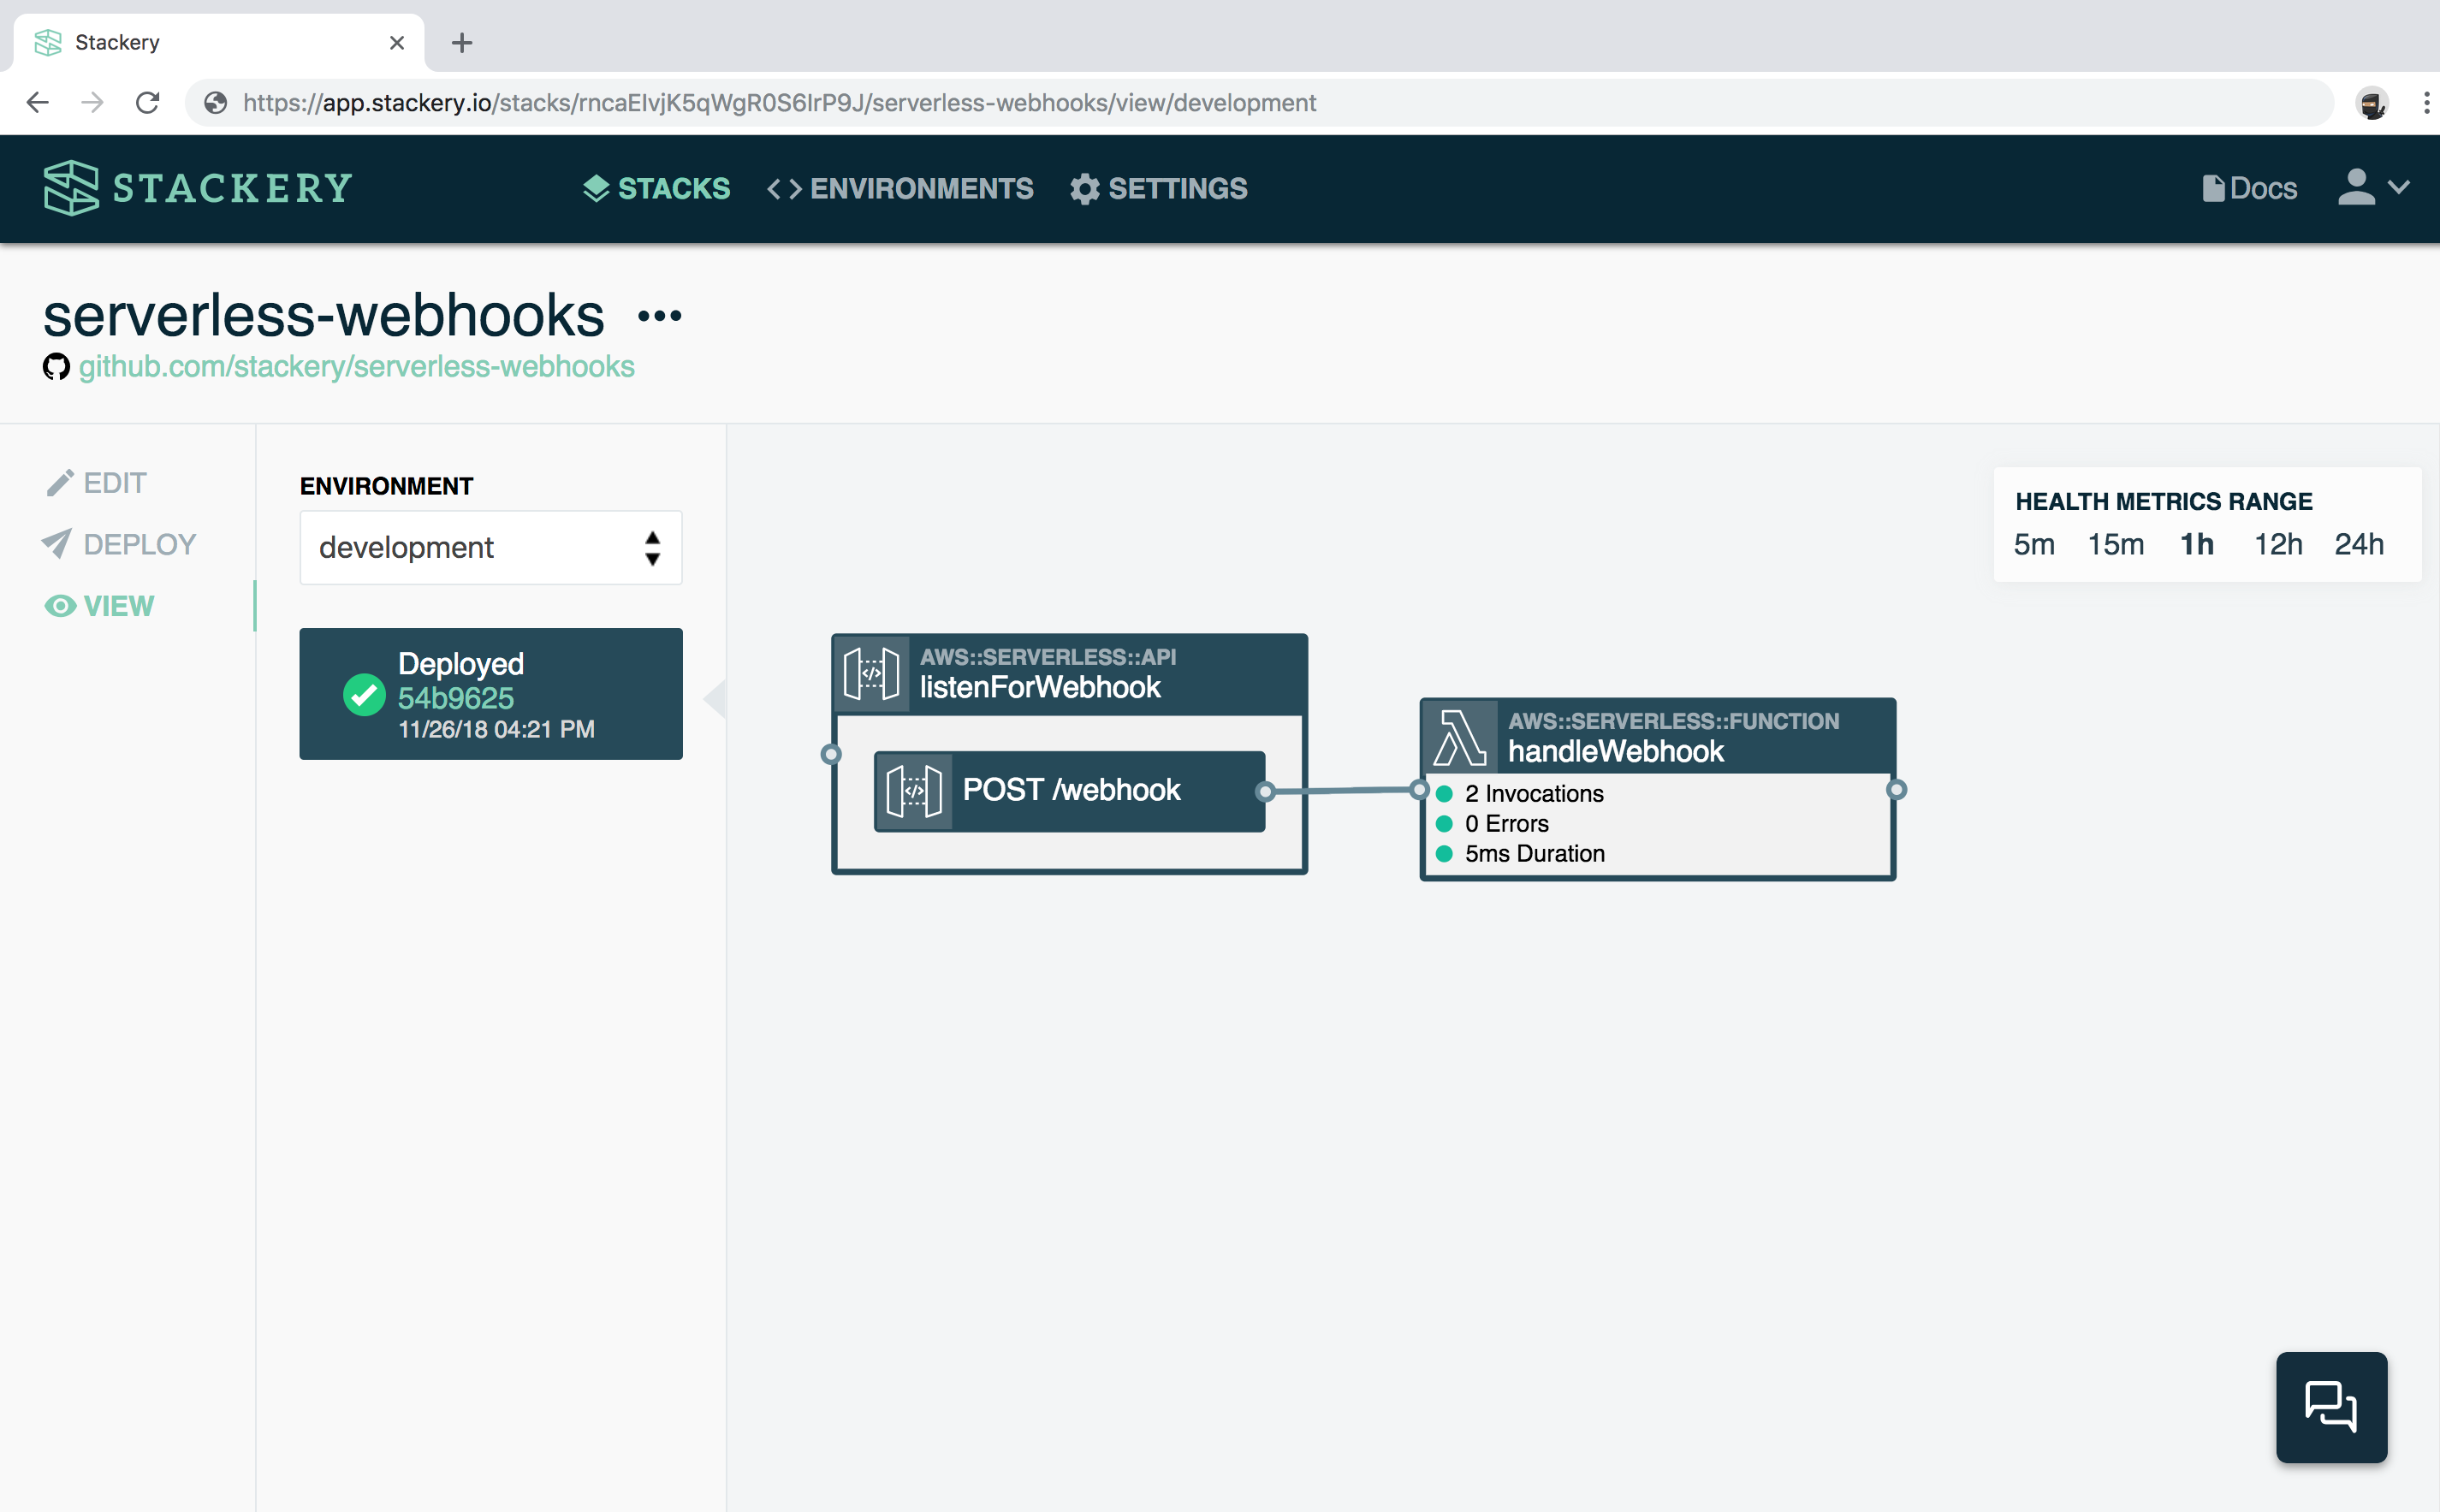
Finished stack
This is an example of the finished stack in the Stackery Editor. Feel free to play around:
Resources used
The following are descriptions of the Stackery resources we'll be working with:
Function : Our function will be configured to log events to the console when it is triggered by the API endpoint.
Rest API : An API Gateway resource with a POST method that will be connected to a GitHub webhook.
We will configure these resources in later parts, but first we need to create our stack.
UP NEXT: Setting up the stack you will be using in this tutorial.
1. Set up Your Stack
Create a new stack for your webhook app
First you will create the stack that will house your webhook function. For that you need to sign into the Stackery App.
- In the Stackery Dashboard, navigate to Stacks
- Select With a new repo from the Add a Stack dropdown in the top right corner
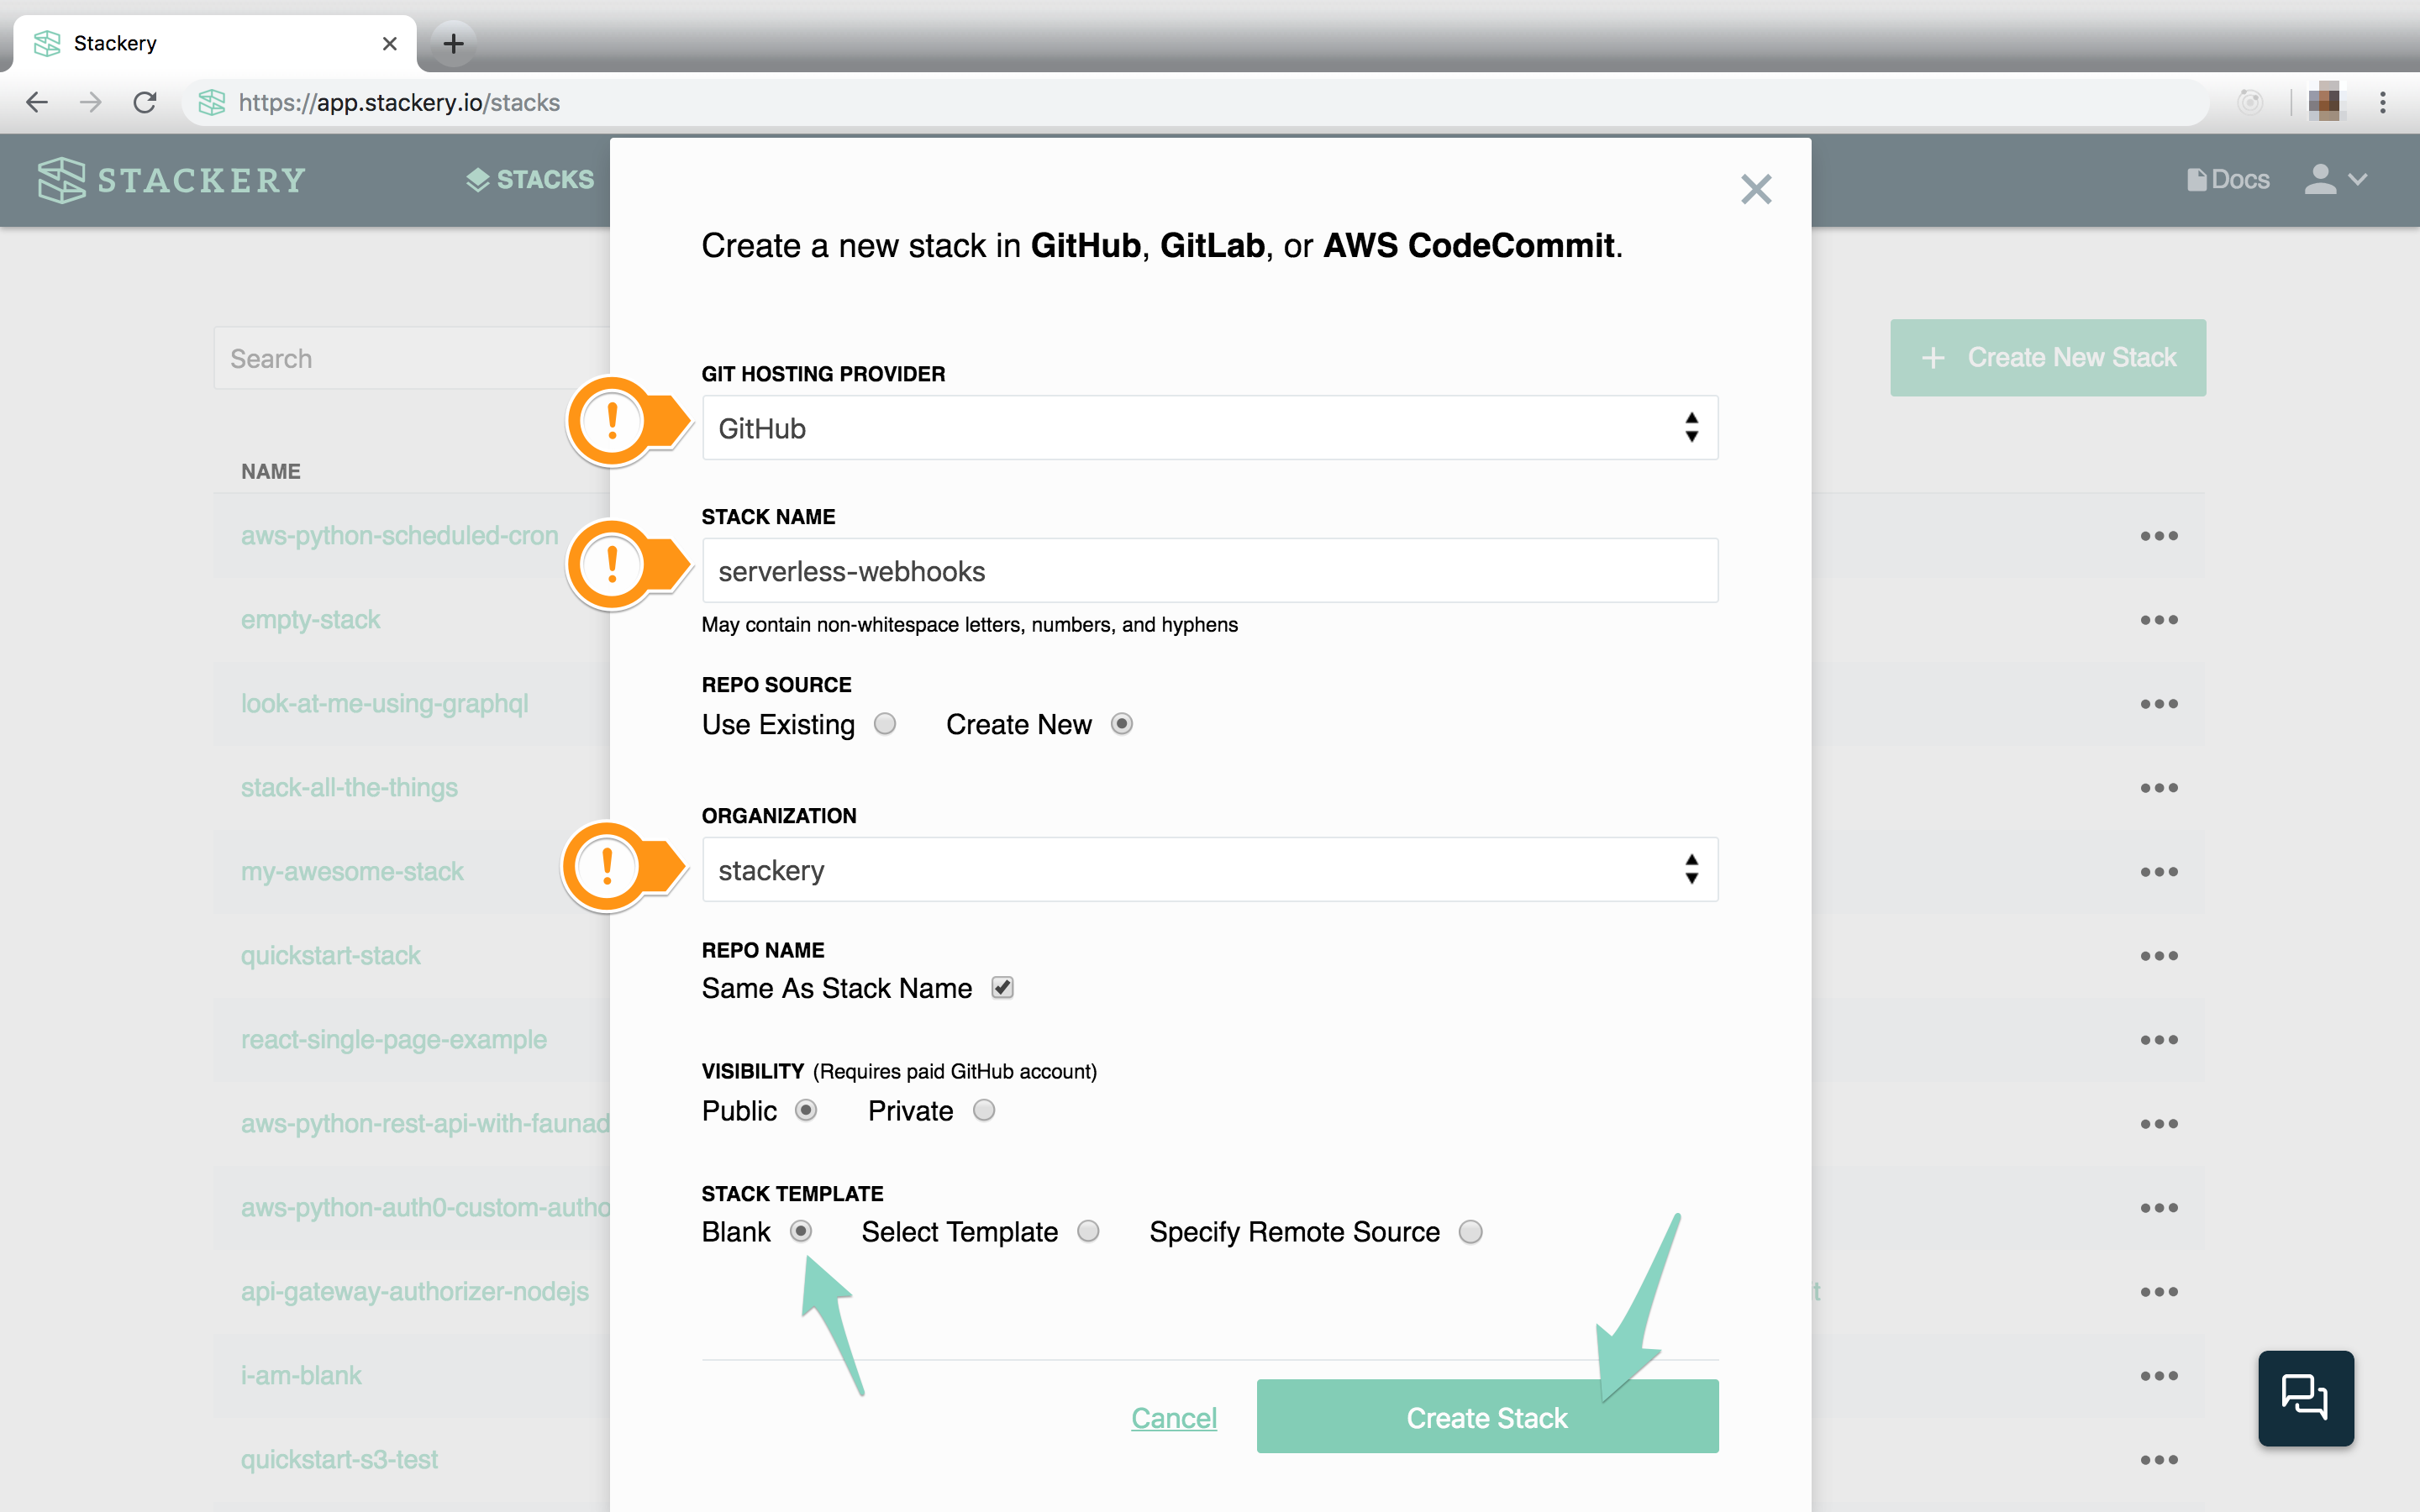
- Select GitHub for Git Hosting Provider
- Enter
serverless-webhooksfor Stack Name - For Organization, select the Git account you want this repository in
- Keep the Repo Name the same as Stack Name
- Click Add Stack to create a new blank stack
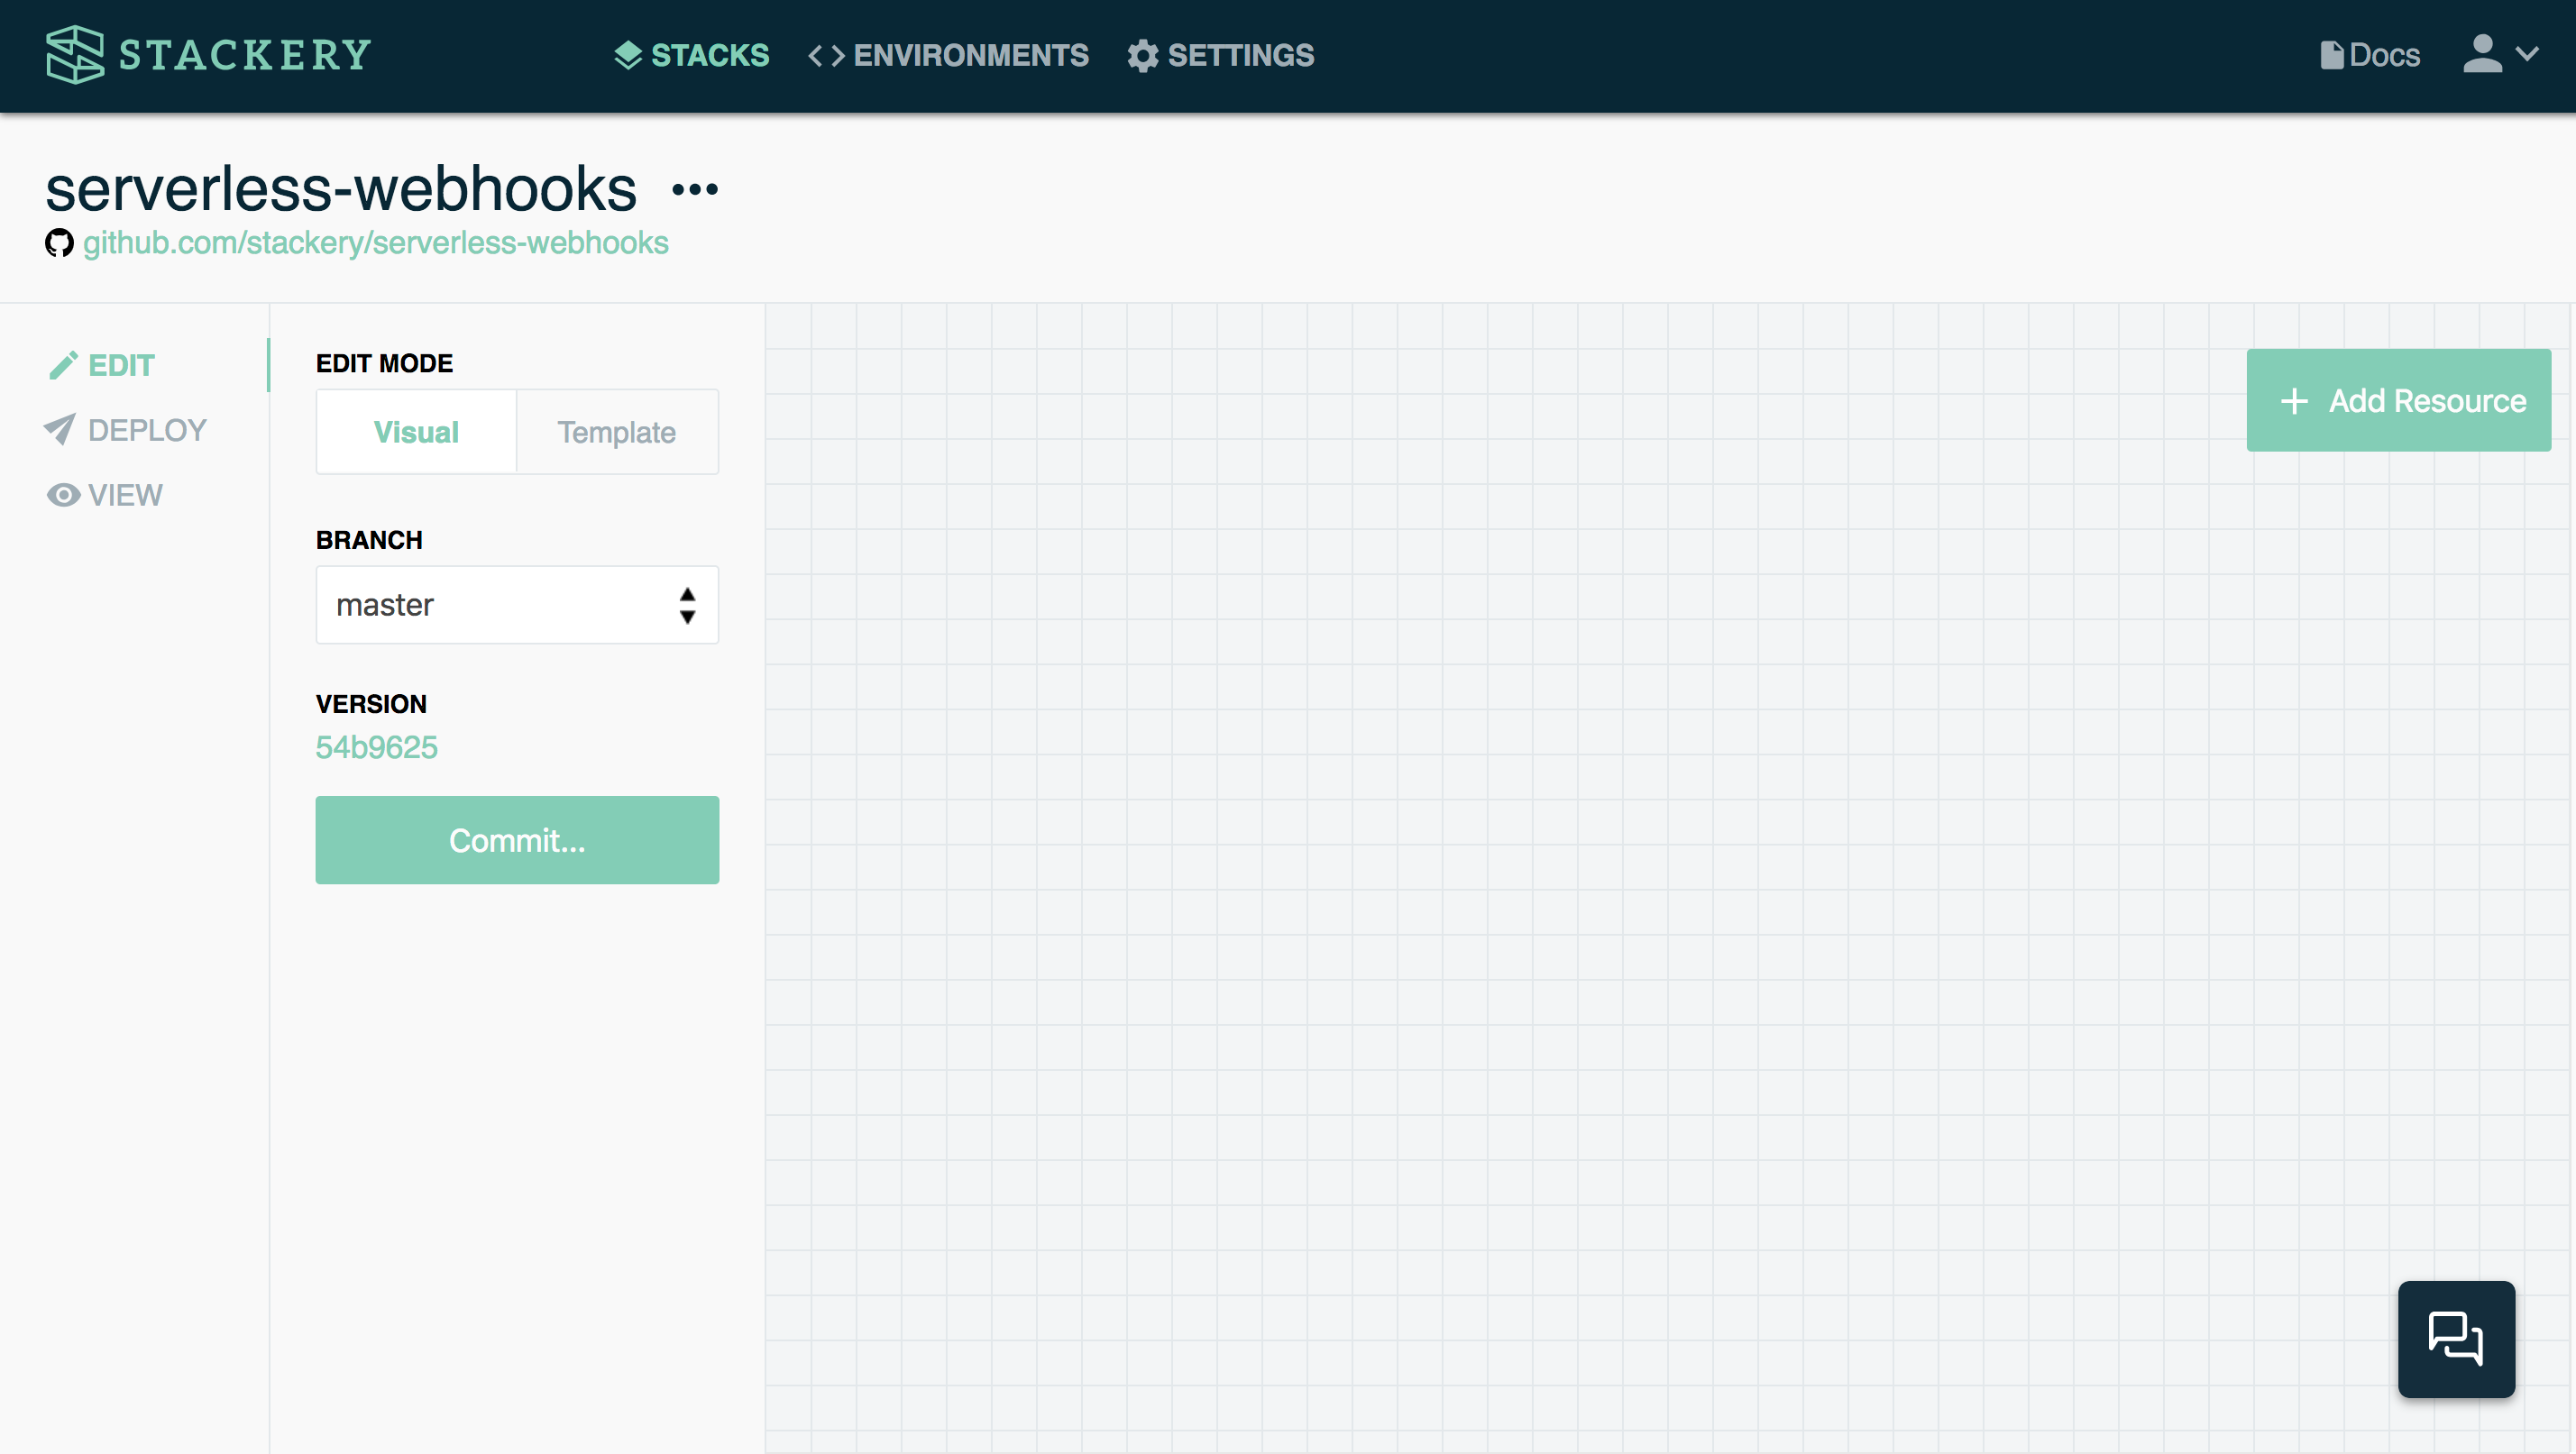
Stackery initializes the following blank stack:
Add an API resource
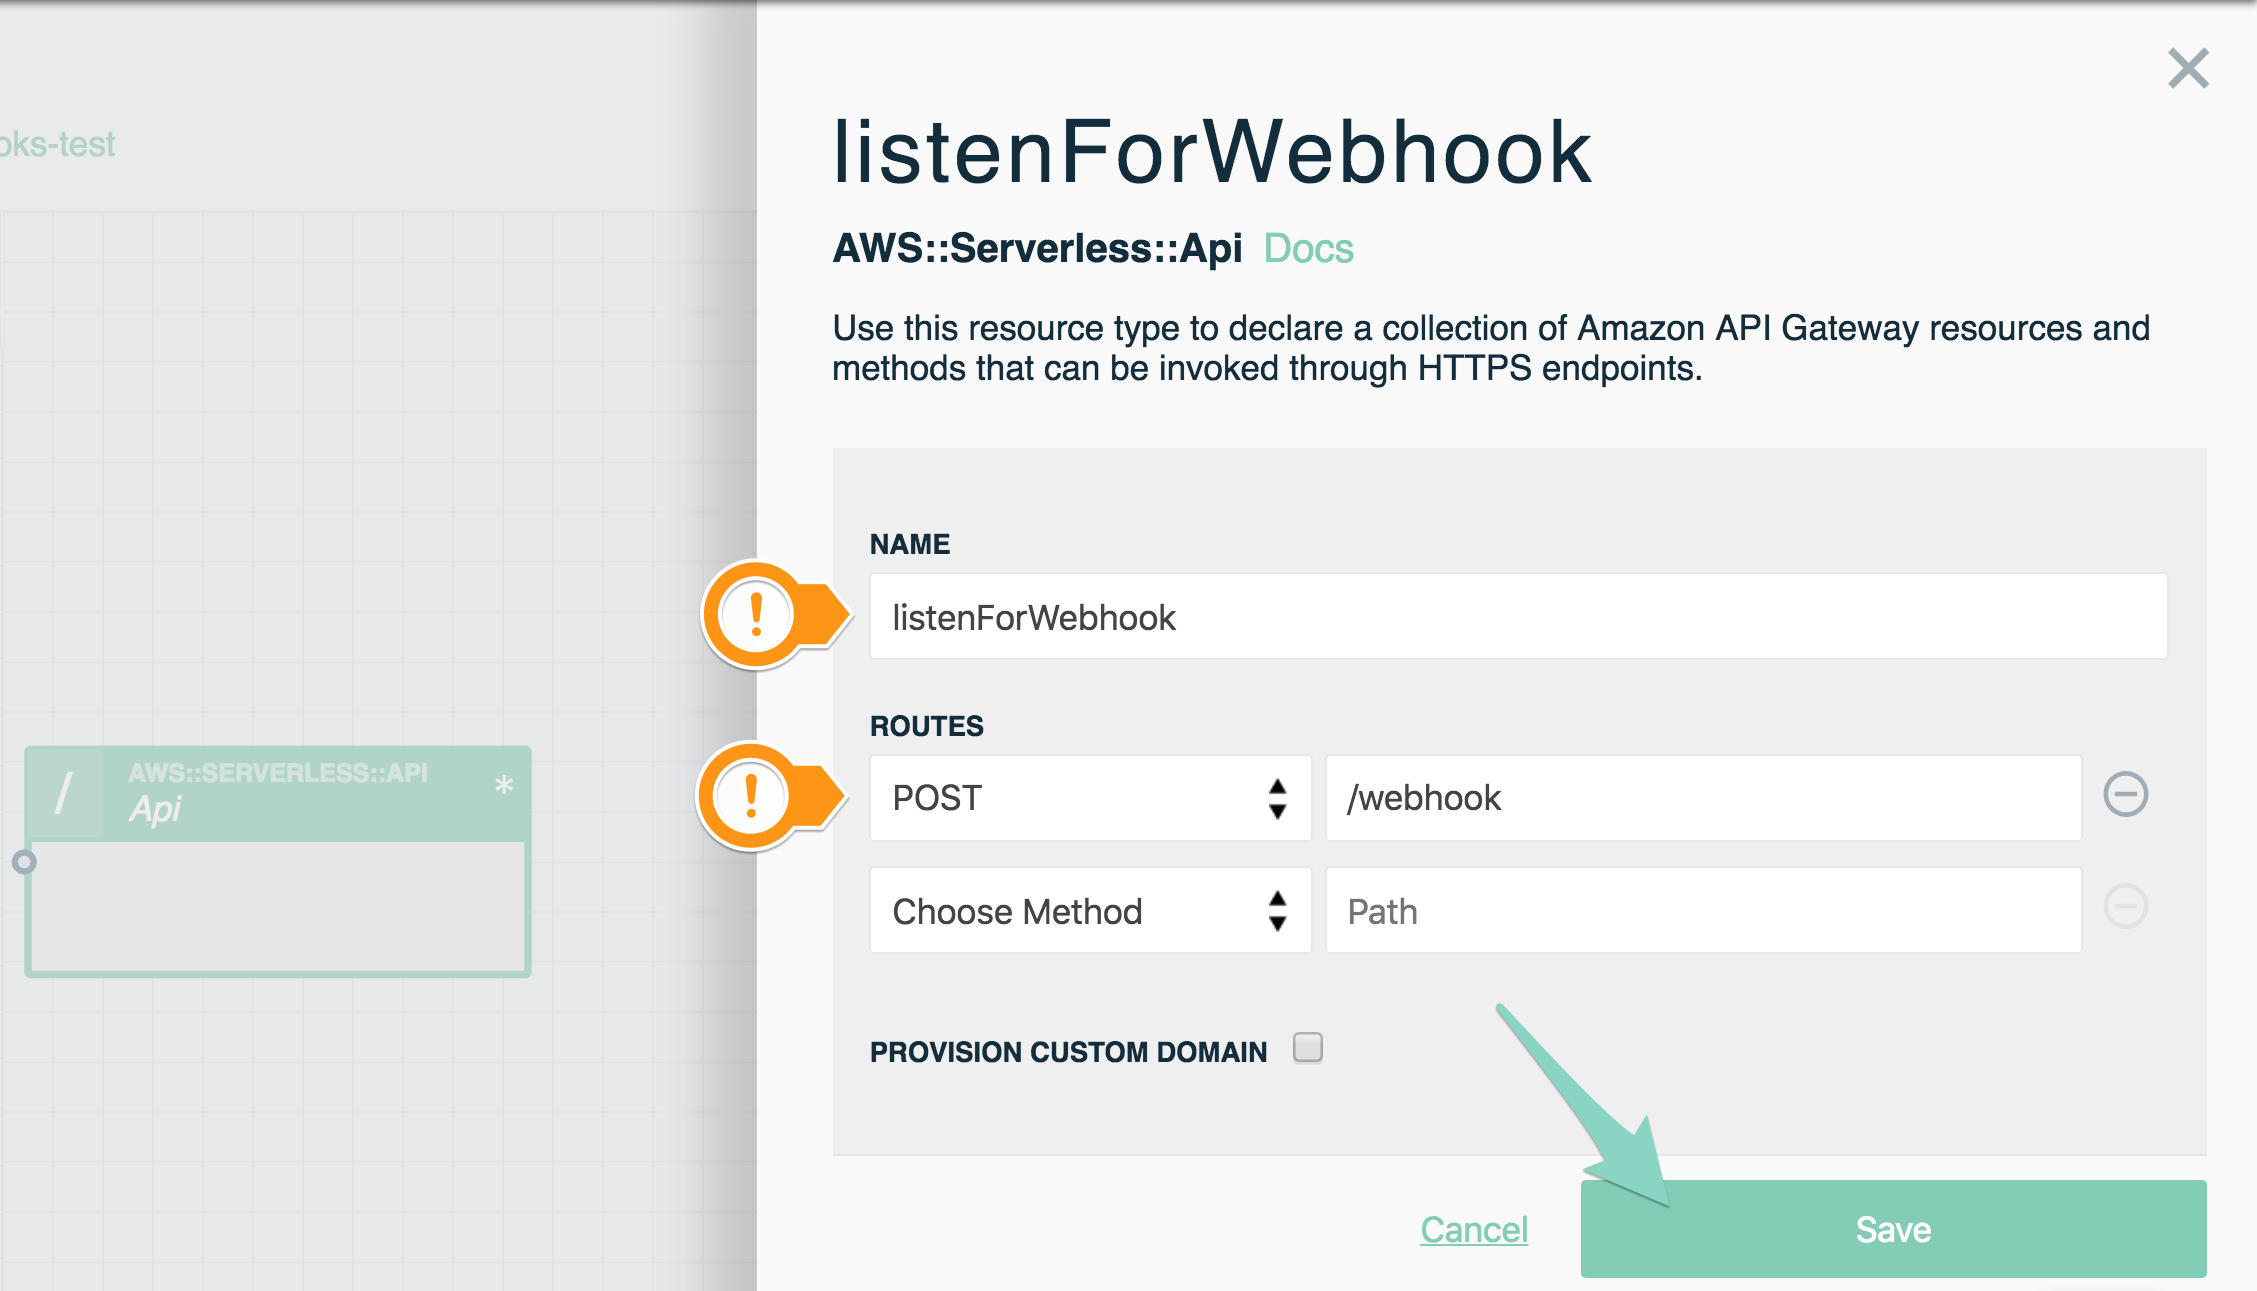
Our serverless-webhooks app needs a Rest API to receive the GitHub webhook:
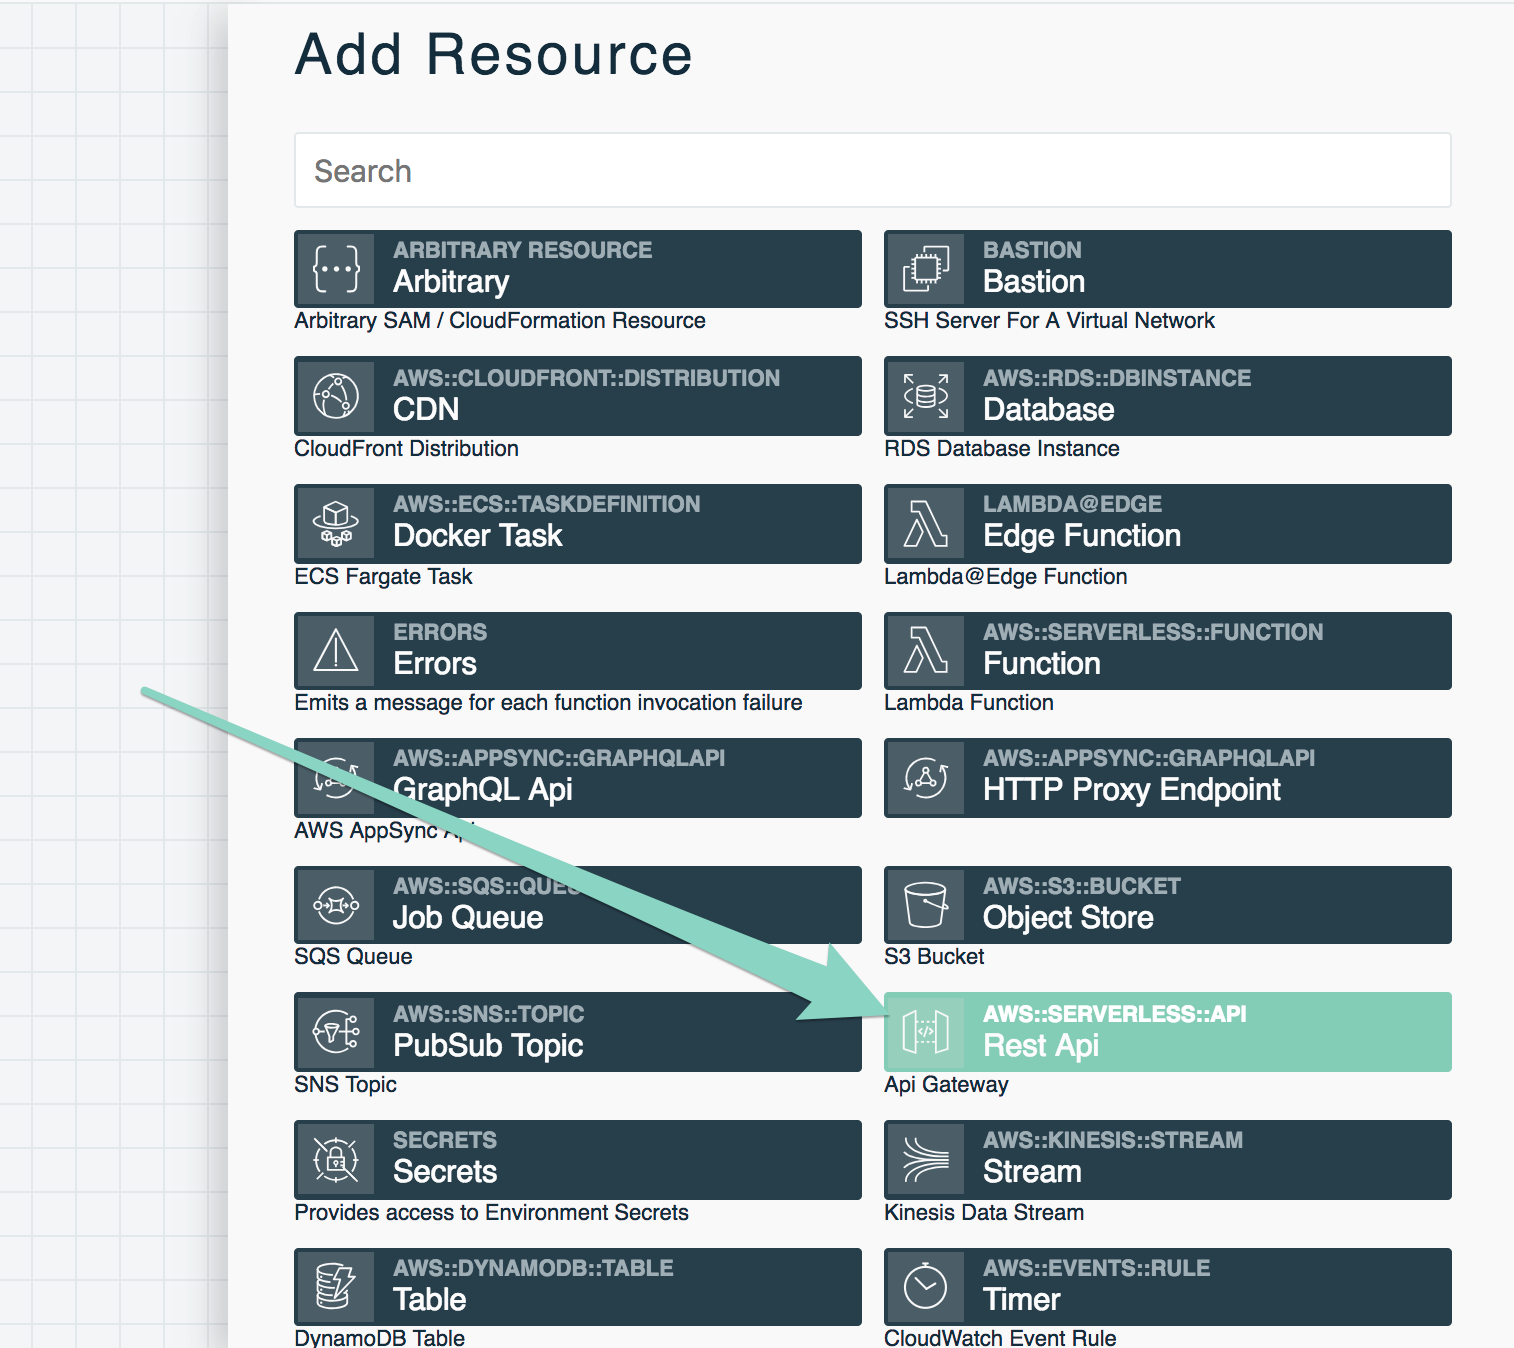
- Click the Add Resource button in the top right
- Select Rest Api and click or drag and drop it onto the canvas
- Double-click the API to open the editing panel
- (optional) Give the API a name such as
listenForWebhook - Under Routes choose POST as your method and enter
/webhookas your Path - Click Save at the bottom to save your API resource
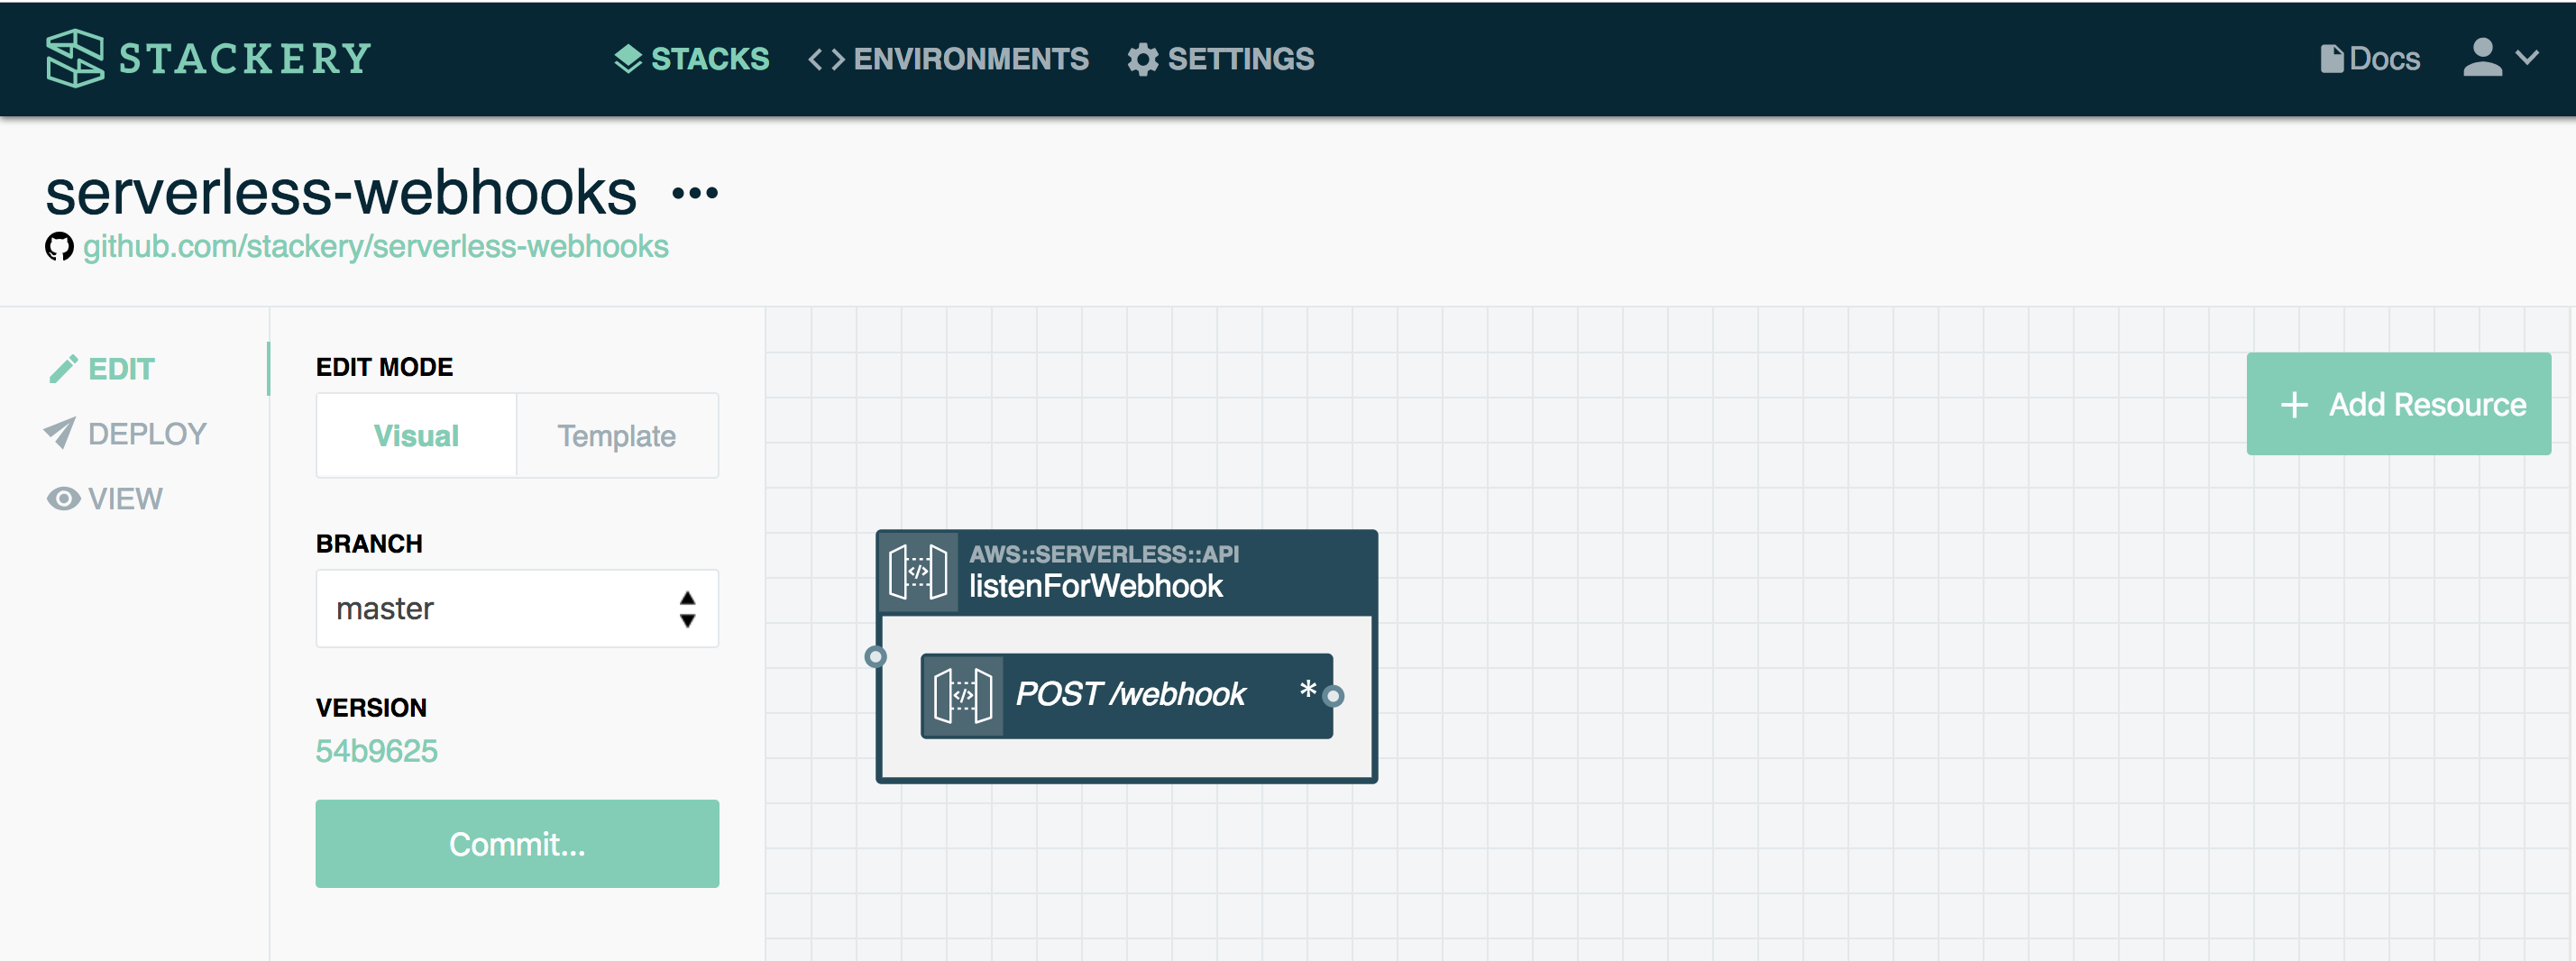
Your Dashboard should now look like this:
Add a function resource
Next you need to add a function resource to your stack:
- Click the Add Resource button in the top right
- Select Function and click or drag and drop it onto the canvas
- Double-click the Function to open the editing panel
- Enter
handleWebhookfor the function Name - Change the Source Path to
src/handleWebhook - Change Handler to
index.githubWebhookHandler
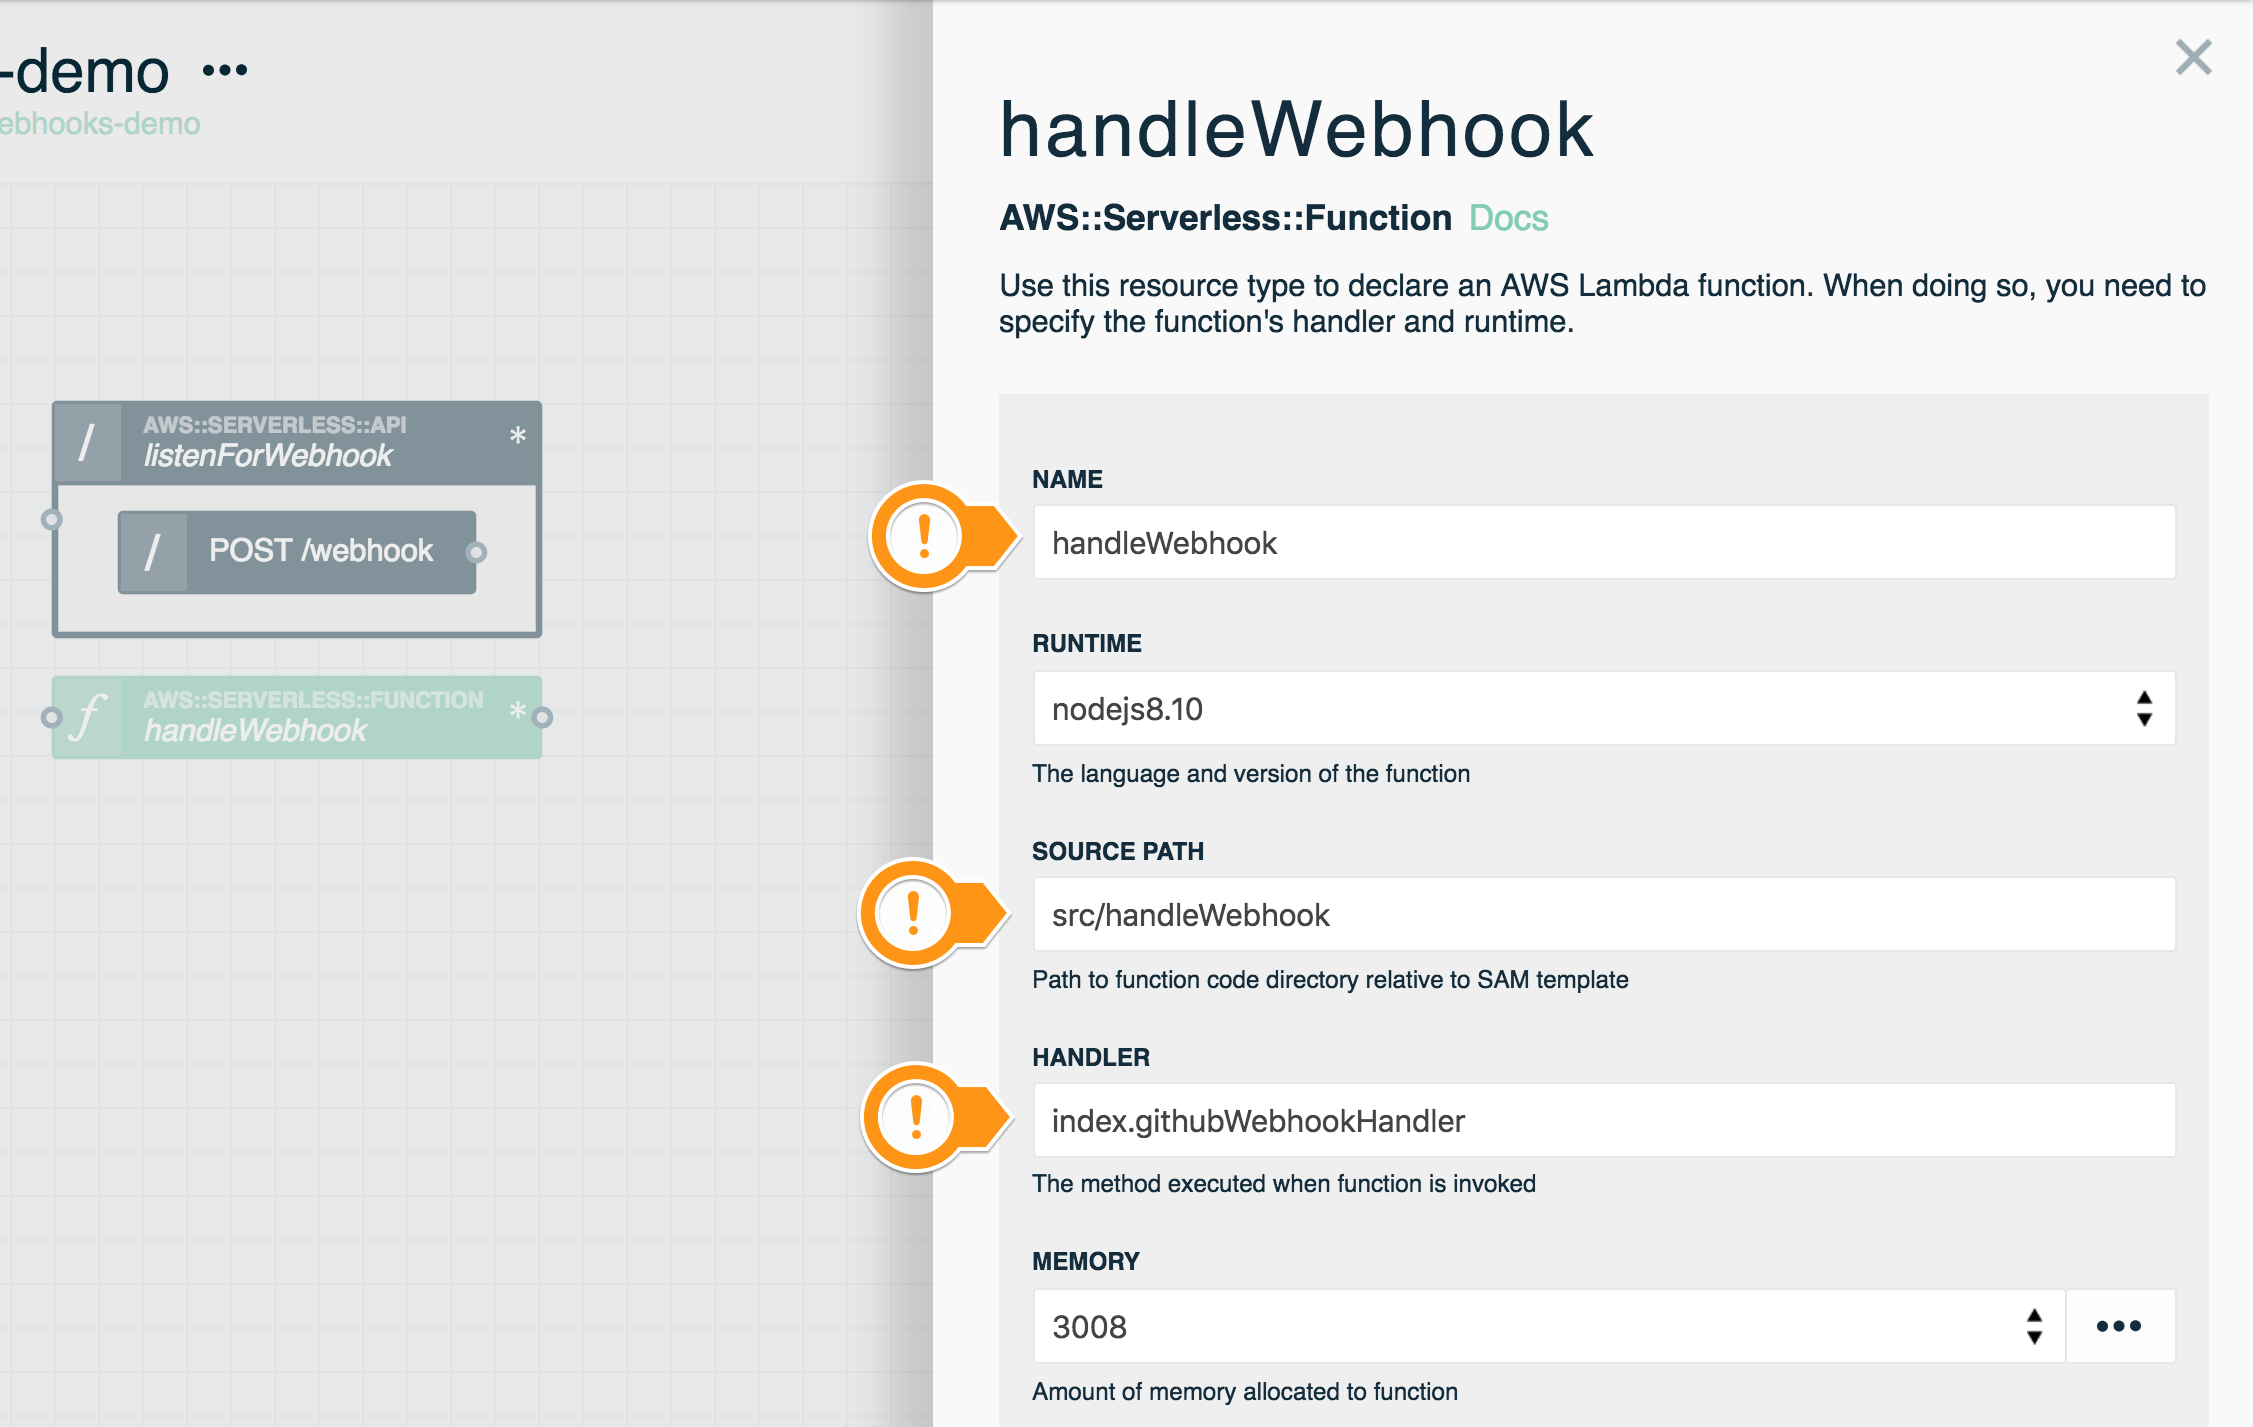
- Leave the other values as they are
- Click Save at the bottom to save your function
Connect and save your resources
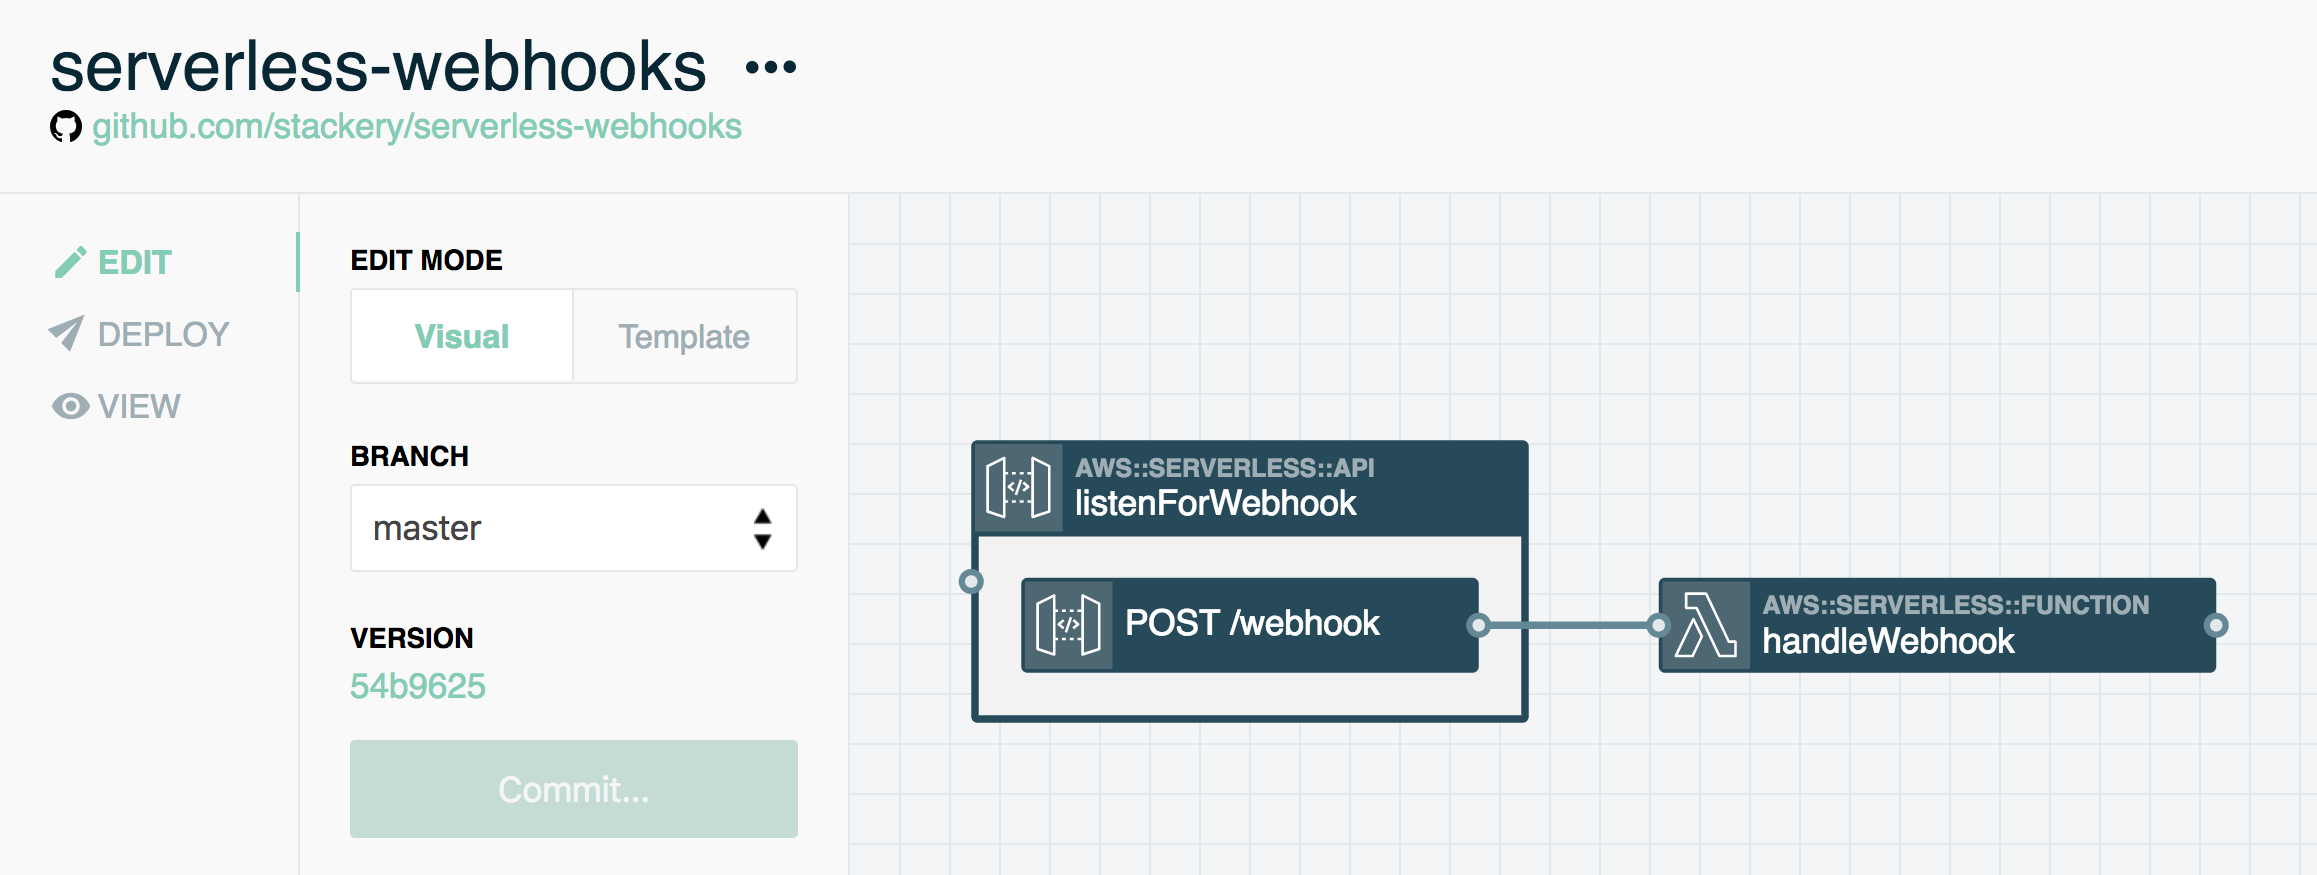
Your stack now has two resources. The final step before you edit your code is to connect them and commit your changes:
- Drag an Integration Wire from the endpoint on the right side of the API's POST method to the endpoint on the left side of the Function
- Commit your changes by pressing the Commit... button in the sidebar and entering a commit message
Your serverless-webhooks stack should now look like this:
UP NEXT: Get your code from your GitHub repository.
2. Get Code from GitHub
Pull down your code from GitHub
In order to configure our webhook function, we need to be able to edit it on our local machine. Luckily, Stackery makes this easy to do so.
- If it's not open already, navigate to
serverless-webhooksin Stacks - Click the git SHA link under Version (see screenshot below). This will open your GitHub repository
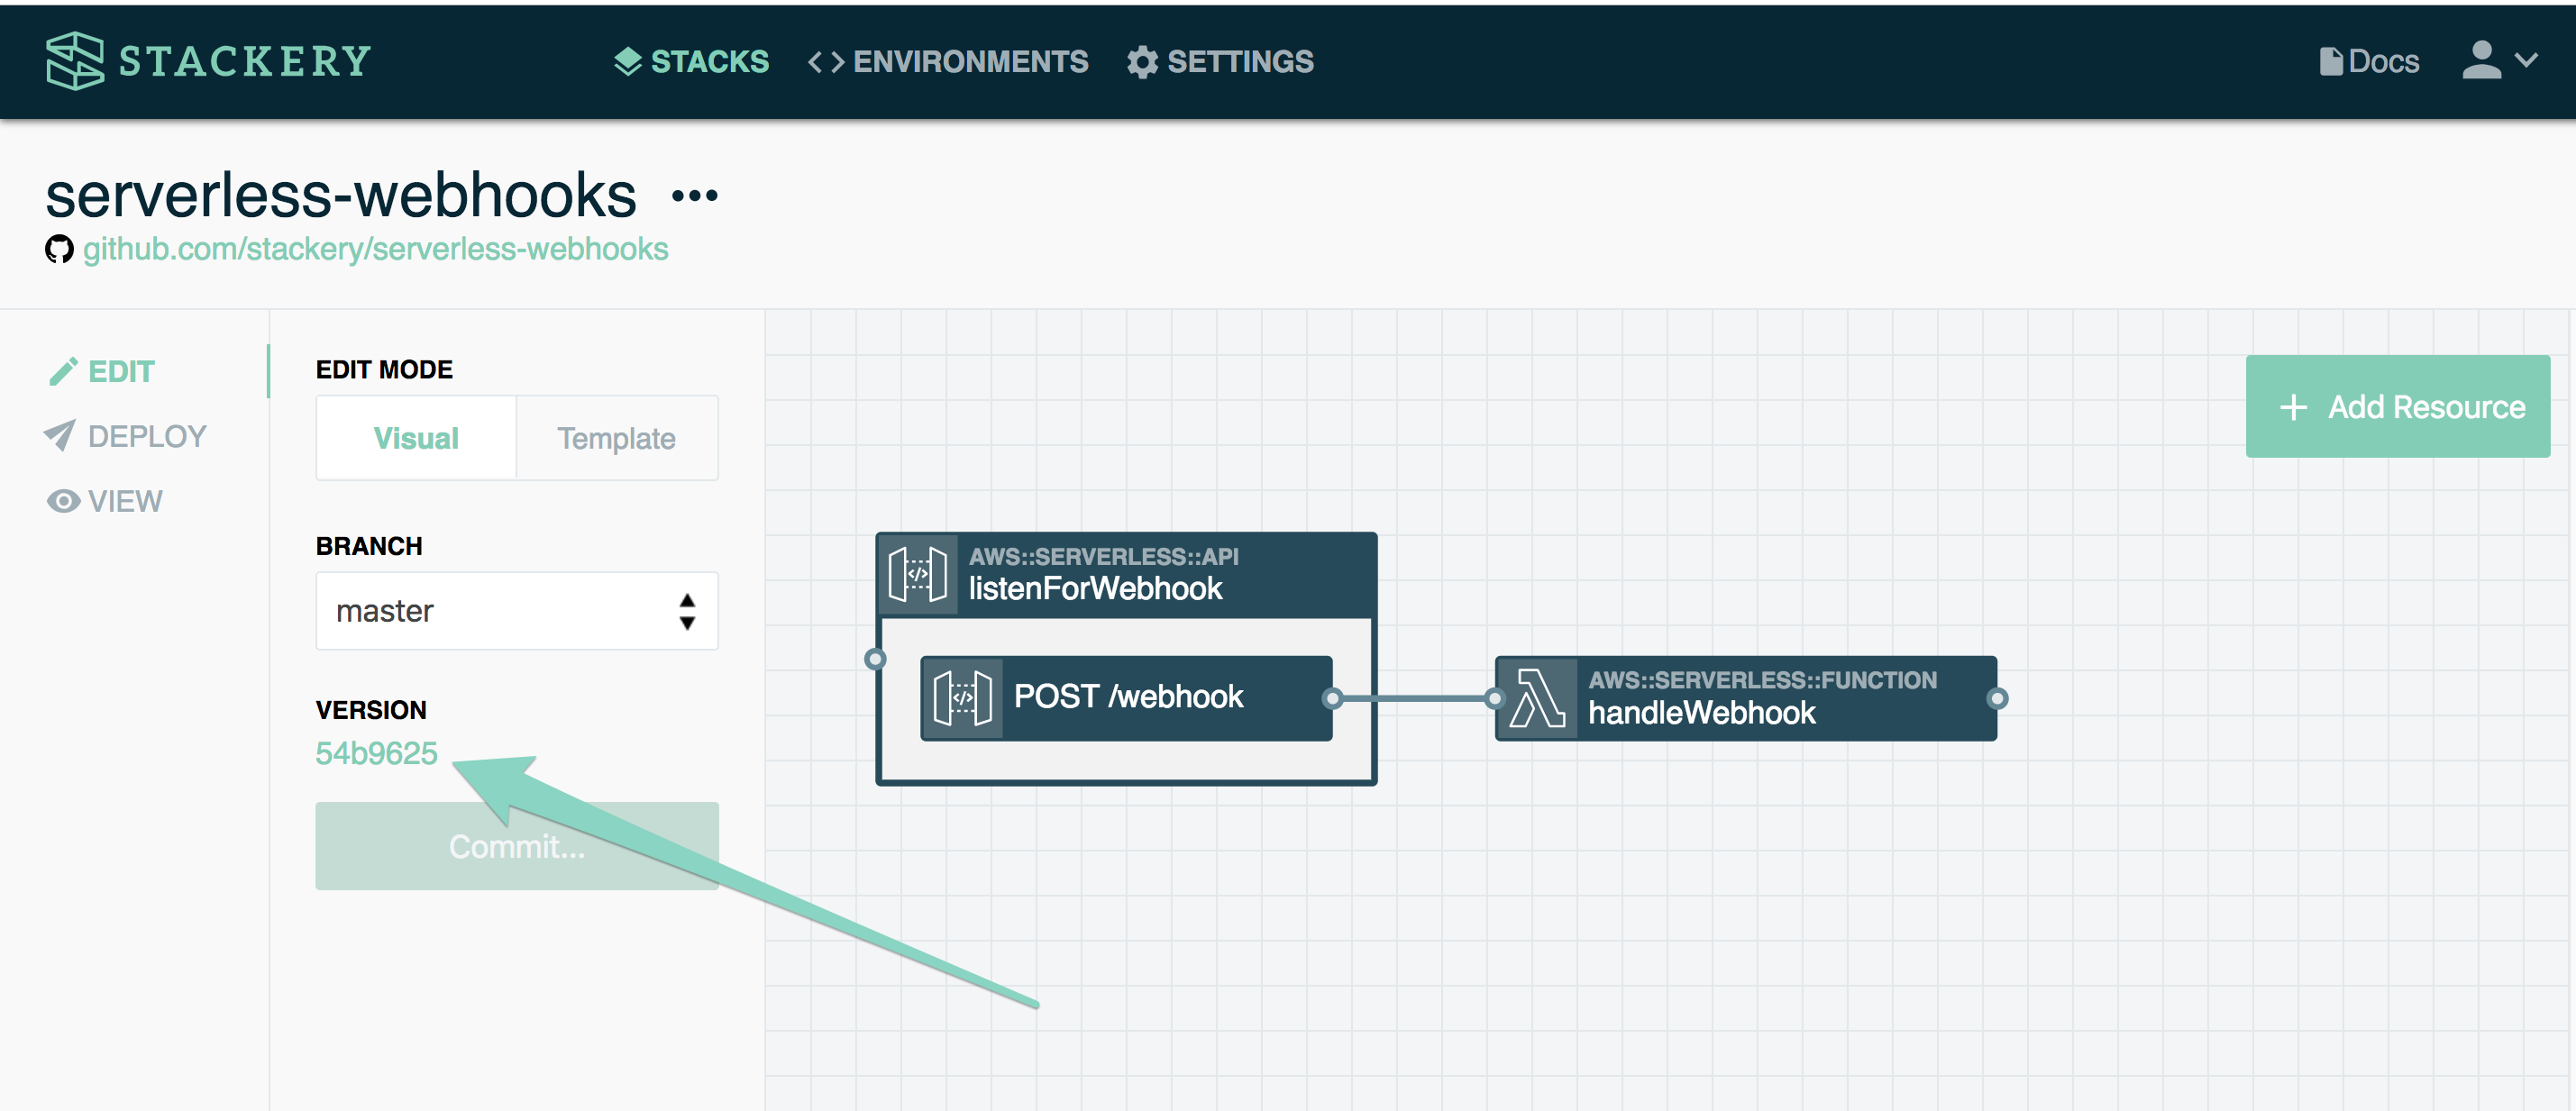
- Clone your repository onto your local machine
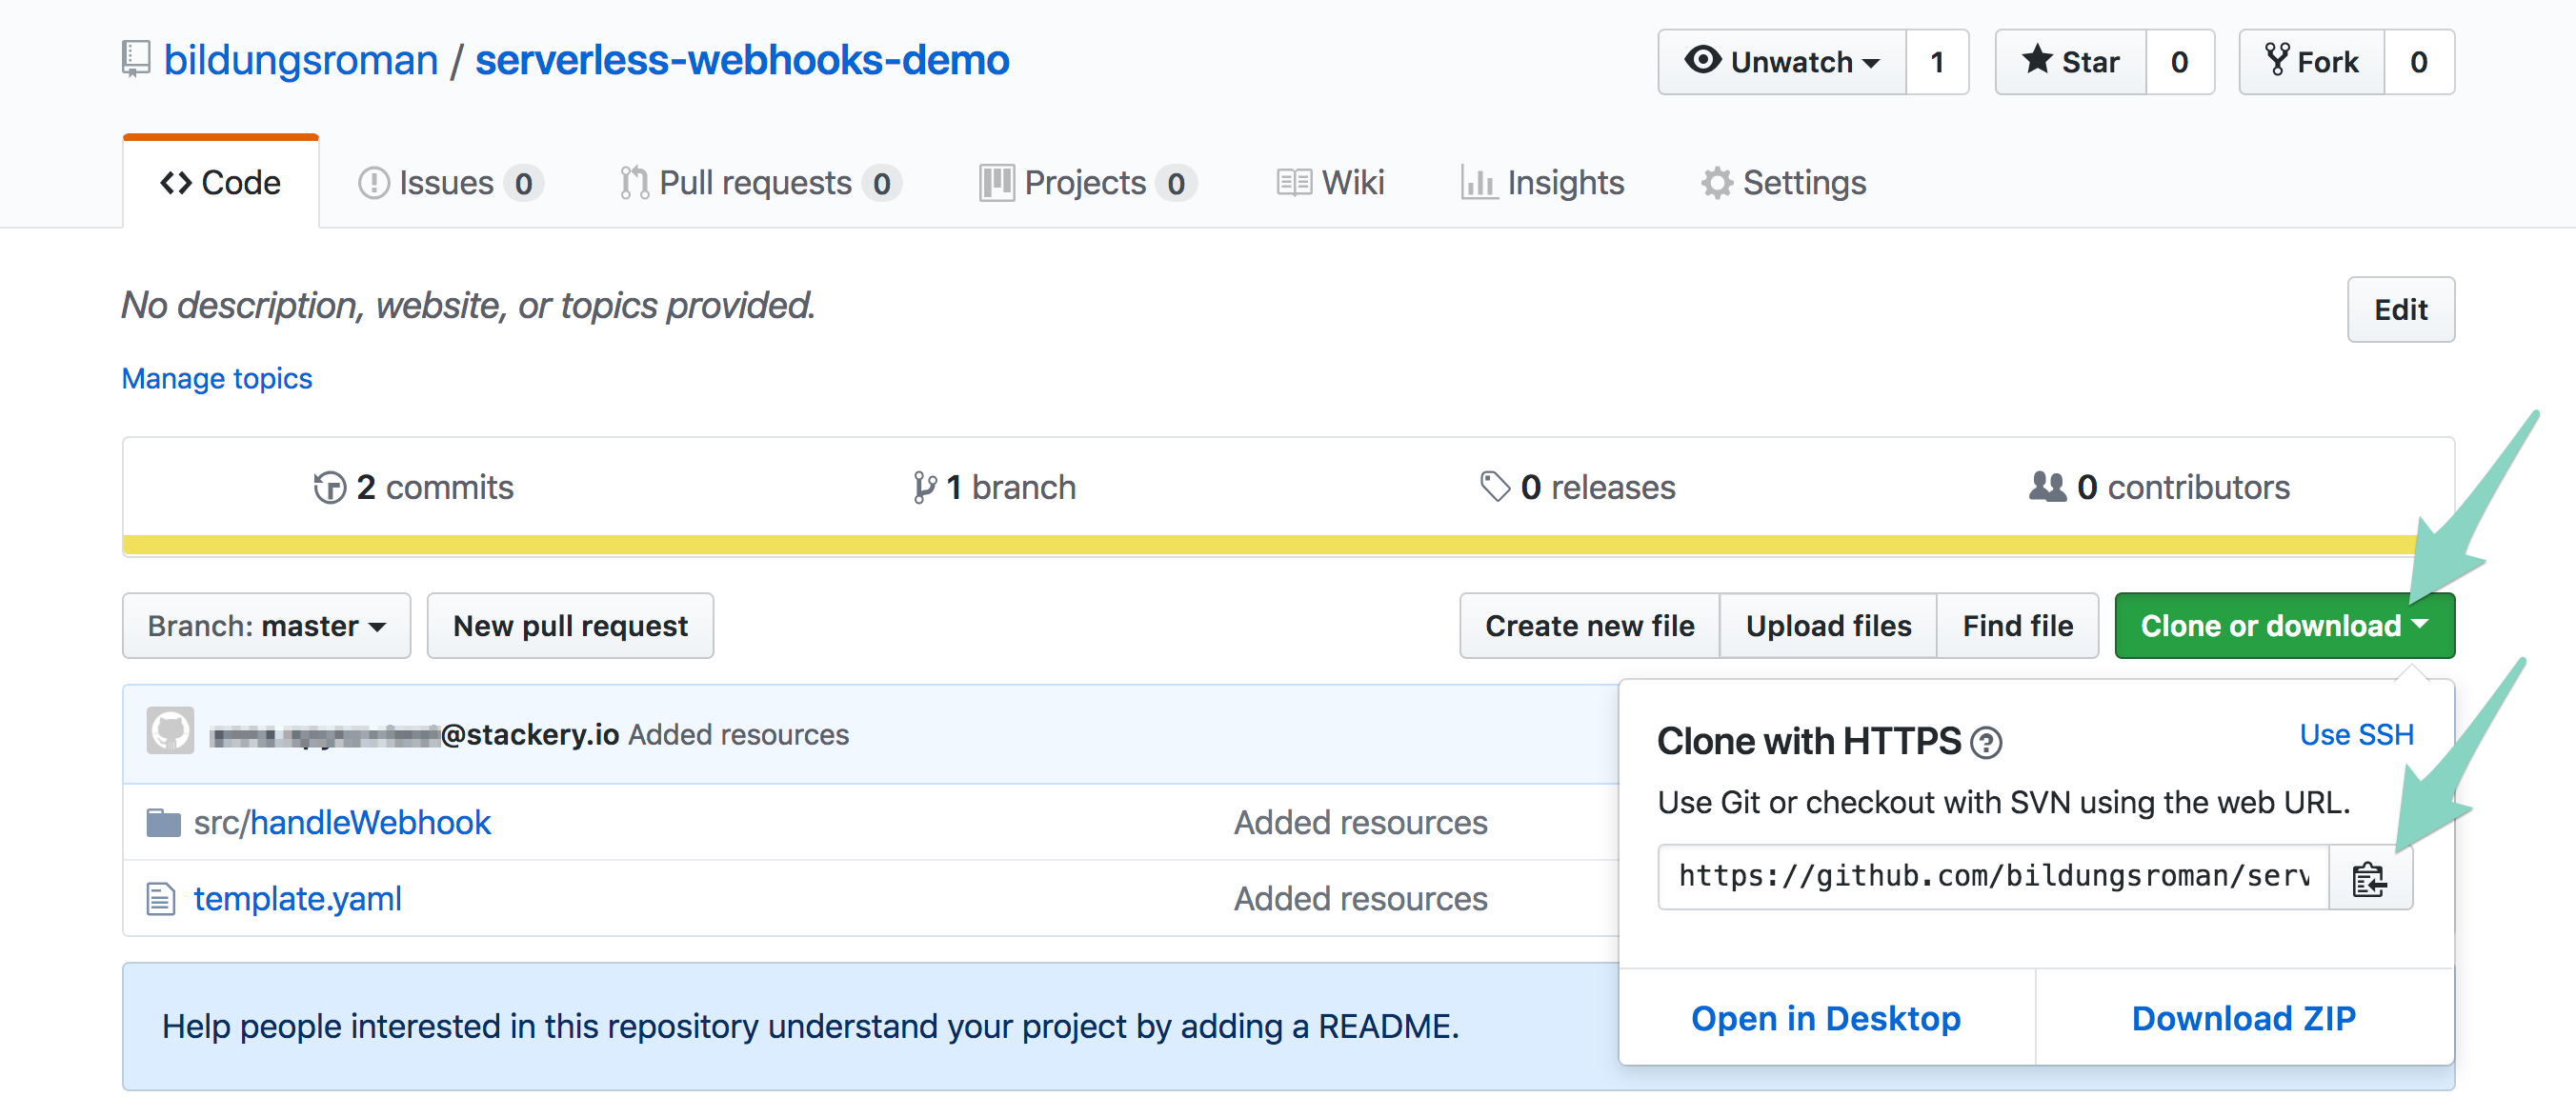
You should now have access to your serverless application in your IDE, and your project files should look similar to this:

UP NEXT: Writing and deploying the webhook stack.
3. Write and Deploy the Webhook Function
Add function code
Now we need to make our function handle the event that will be coming in from the listenForWebhook API.
The function code below will just parse the event.body coming in from the GitHub webhook, and print select information from the event using console.log(). This will show up in your CloudWatch Logs.
Logging the event our function receives is a good way to make sure our webhook is working correctly, so we can debug any problems right away rather than trying to find the point of failure in a more complicated application.
- In your text editor or IDE, open
serverless-webhooks/src/handleWebhook/index.js - Replace the existing
exports.handlerfunction with the followinggithubWebhookHandlerfunction (see comments for explanations):
const crypto = require('crypto');
// This function will validate your payload from GitHub
// See docs at https://developer.github.com/webhooks/securing/#validating-payloads-from-github
function signRequestBody(key, body) {
  return `sha1=${crypto.createHmac('sha1', key).update(body, 'utf-8').digest('hex')}`;
}
// The webhook handler function
exports.githubWebhookHandler = async event => {
  // get the GitHub secret from the environment variables
  const token = process.env.GITHUB_WEBHOOK_SECRET;
  const calculatedSig = signRequestBody(token, event.body);
  let errMsg;
  // get the remaining variables from the GitHub event
  const headers = event.headers;
  const sig = headers['X-Hub-Signature'];
  const githubEvent = headers['X-GitHub-Event'];
  const body = JSON.parse(event.body);
  // this determines username for a push event, but lists the repo owner for other events
  const username = body.pusher ? body.pusher.name : body.repository.owner.login;
  const message = body.pusher ? `${username} pushed this awesomeness/atrocity through (delete as necessary)` : `The repo owner is ${username}.`
  // get repo variables
  const { repository } = body;
  const repo = repository.full_name;
  const url = repository.url;

  // check that a GitHub webhook secret variable exists, if not, return an error
  if (typeof token !== 'string') {
    errMsg = 'Must provide a \'GITHUB_WEBHOOK_SECRET\' env variable';
    return {
      statusCode: 401,
      headers: { 'Content-Type': 'text/plain' },
      body: errMsg,
    };
  }
  // check validity of GitHub token
  if (sig !== calculatedSig) {
    errMsg = 'X-Hub-Signature incorrect. Github webhook token doesn\'t match';
    return {
      statusCode: 401,
      headers: { 'Content-Type': 'text/plain' },
      body: errMsg,
    };
  }

  // print some messages to the CloudWatch console
  console.log('---------------------------------');
  console.log(`\nGithub-Event: "${githubEvent}" on this repo: "${repo}" at the url: ${url}.\n ${message}`);
  console.log('Contents of event.body below:');
  console.log(event.body);
  console.log('---------------------------------');

  // more advanced logic can go here

  // return a 200 response if the GitHub tokens match
  const response = {
    statusCode: 200,
    body: JSON.stringify({
      input: event,
    }),
  };

  return response;
};
- Save the file, and add, commit, and push it to your GitHub repository
- Back in the Stackery Dashboard, you will see a message to refresh the app as changes from GitHub have been detected. Click refresh (If this alert does not show for you, simply refresh your browser to display any changes)
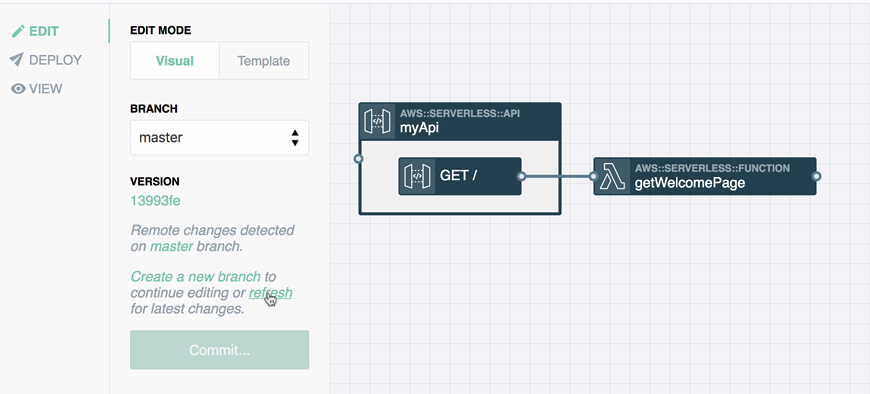
Configure your environment variables
Next, you need to add your GITHUB_WEBHOOK_SECRET token so that your function will return a successful response. You will do this in your Stackery environment configurations rather than directly in your function source code, since it's a best practice to separate secrets and environment config from your source code.
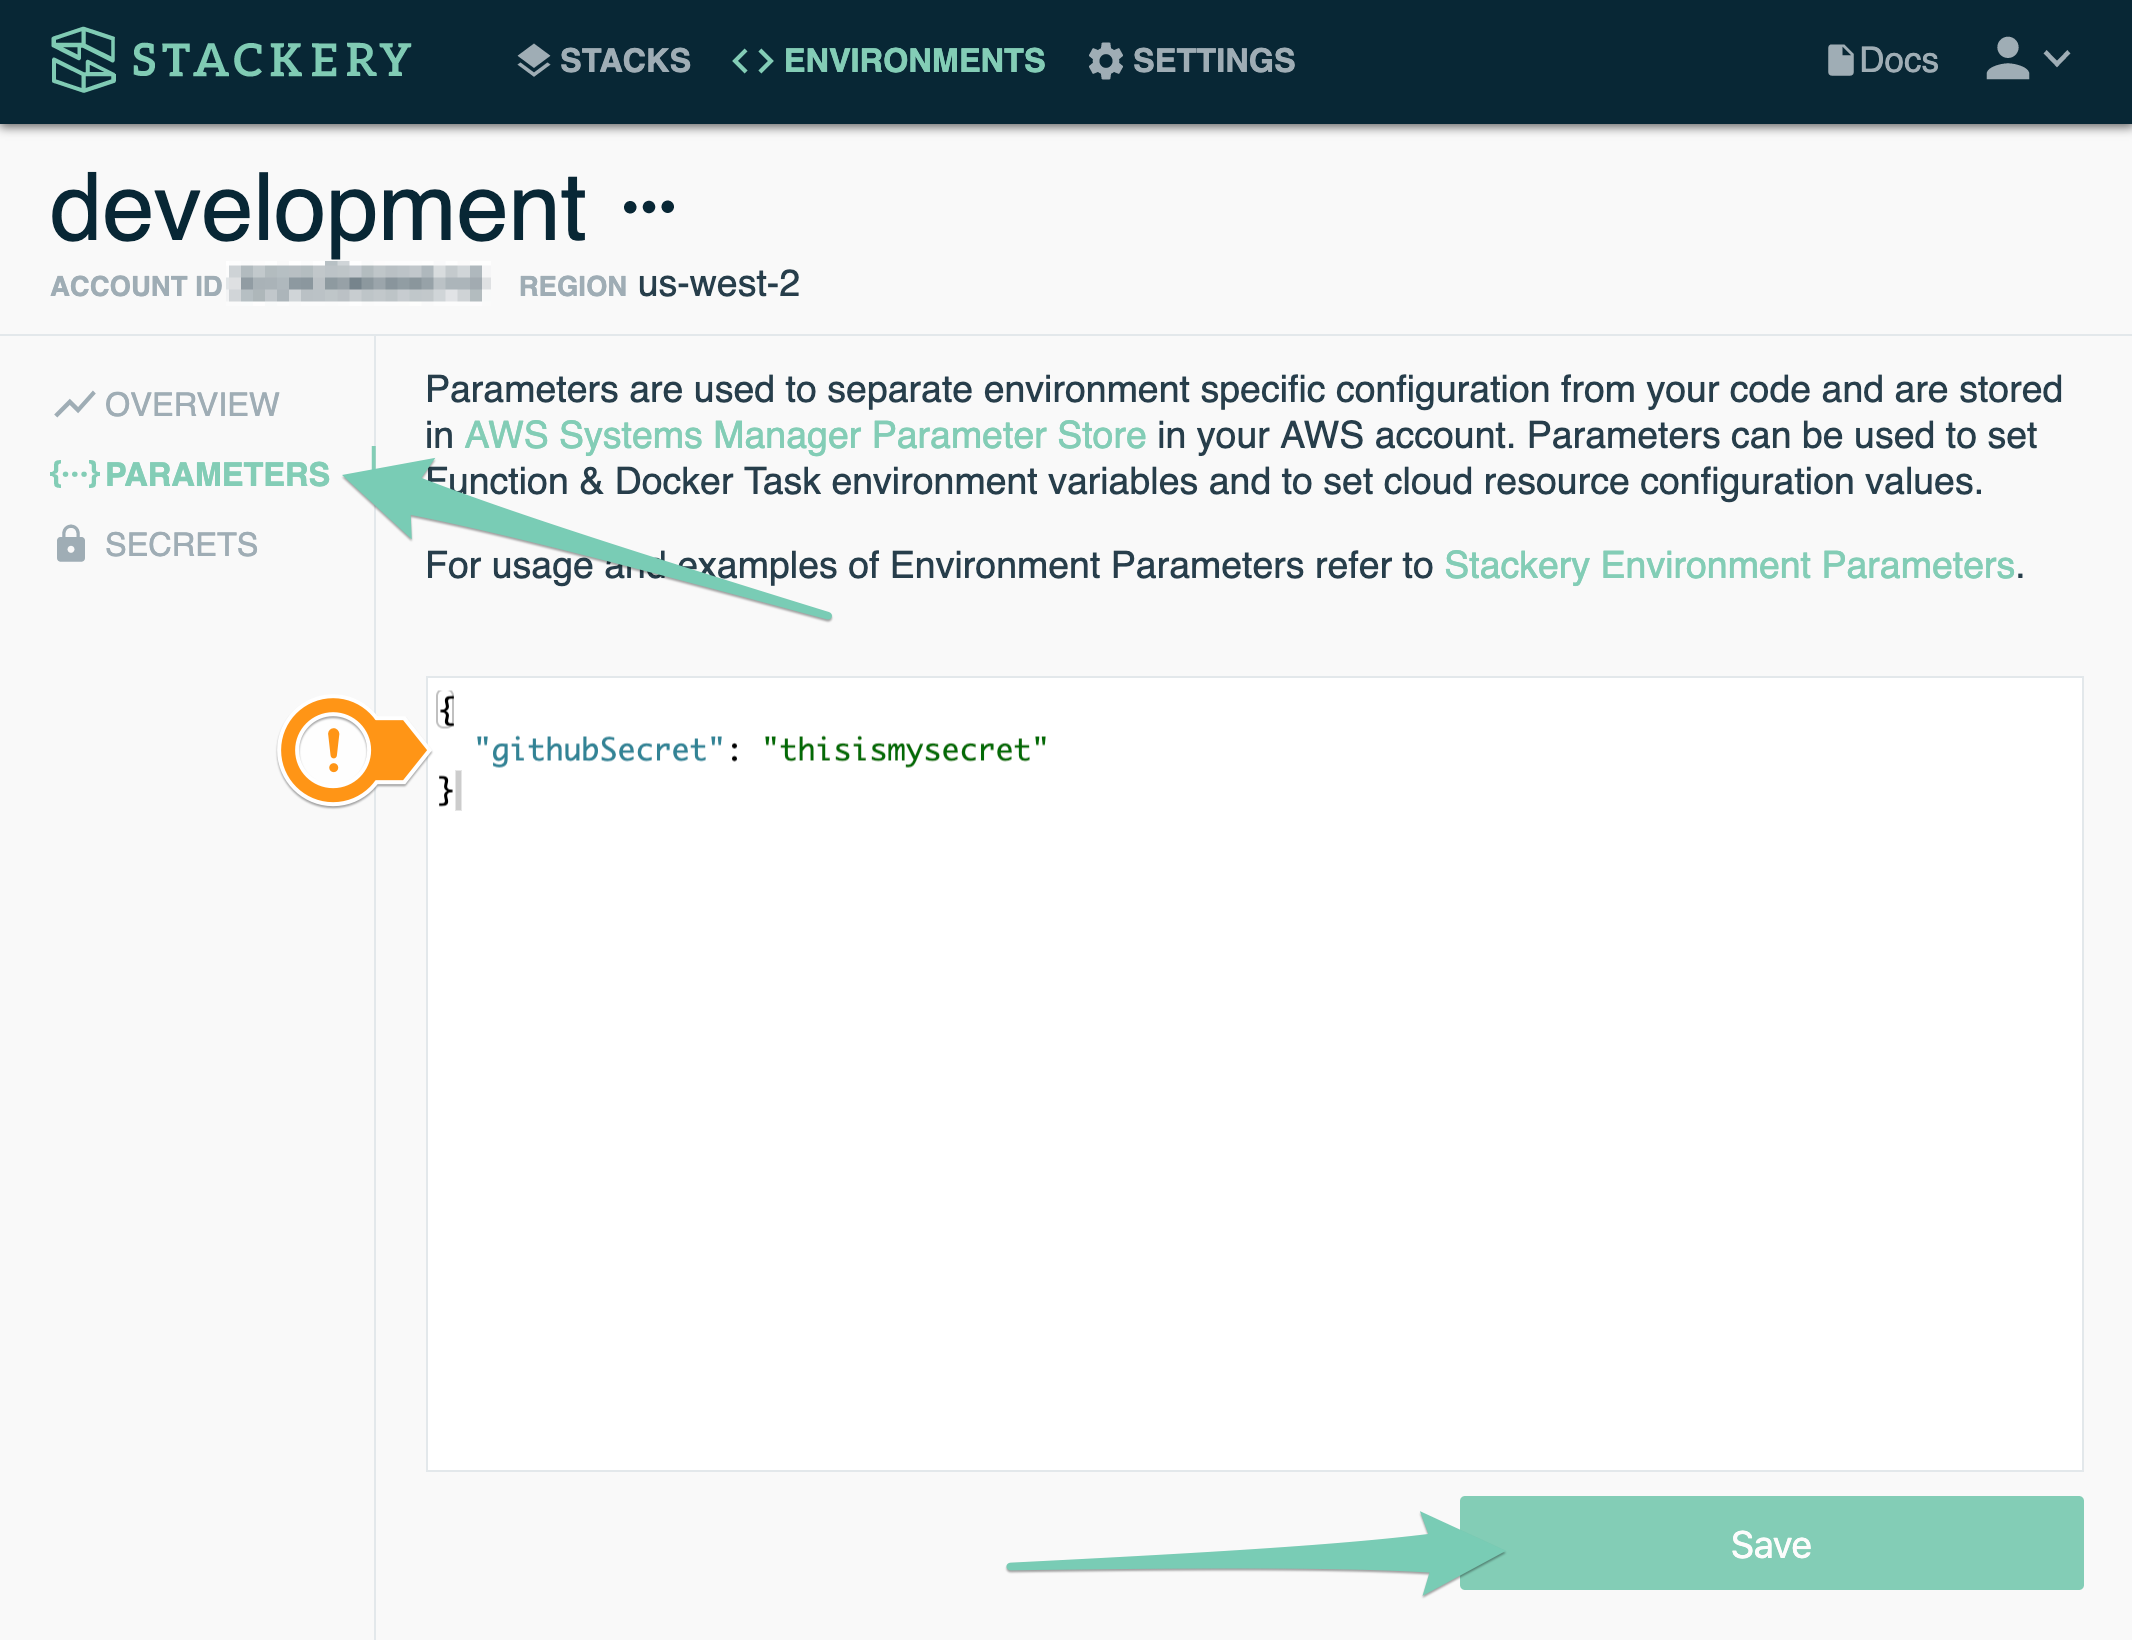
- In the top navigation, choose Environments. You will be taken to your list of environments
- Click on the name of the environment your are working in - by default, this will be called "development"

This is where you will configure your GitHub secret for authentication - keeping it out of your public repository.
- Choose Parameters from the left sidebar
- Paste the following in the Environment Editor
{
  "githubSecret": "thisismysecret"
}
- Replace
"thisismysecret"with your own secret passphrase, ideally a randomly-generated one - keep it handy as you'll need it for the next part - Click Save to save your environment parameters
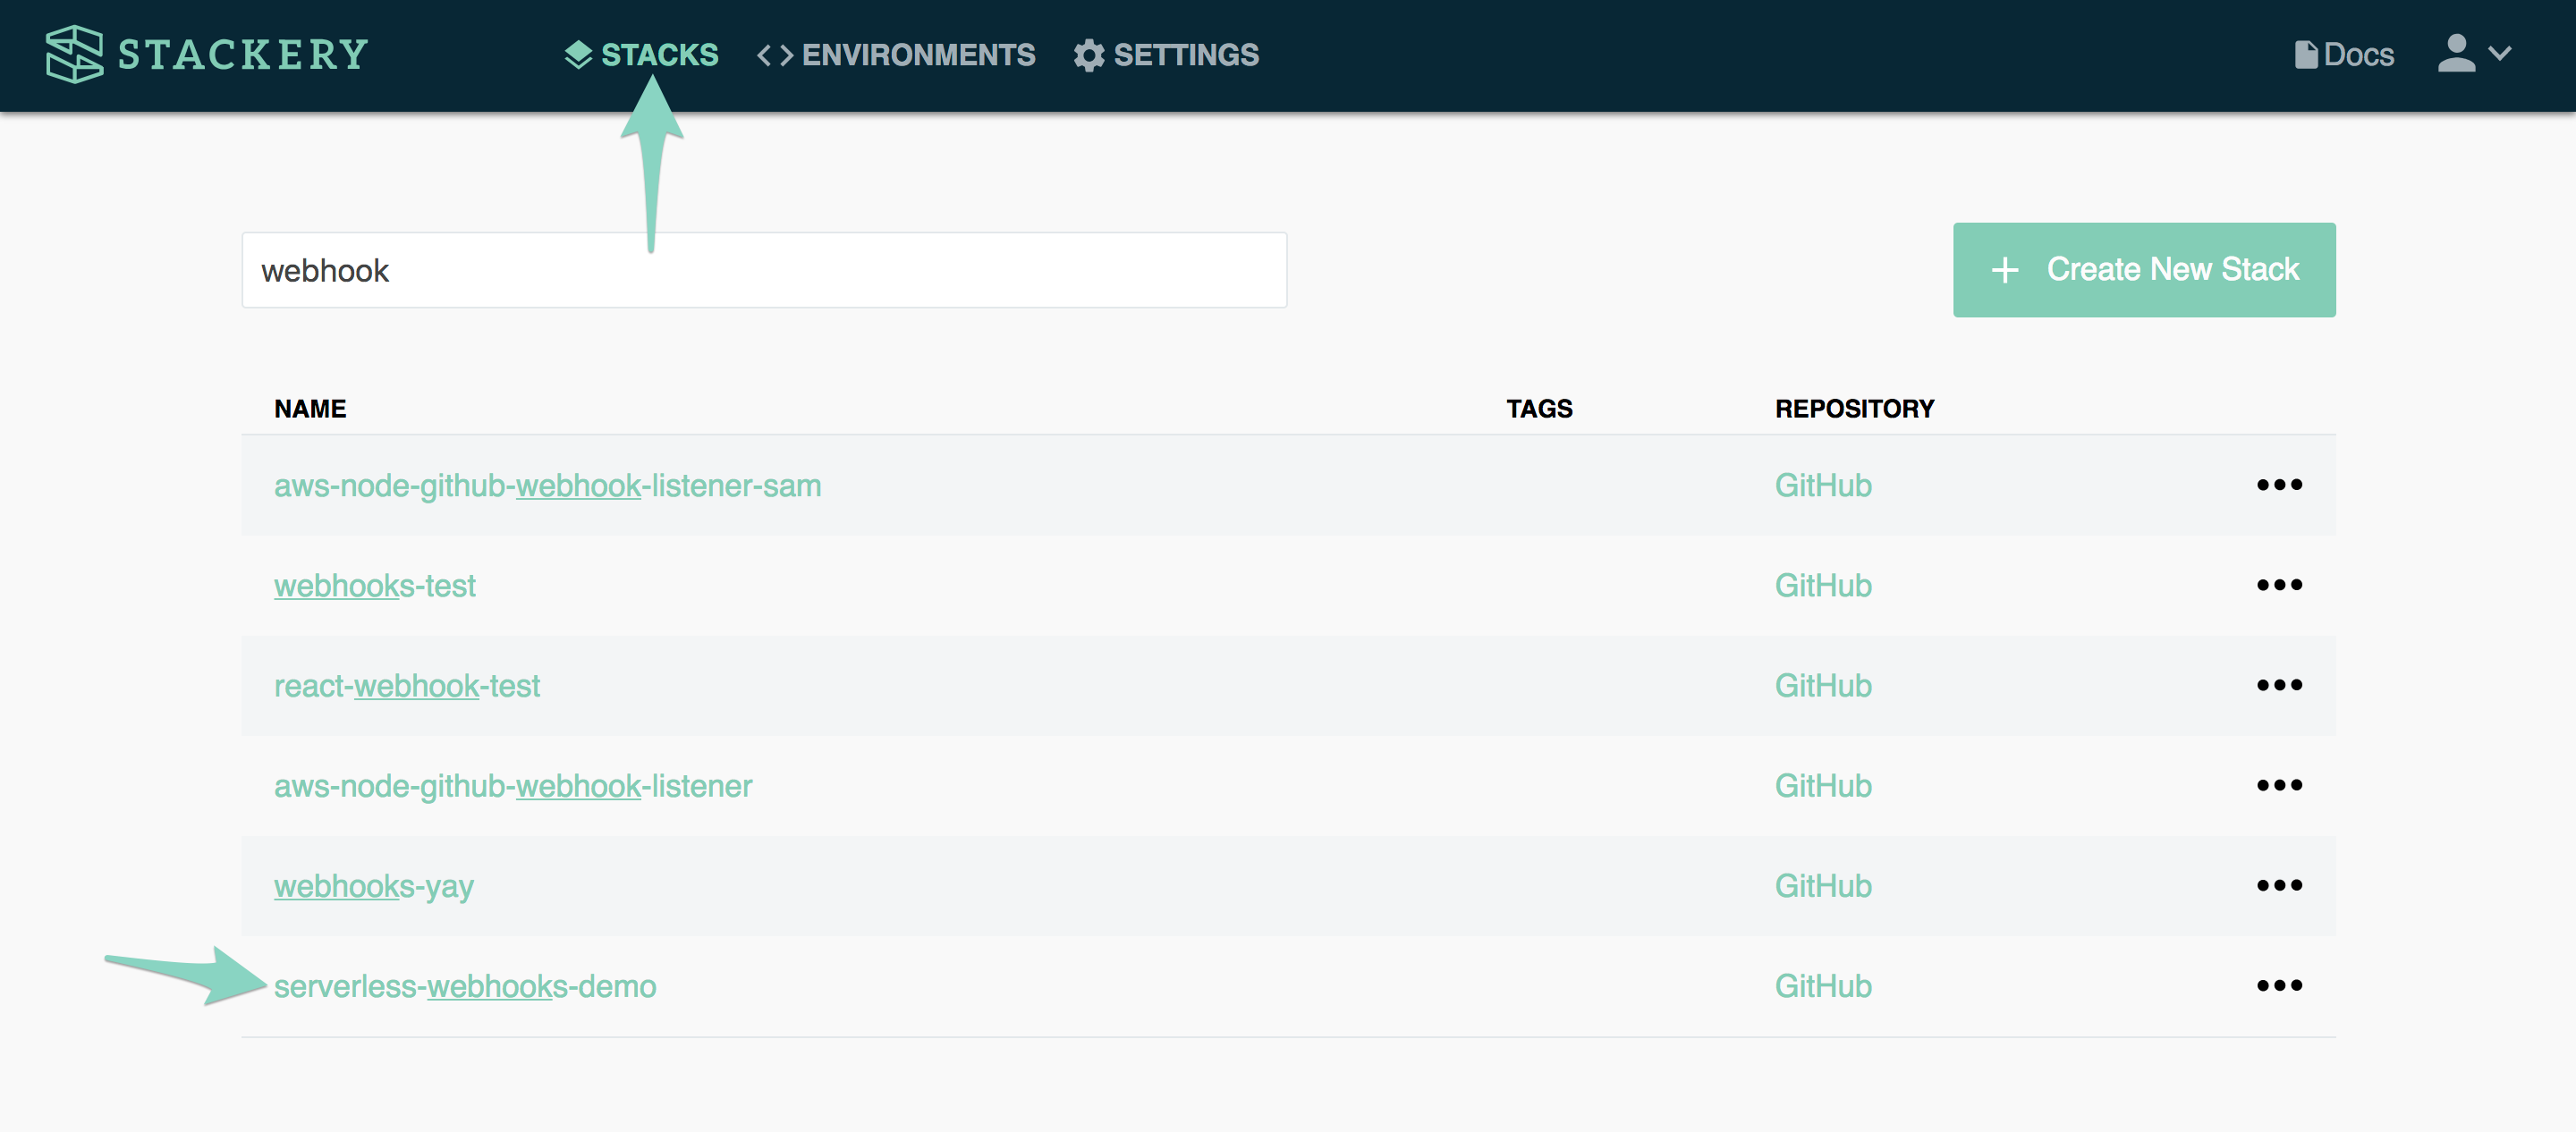
- Navigate back to Stacks and choose
serverless-webhooksfrom your stacks list
- Double-click on the
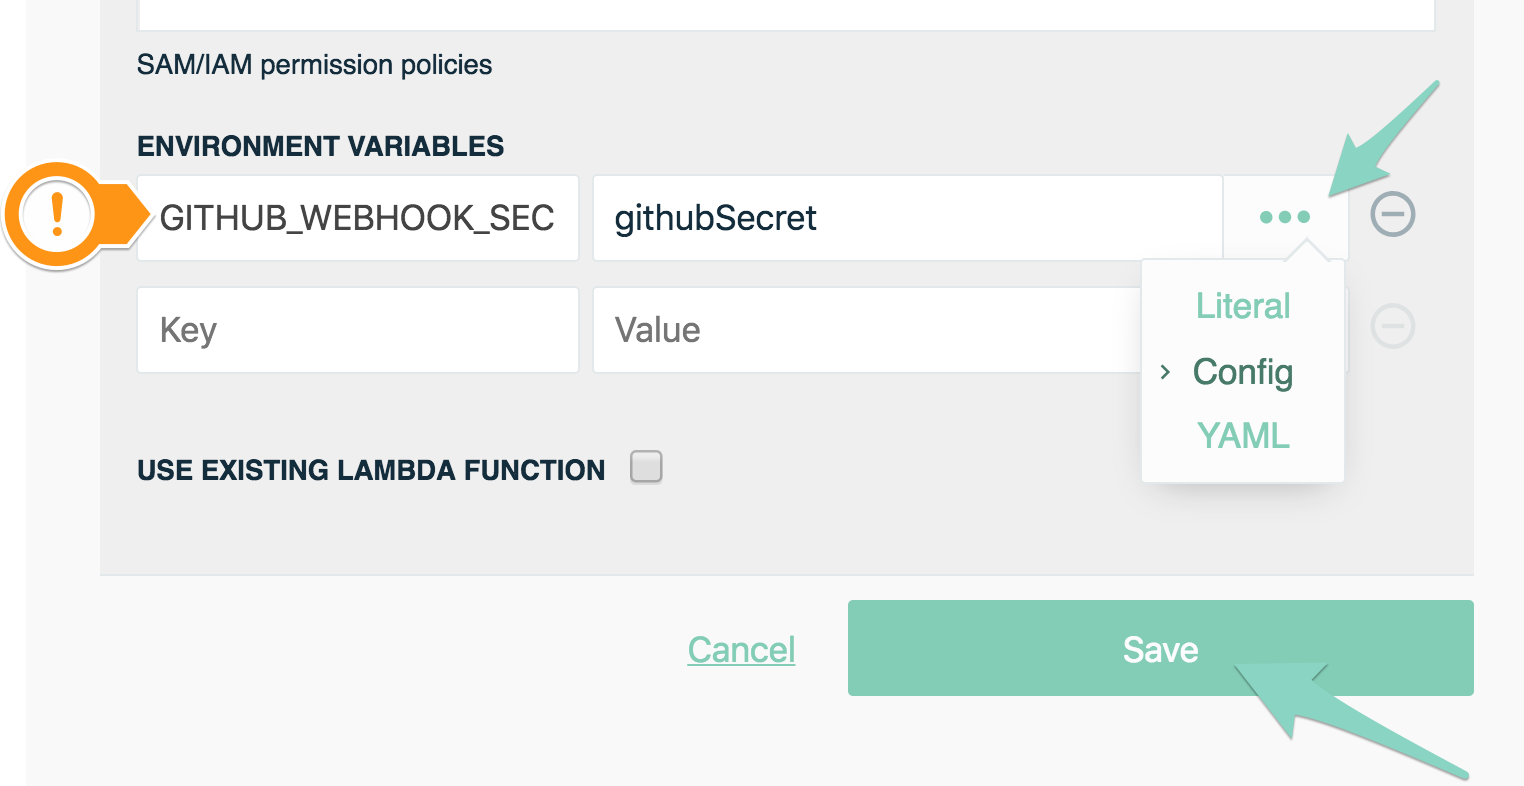
handleWebhookfunction to open the editor panel - At the very bottom, under Environment Variables, click the ellipses, and choose
Config - Enter
GITHUB_WEBHOOK_SECRETas the Key - Enter
githubSecretas the Value (it should auto-populate from your Environments config) - Click Save at the bottom to save your function
- Click Commit... in the left sidebar to commit your changes
Deploy the webhook stack
Now we need to deploy the serverless-webhooks stack in order to get an API endpoint for our GitHub webhook.
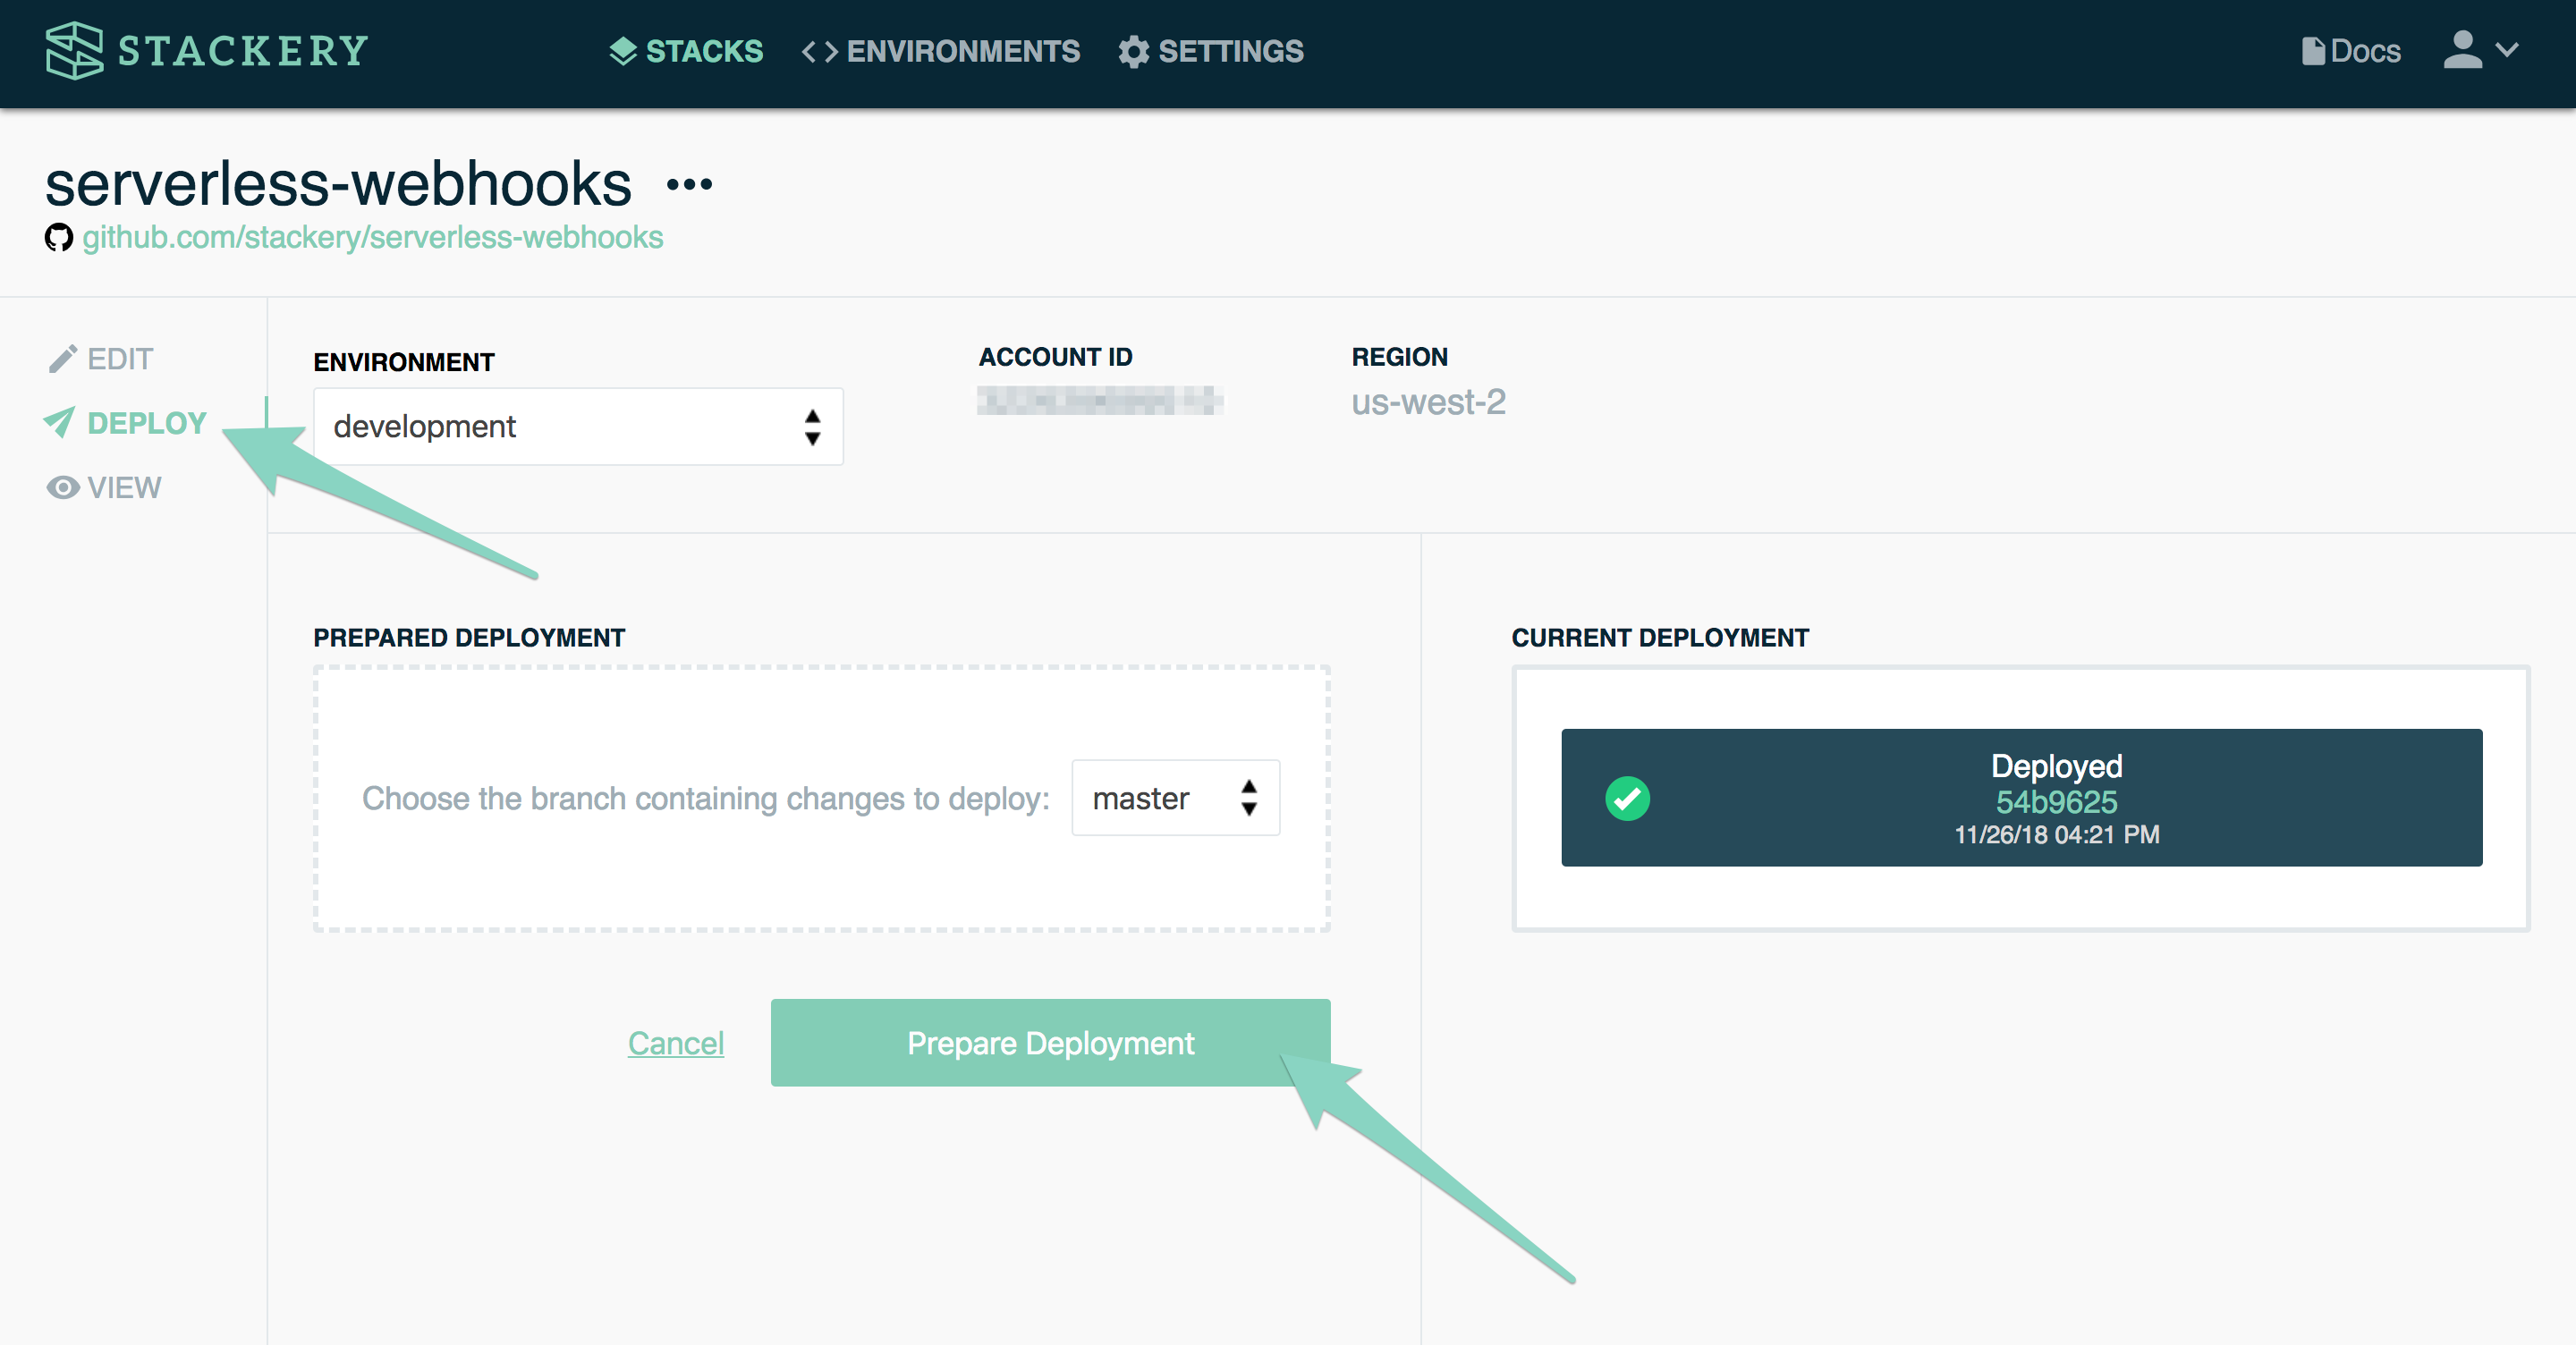
- In the left sidebar, navigate to the Deploy view, and click Prepare new deployment
- Choose your master branch, and click Prepare Deployment. This will take about a minute
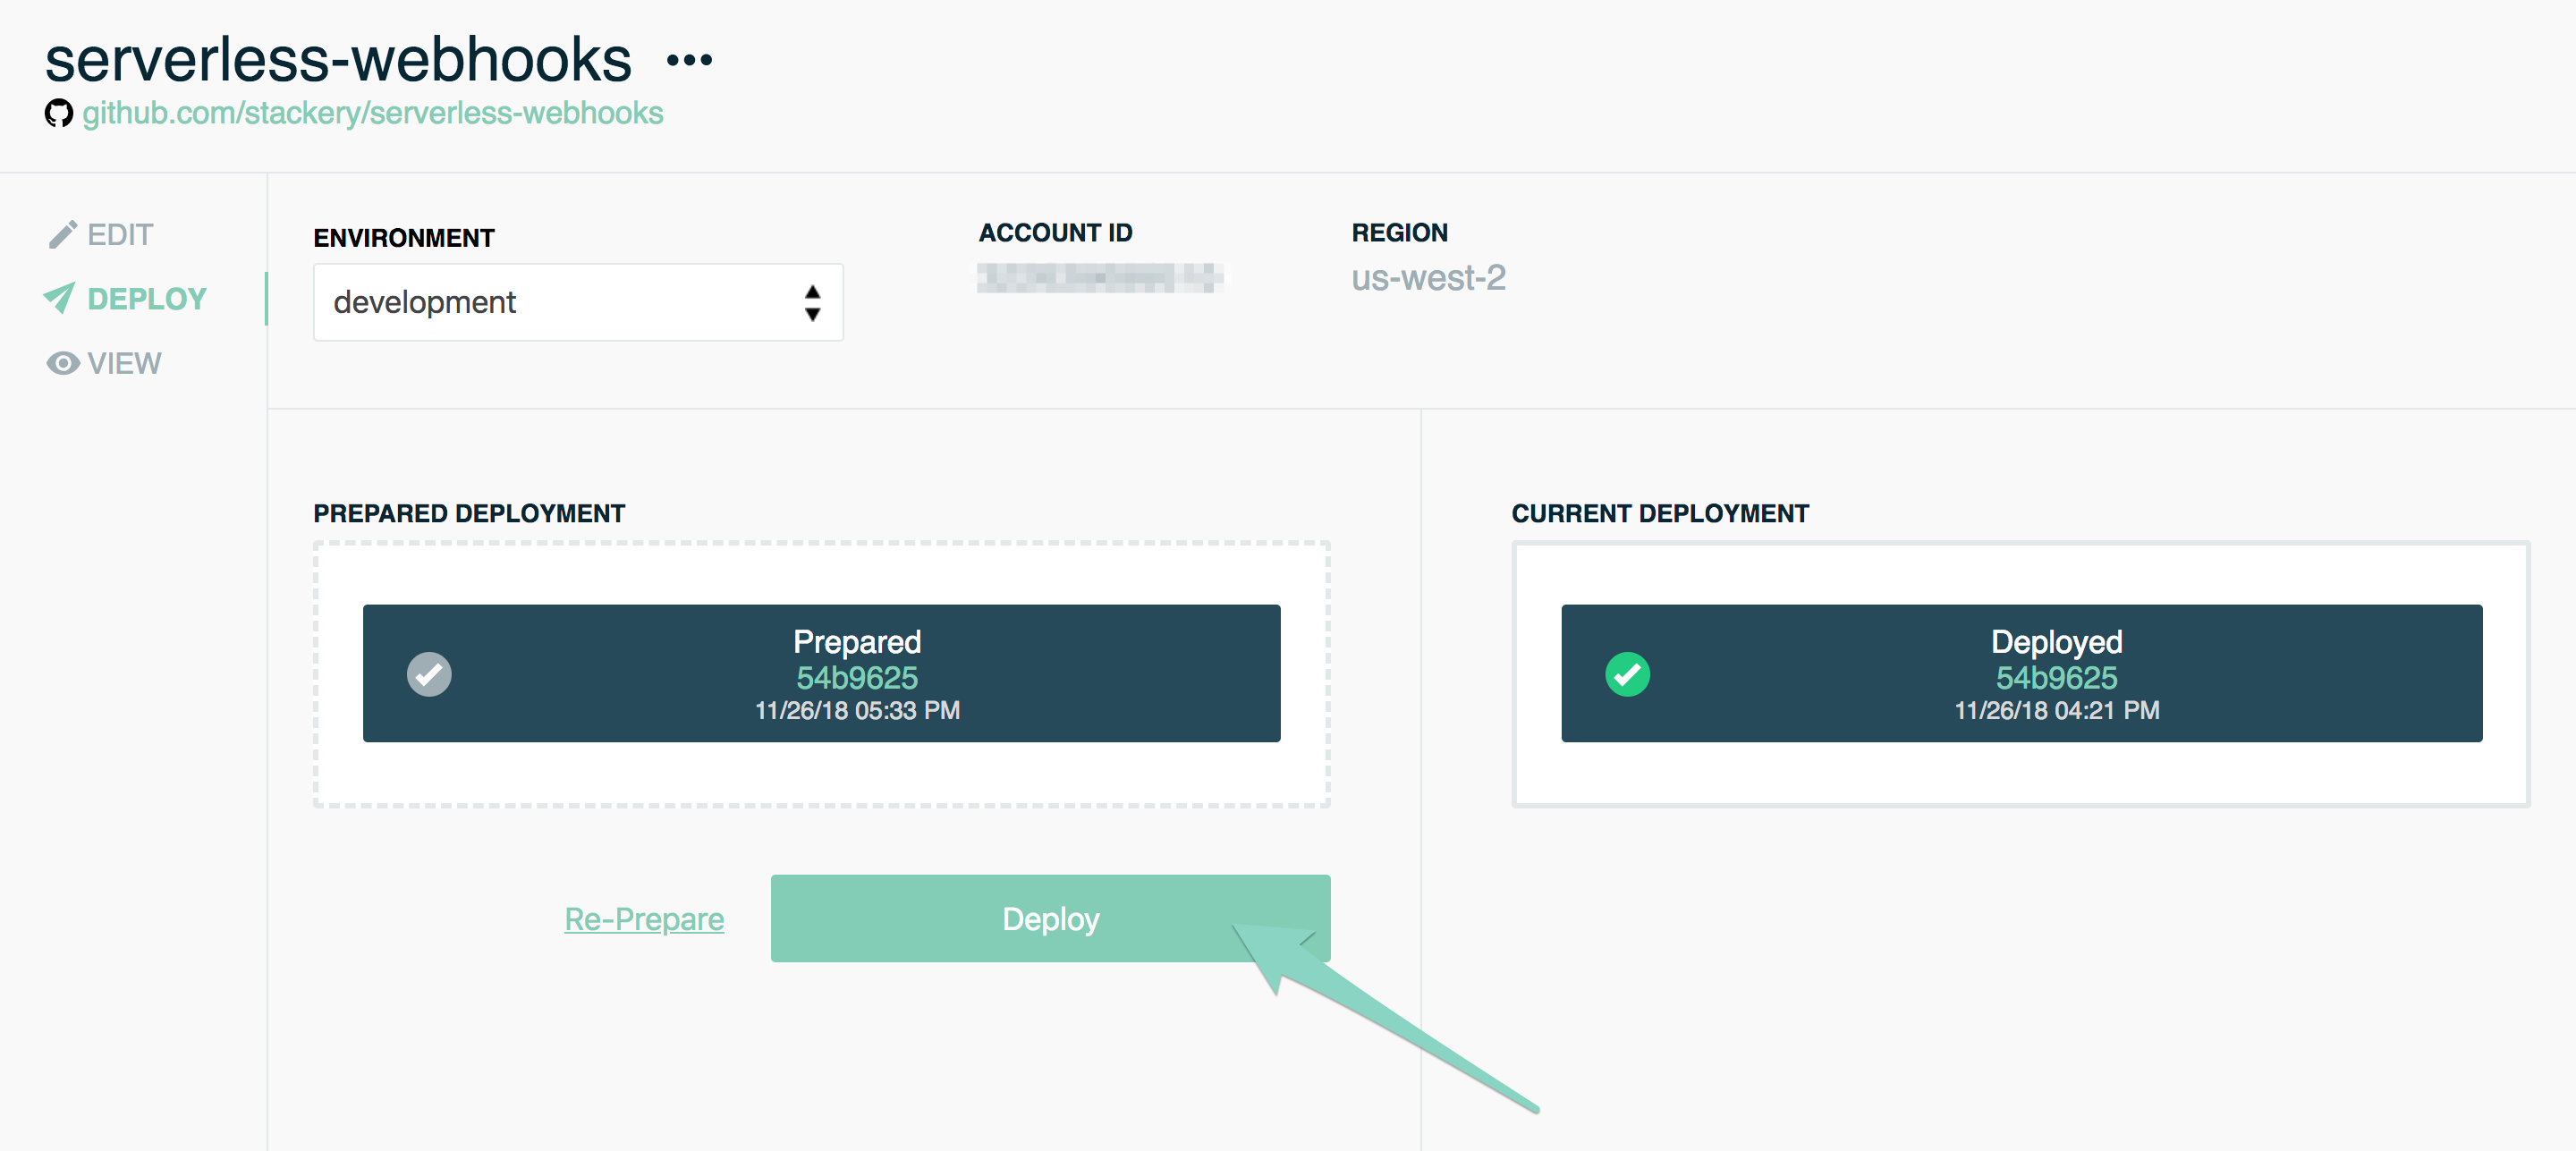
- Once the deployment is prepared, click Deploy. This will take you to the AWS Console
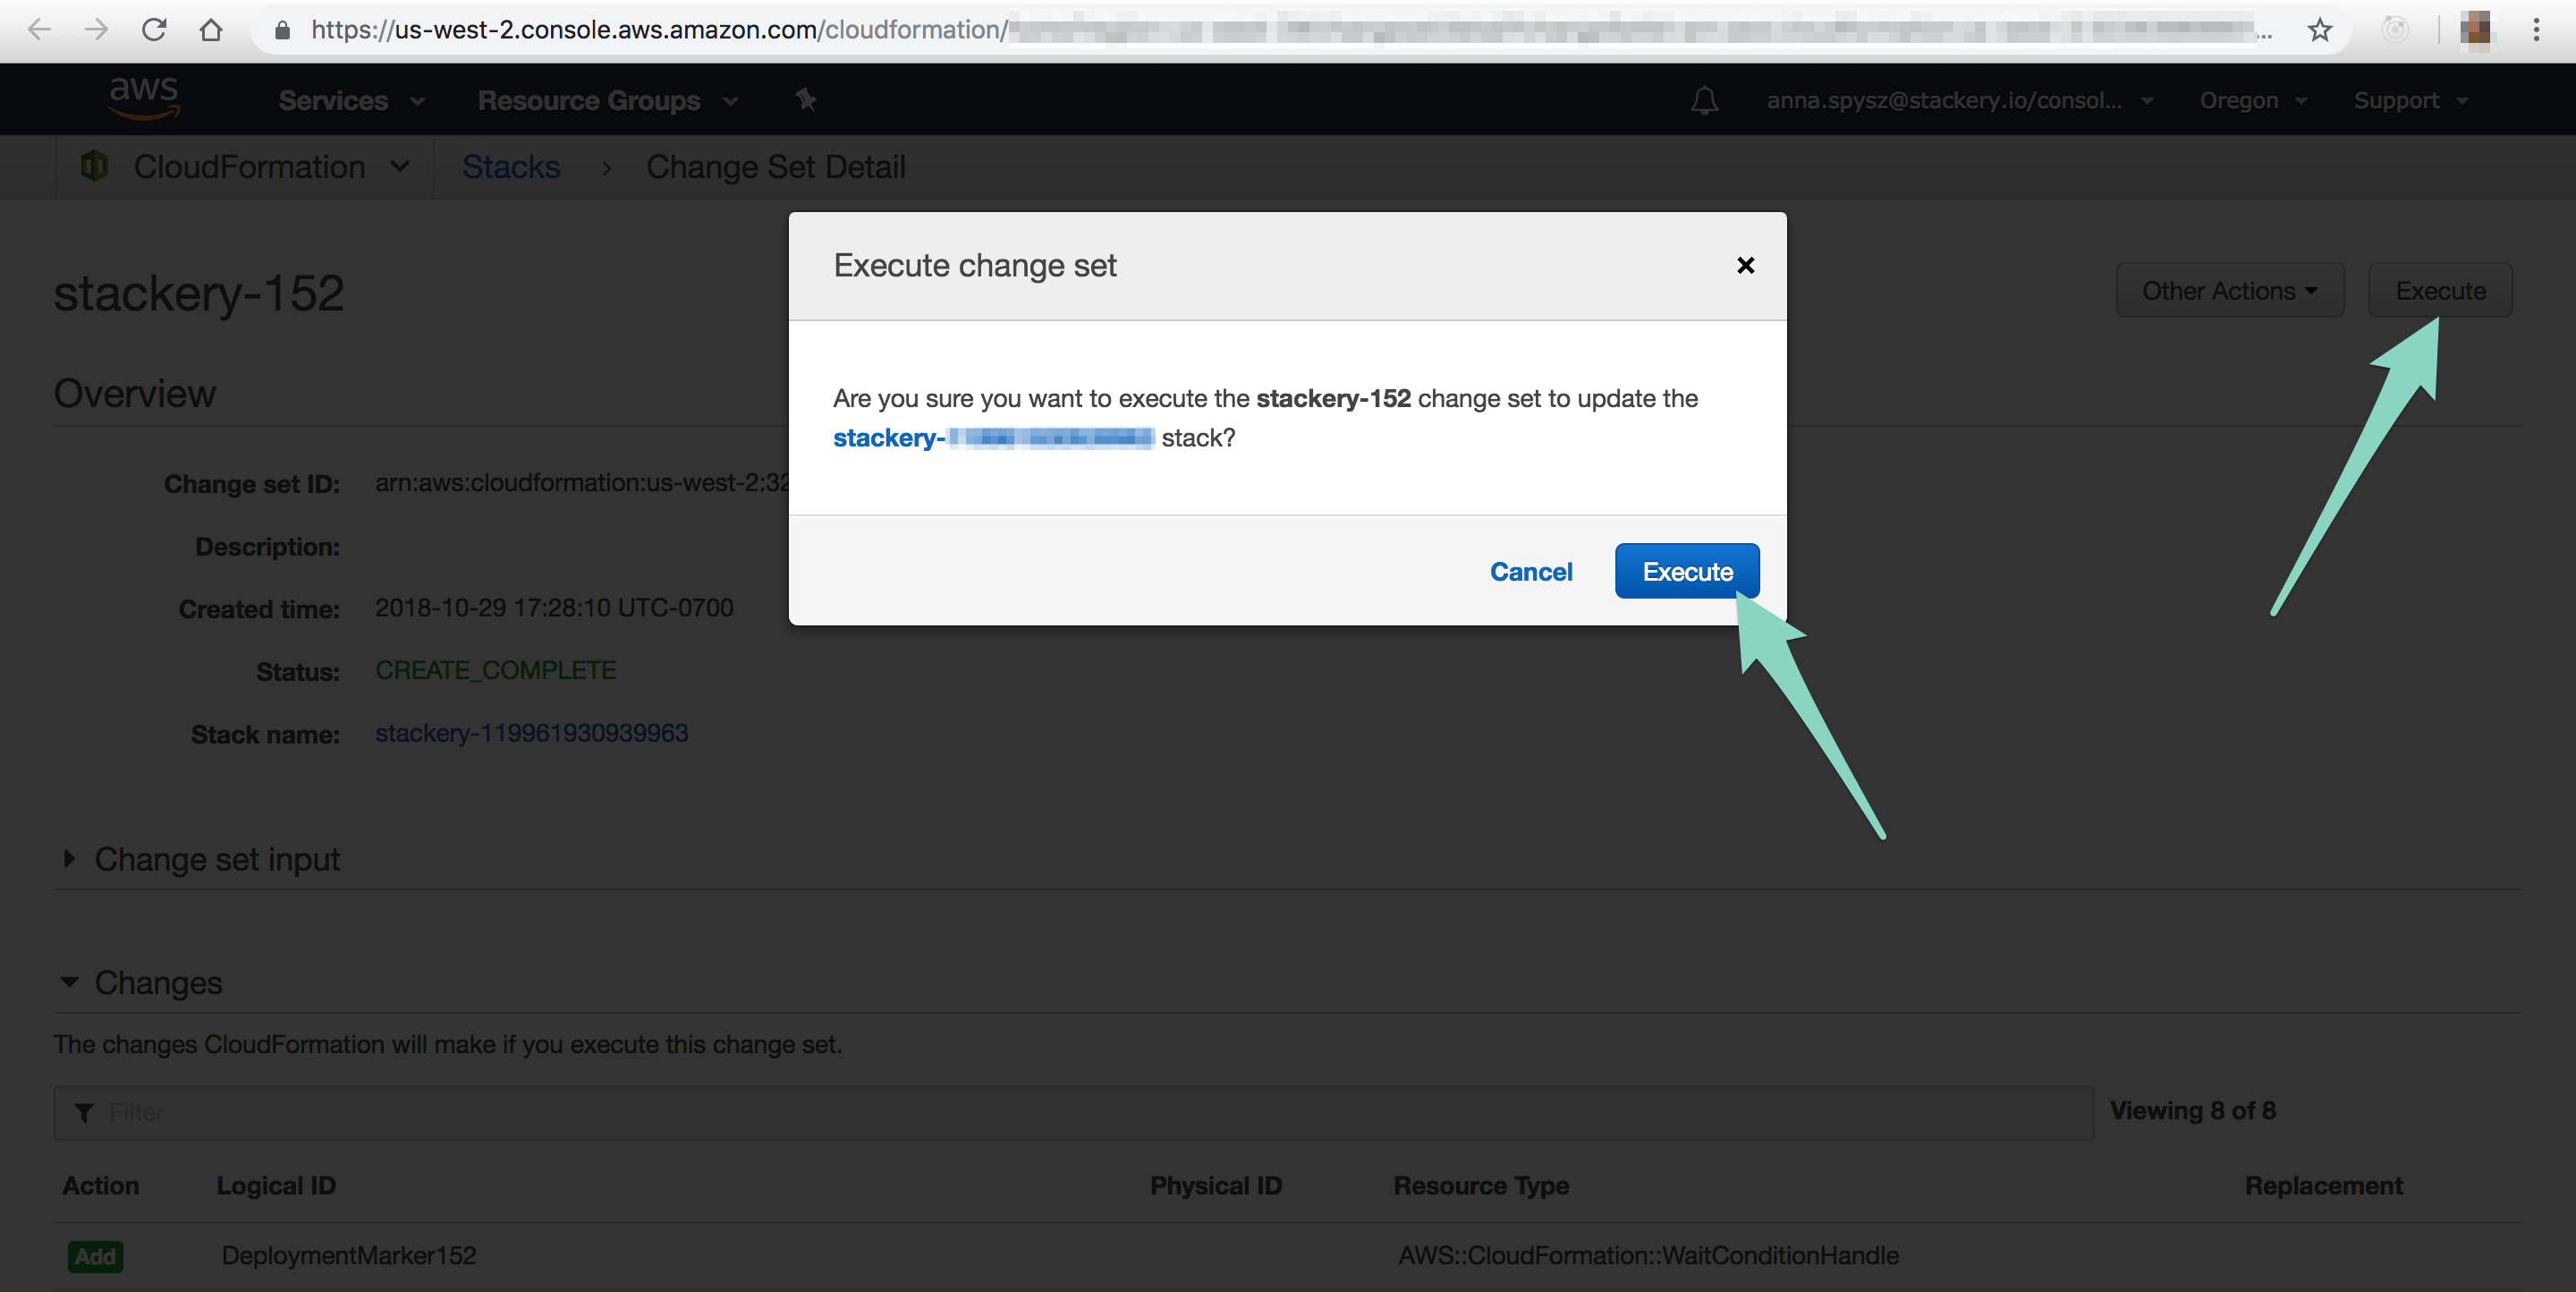
- In the AWS Console, click Execute in the top right, and again in the modal. Deploying your stack will take a few minutes. (You can close the AWS Console once the deployment process has started)
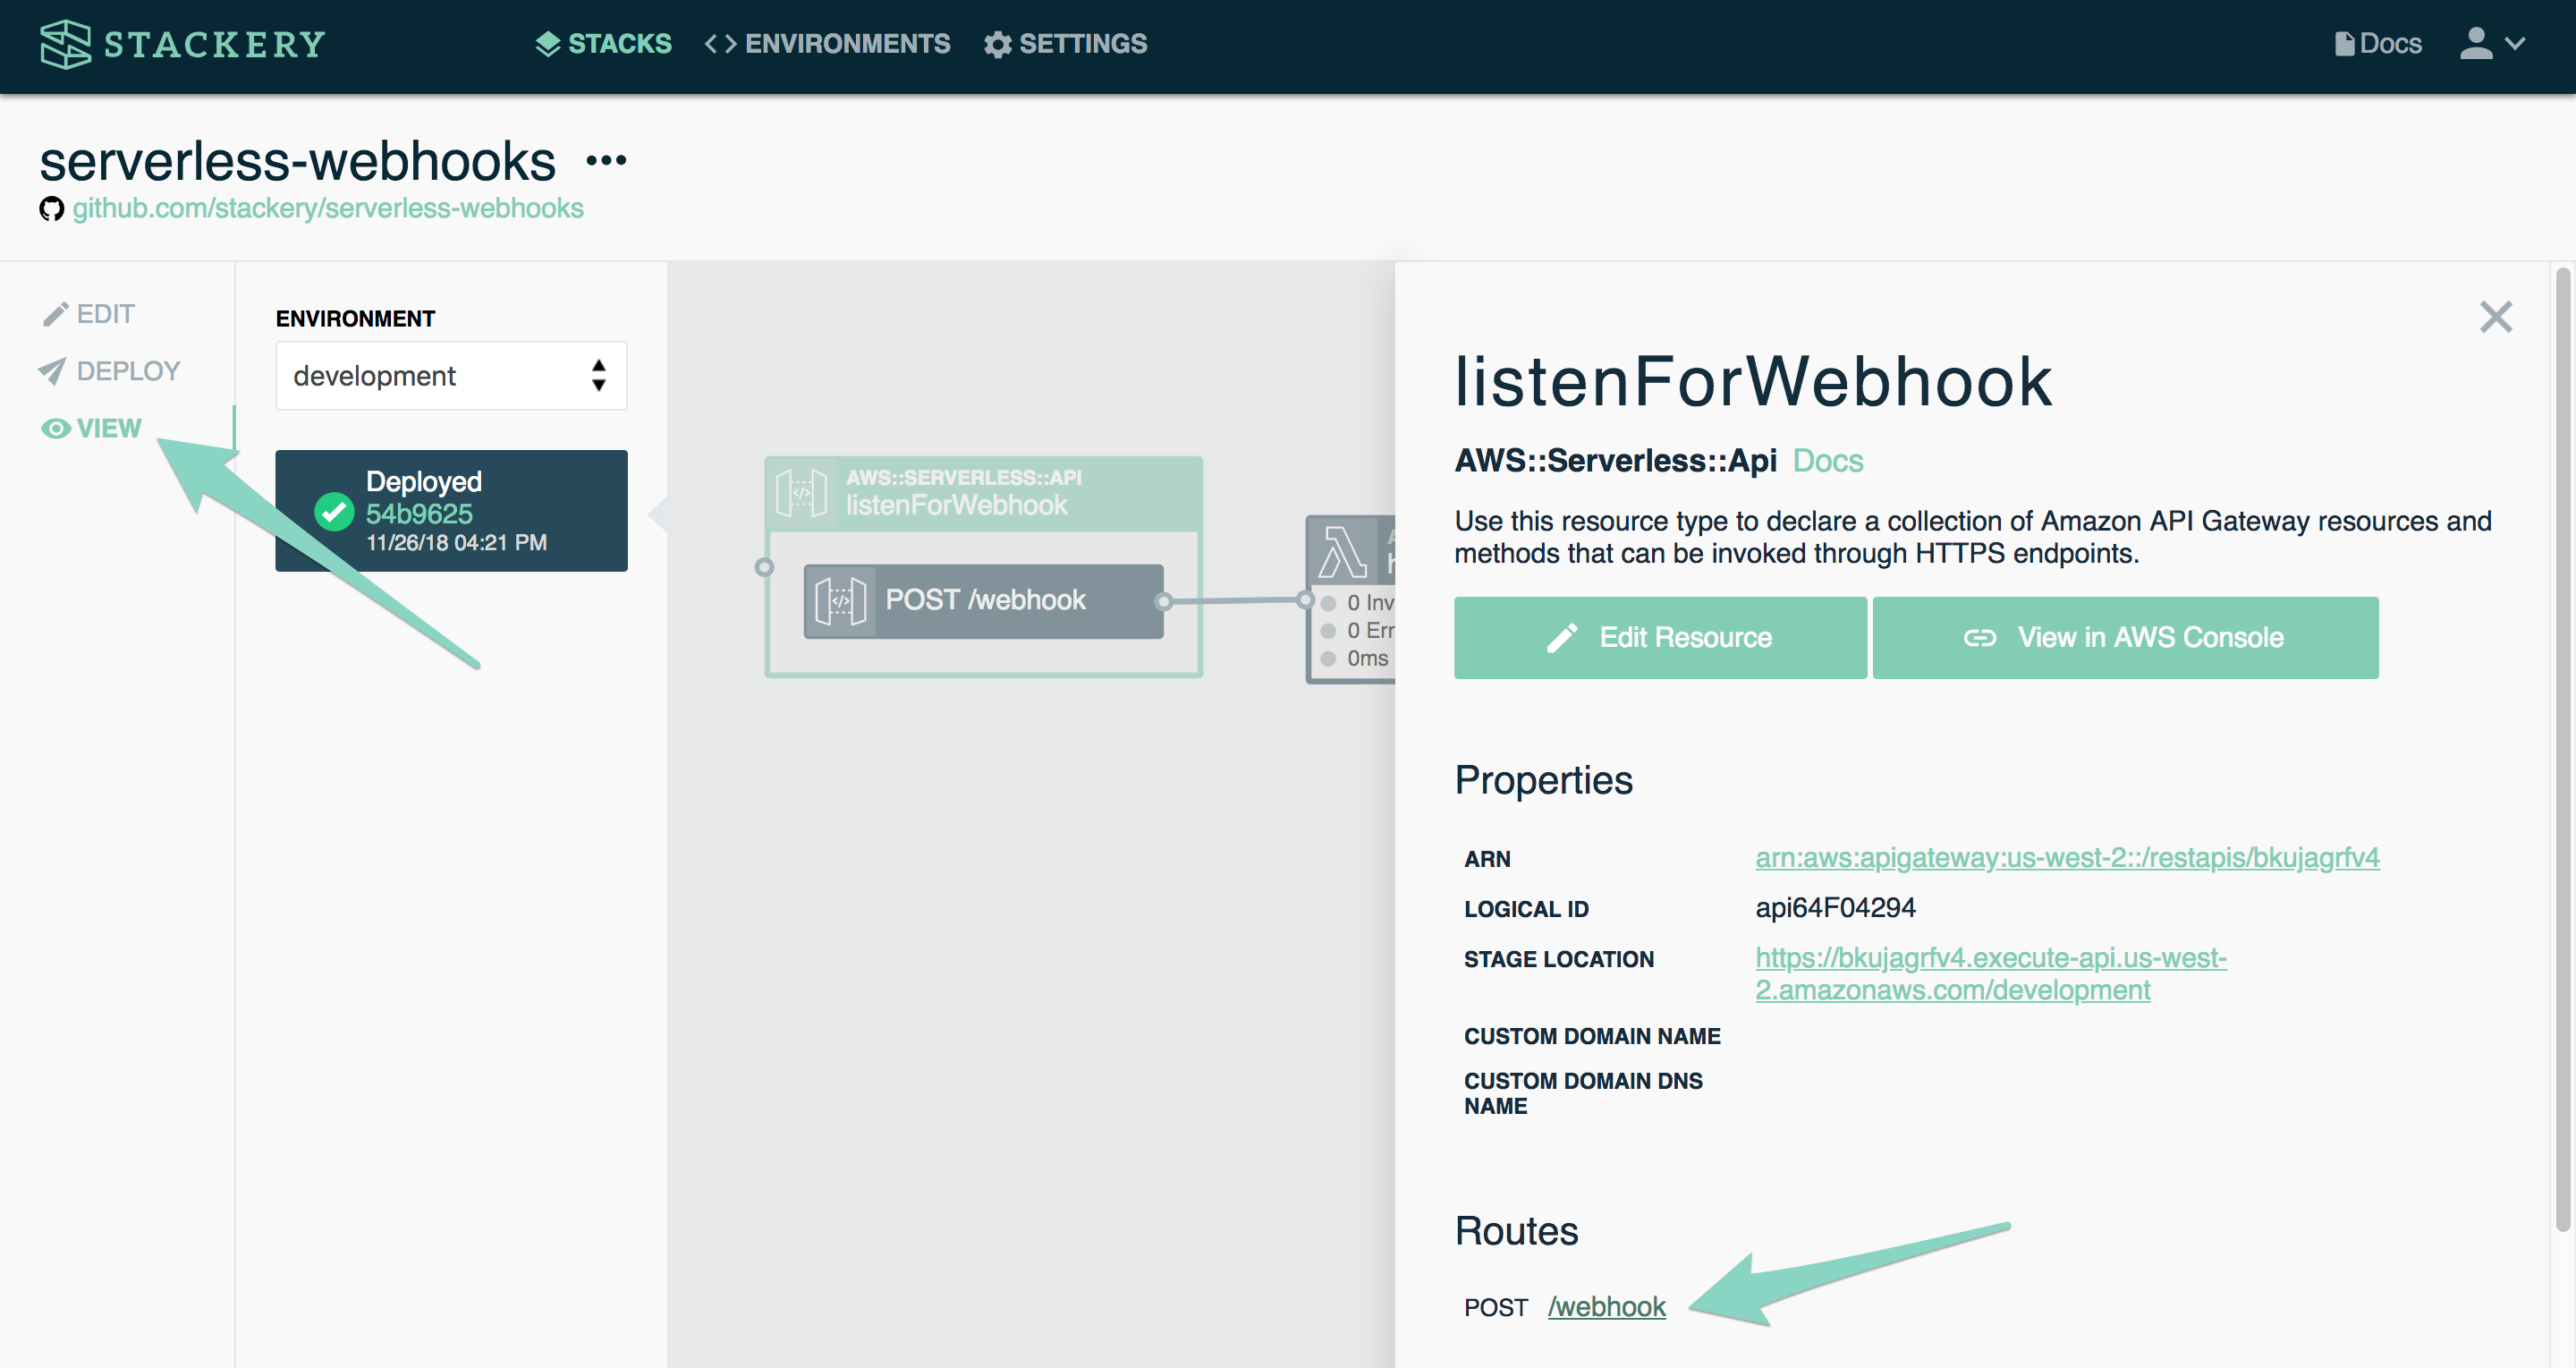
- Back in the Stackery Dashboard, you will see a notification when your deployment is ready. Click the View tab to see your deployed stack
- Double-click on the API resource. This will open its Deployment Properties panel
- Copy the route under Routes - POST
/webhook. It should look something likehttps://1234abcde.execute-api.us-west-2.amazonaws.com/development/webhook. Keep this link handy for the next step
UP NEXT: Configuring our webhooks in the GitHub console.
4. Set Up GitHub Webhooks
Add the GitHub webhook
In this step, we are going to set up a GitHub webhook on a specific repository.
- In your browser, open the GitHub page for an existing repository - typically
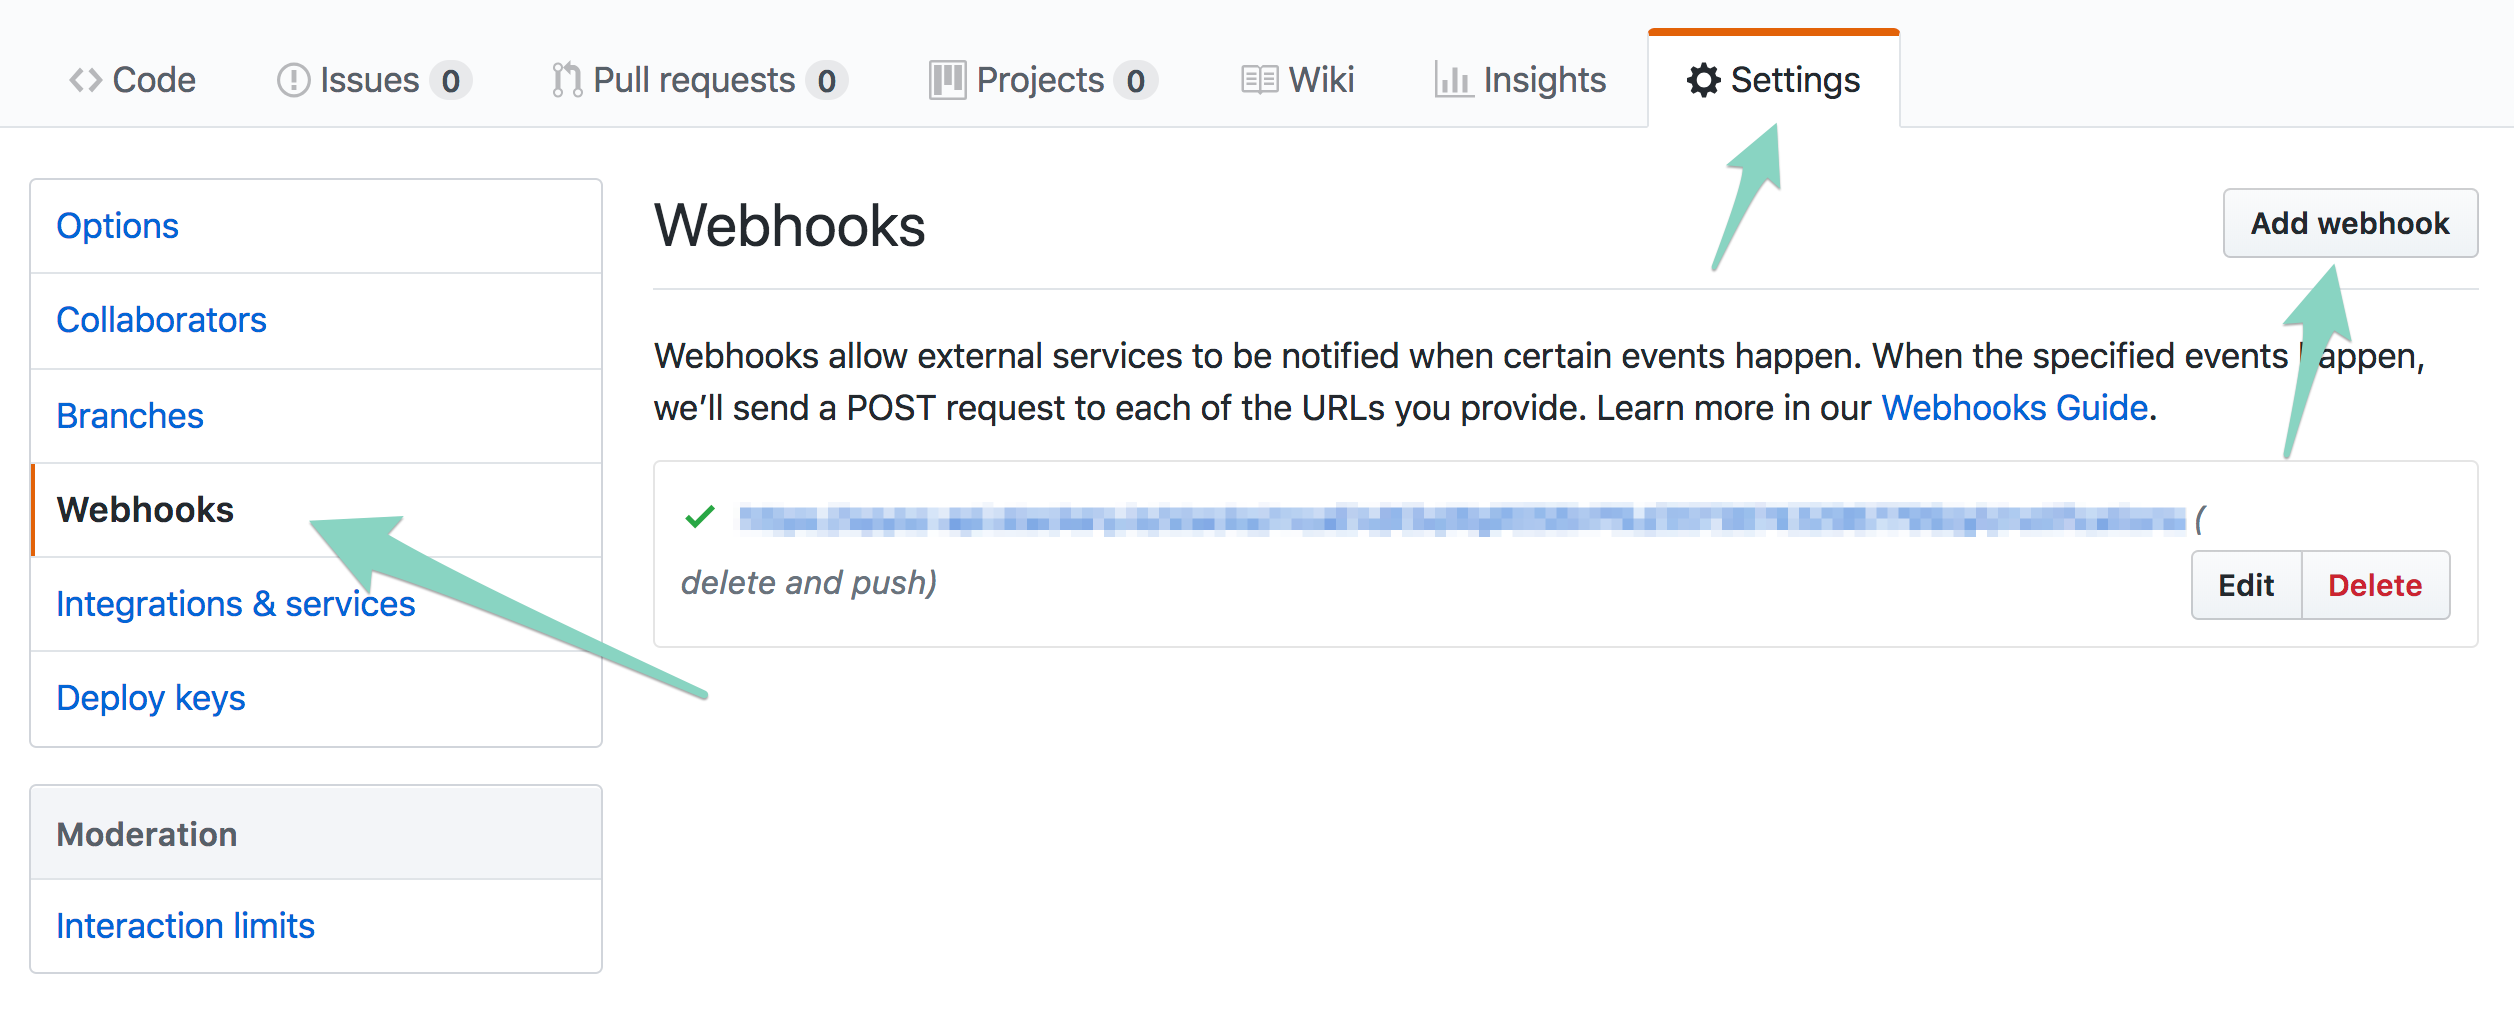
https://github.com/<your-username>/<your-app>/tree/master - Click Settings in the repo navigation
- Choose Webhooks from the side navigation
- Click the Add webhook button (you may be prompted to enter your password)
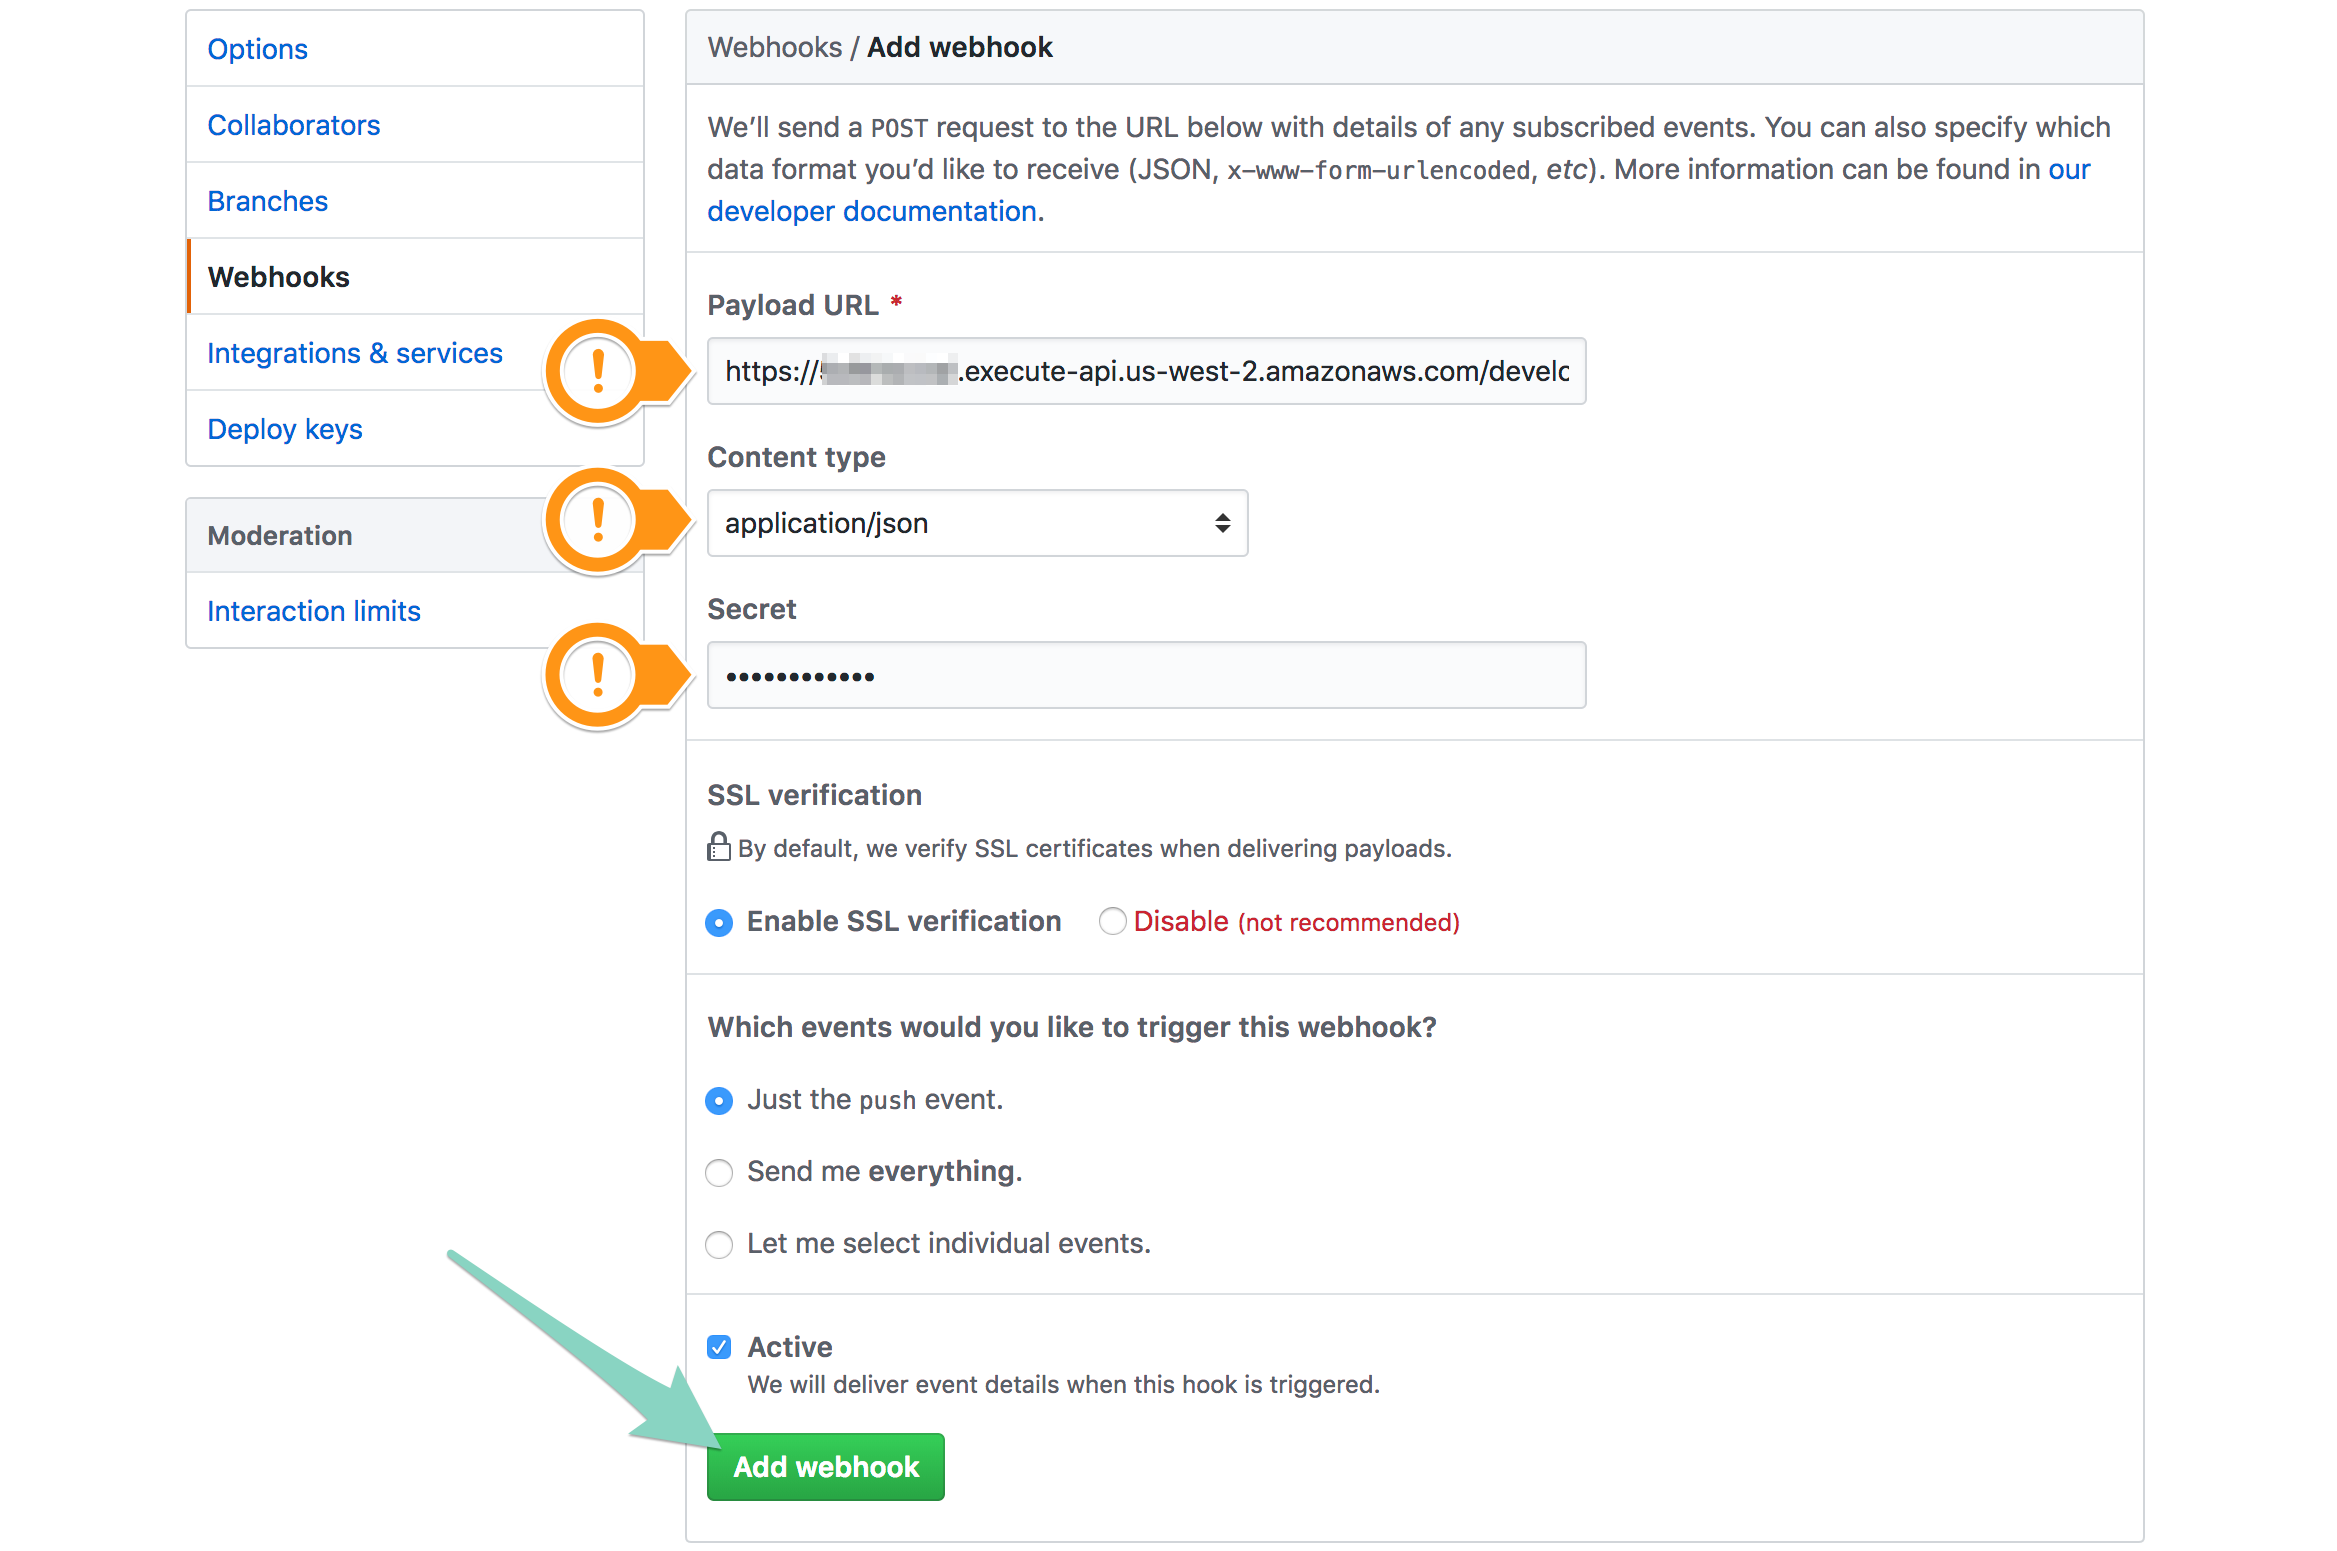
- Paste the API URL from the previous step in Payload URL
- Choose
application/jsonfor Content type - Enter your
githubSecretenvironment variable from earlier into the Secret field - Keep SSL verification enabled
- Select "Send me everything" - we want to know everything that's going on in this repo (you can also select individual events if you already have a use case in mind)
- Click Add webhook to save your settings
Test your webhook
When you initially save your webhook, GitHub will send a test ping. You can now check if your function received it to see if it was set up correctly. Return to the Stackery Dashboard - you should still be in the Deployments view. If all went well, you will see that your function was invoked:

(If you see an error instead, check the Troubleshooting section)
- Double-click the
handleWebhookfunction resource - In the Deployment Properties panel, you will see a Metrics & Logs section at the bottom
- Click on the Logs link
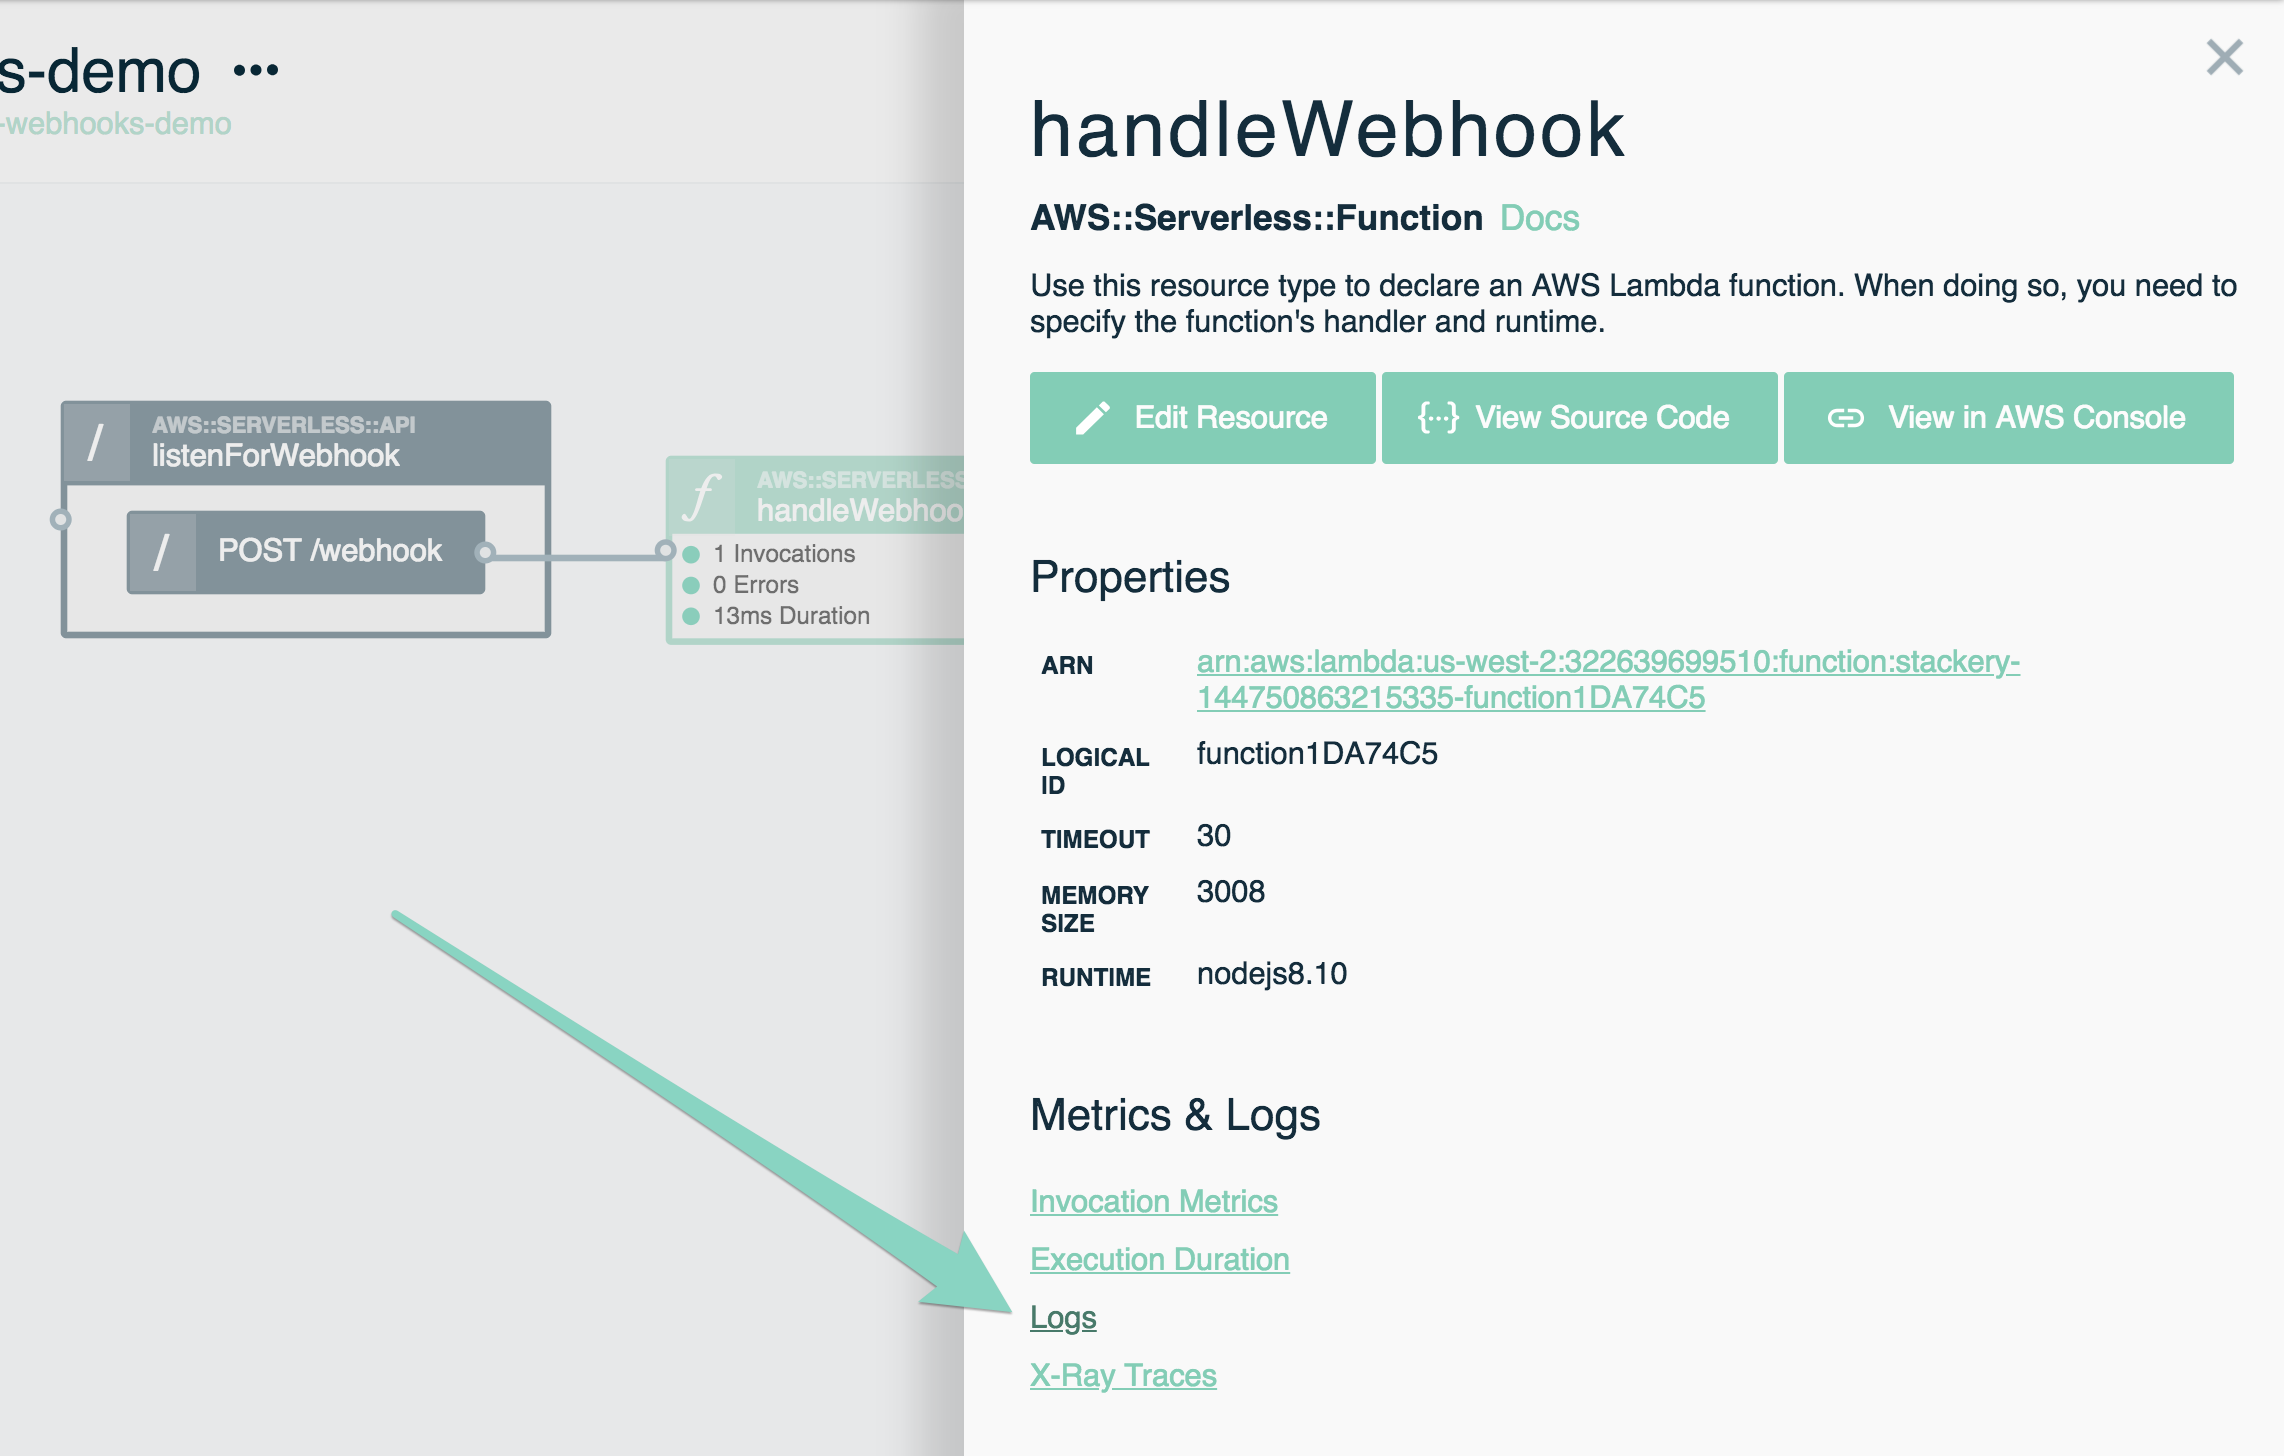
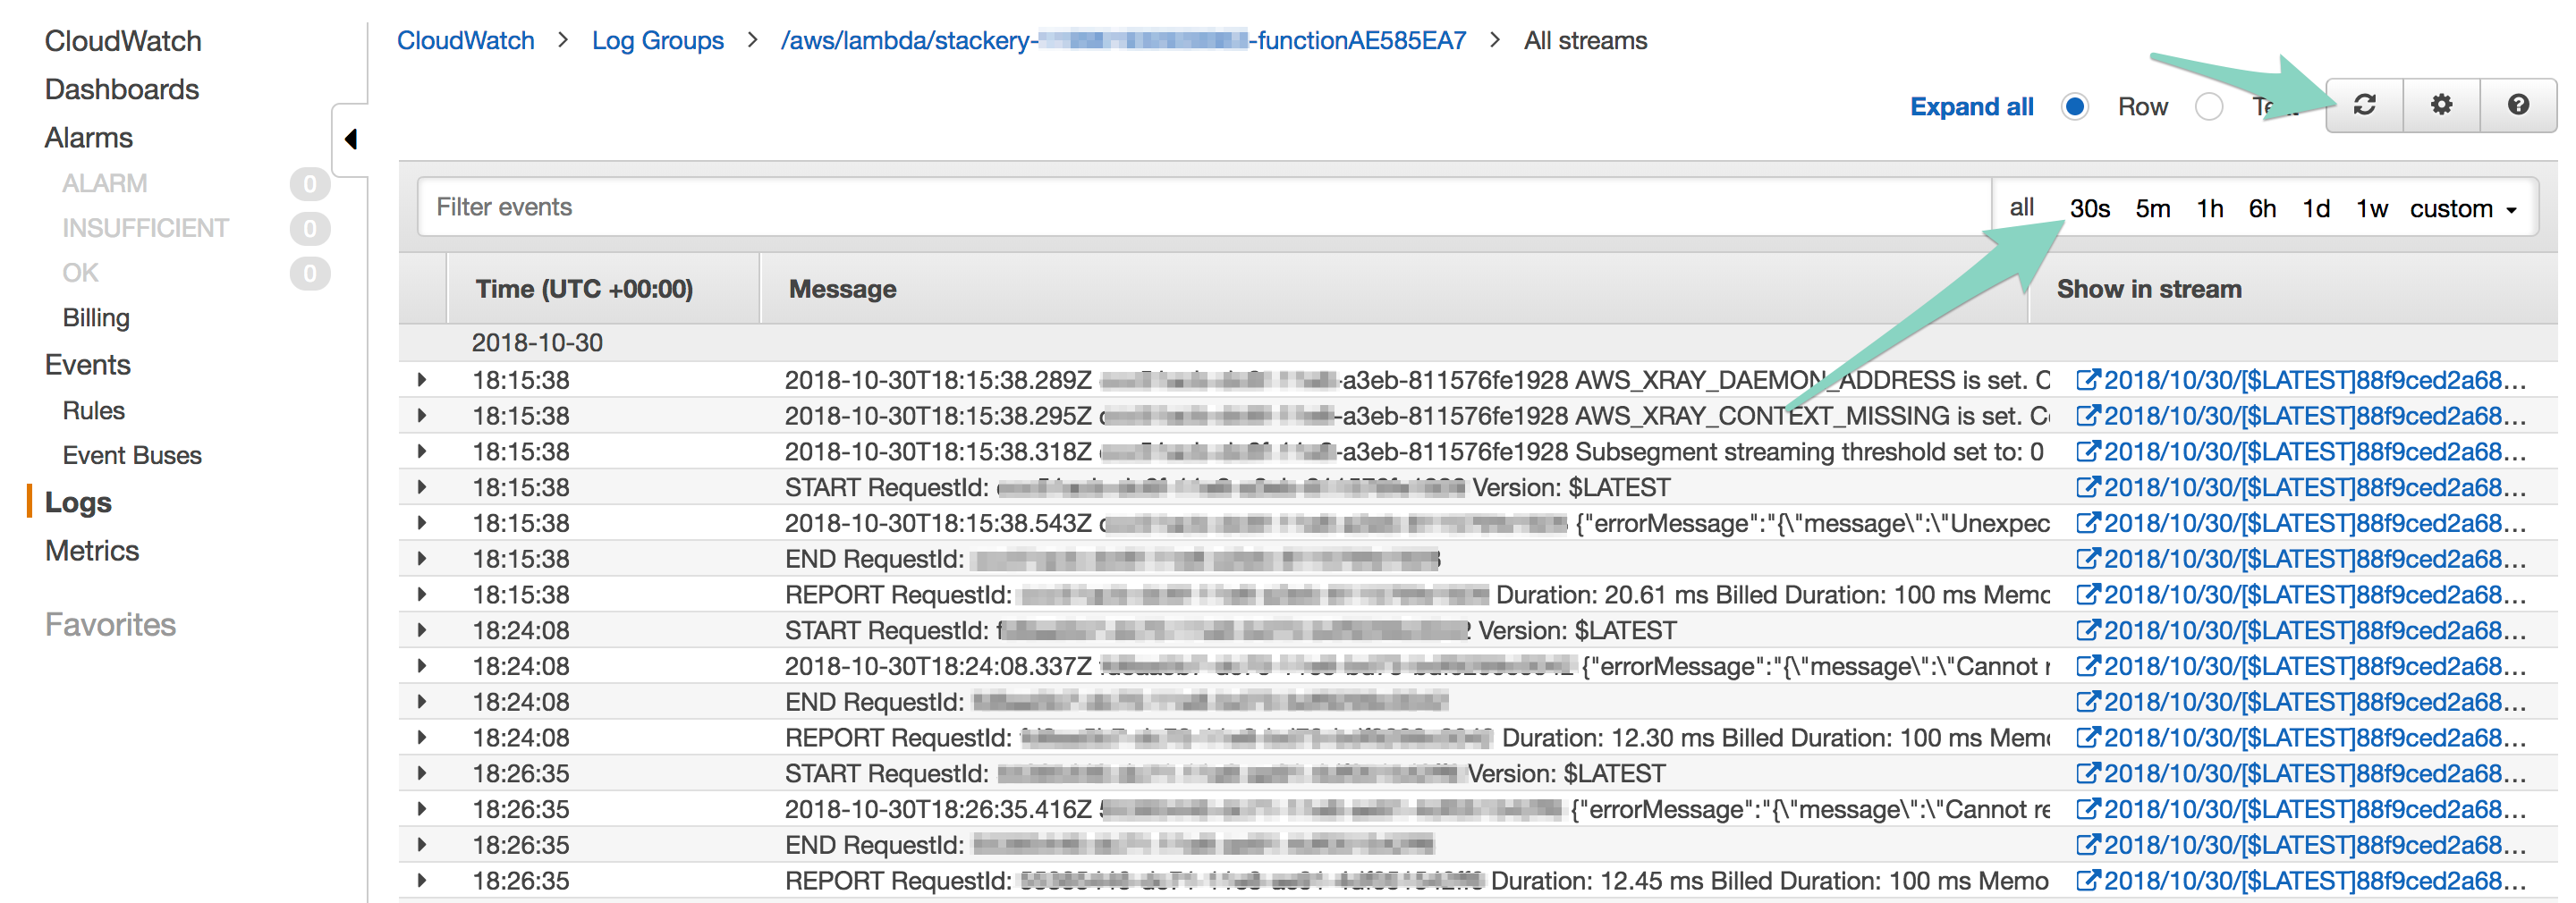
- You will be taken to the AWS CloudWatch logs. While they may seem overwhelming at first, you can narrow down the scope by just viewing the logs from the last 30s. If that's blank, try hitting the 'refresh' button a few times, or increasing the time to 5m
- You should be able to find your GitHub event. It will look something like this:
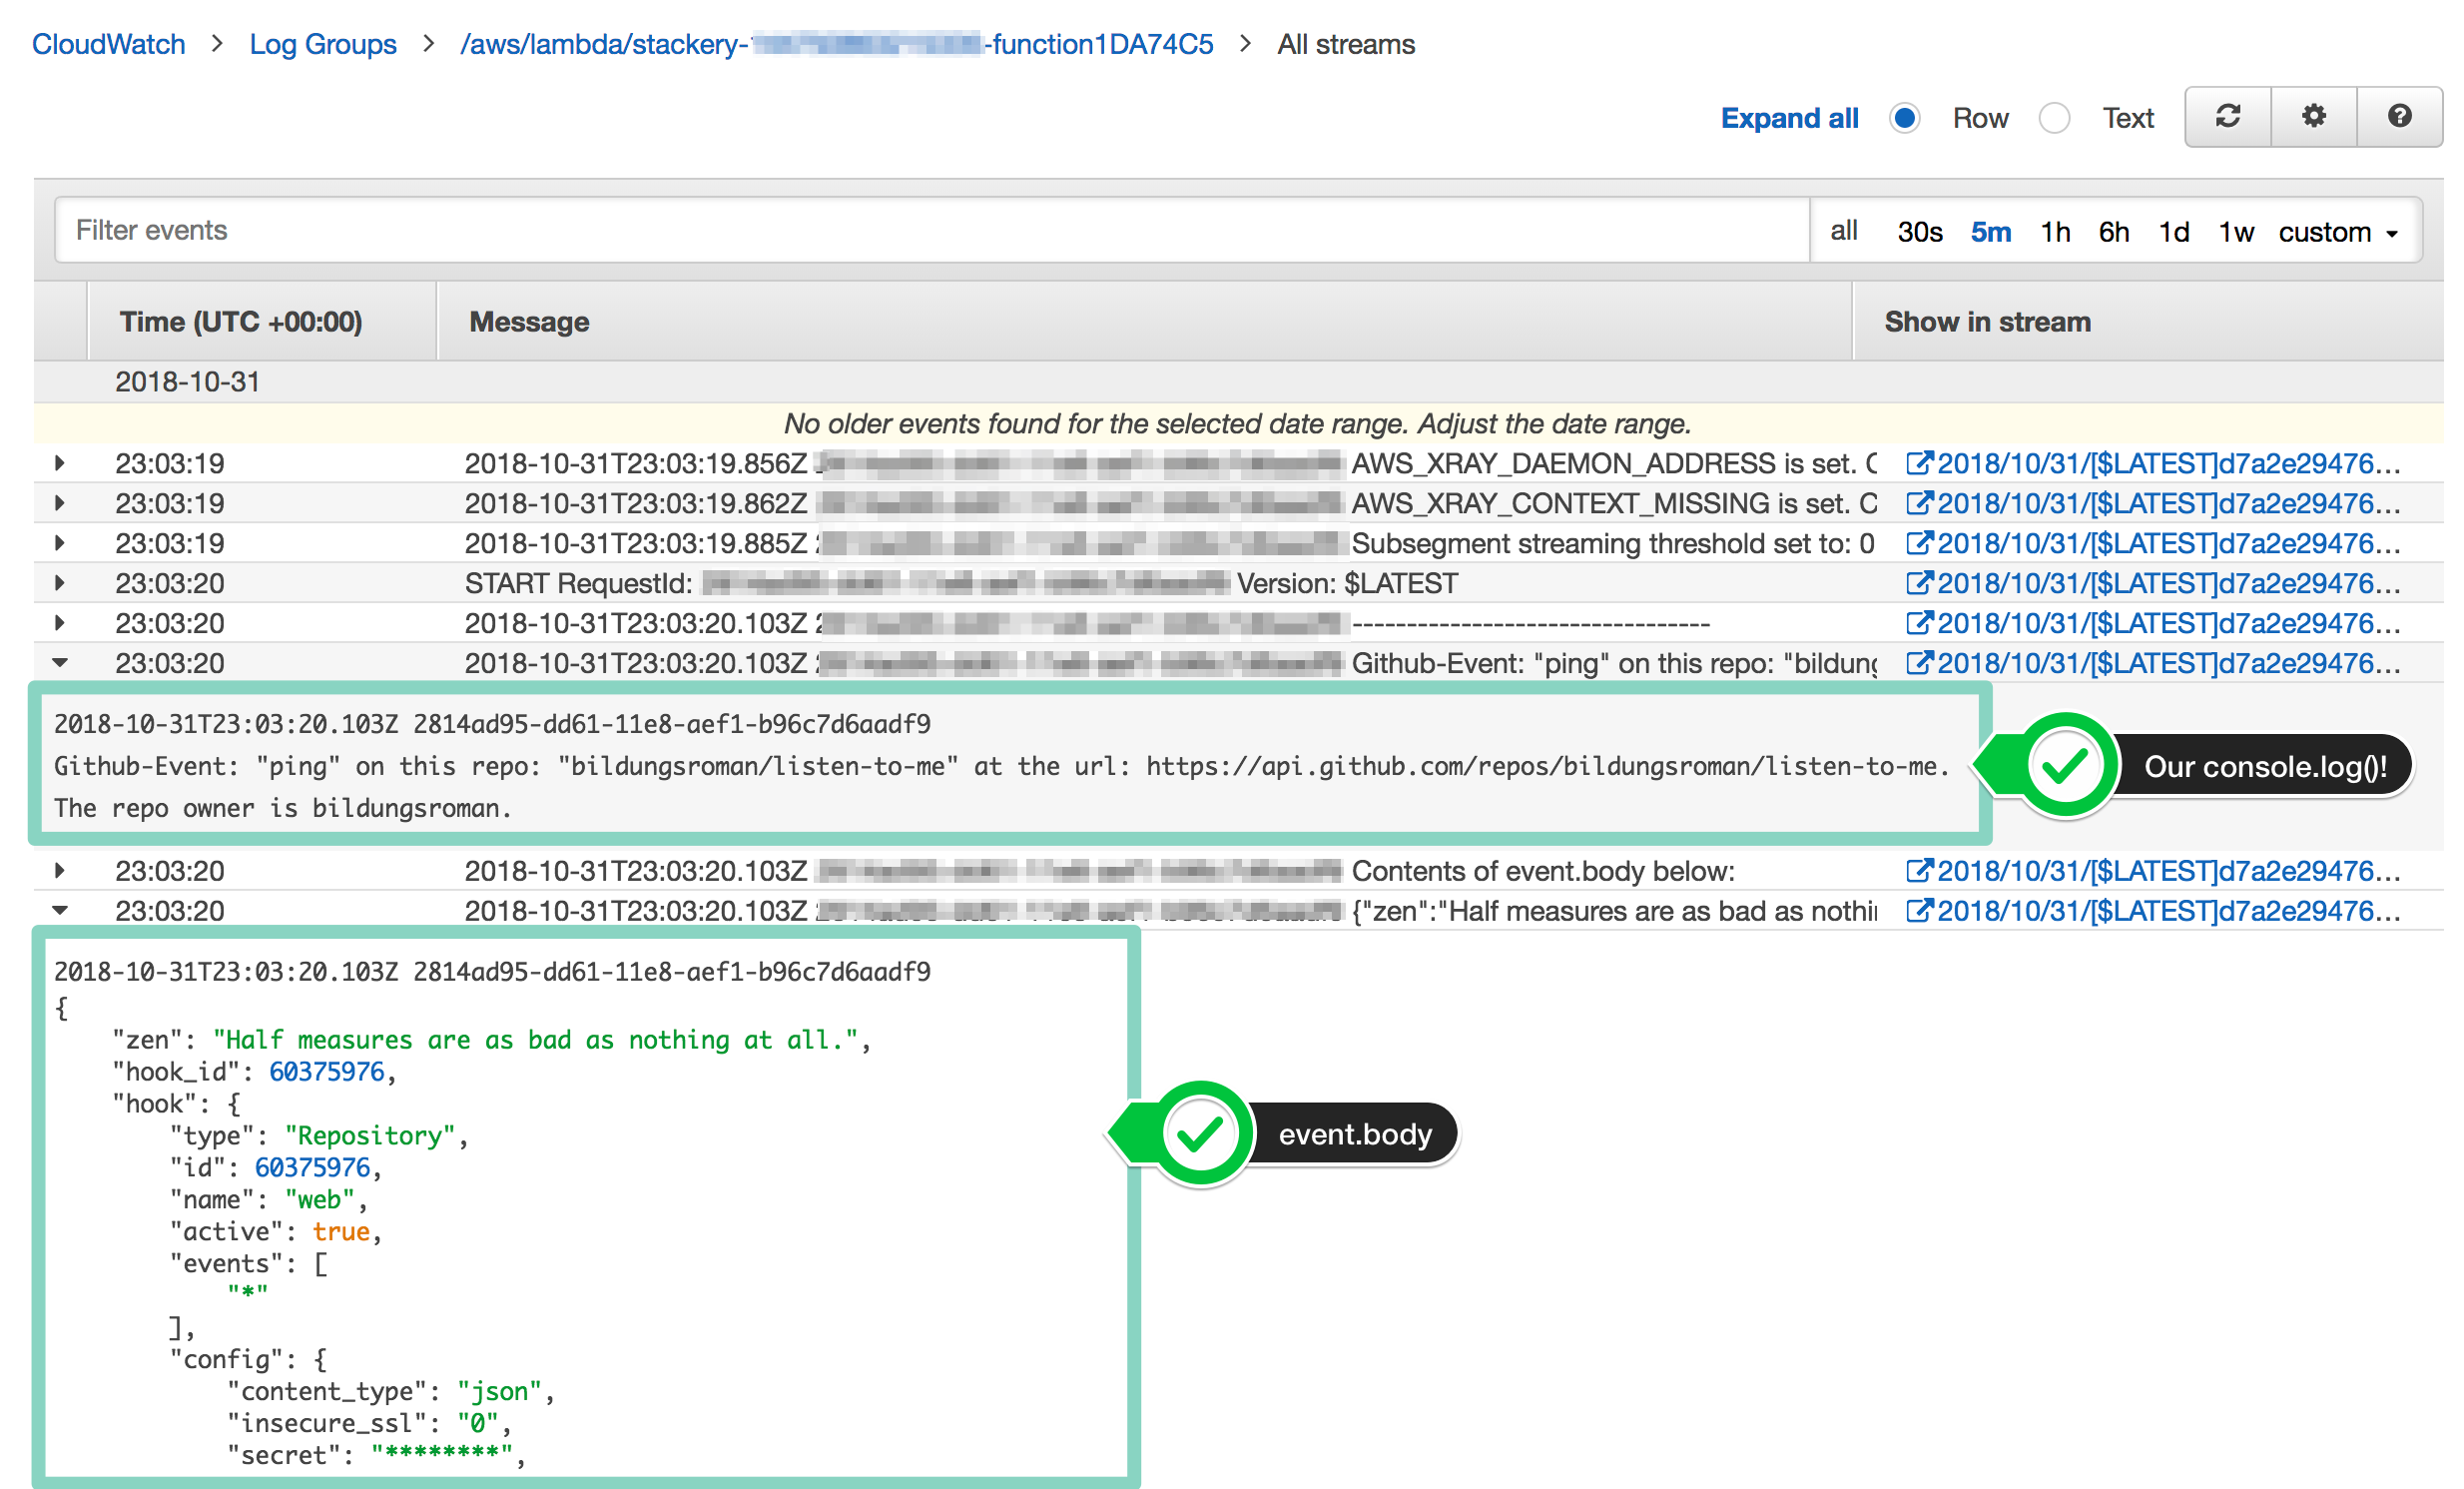
- Click the arrows to expand events. You should see your message, with your GitHub username and git URL!
Success! You've got a working GitHub webhook!
Expanding on this Tutorial
You now have a serverless stack that can listen to GitHub events - but that's just the start.
Here are some ways of expanding on your serverless-webhooks application:
- Add another POST route to your API and connect it to your function to listen to events from multiple repositories
- Add logic to your
handleWebhookfunction that sends Slack messages every time your repository is updated (using environment variables to store your Slack API keys). See these instructions in the Slack docs to get started or follow along with our serverless release gong tutorial in the blog to build a serverless app that 'gongs' your Slack channel every time a new version is released - Add a function that deploys another stack when the
masterbranch of that repository is updated - Set up interaction between GitHub and other APIs, such as Jira
There's a lot more you can do with Stackery, so keep building!
Troubleshooting
Common errors you may come across when following along with this tutorial.
502 response in GitHub when pinging
Unfortunately, error messages in the GitHub console tend to be vague. If you see a 502 response such as the following, you will only see the message "Internal server error", which is not very descriptive.

To debug, it's best to go to the CloudWatch console, which can help us narrow down our problem.
In Stackery, find and follow your function's Logs link as you did in step 5 of this tutorial. You can filter out just the error messages by typing errorMessage in the Filter events searchbar in CloudWatch. The last event will be the latest. If you click the little arrow on the side, you can see the complete error message, which will look something like this:
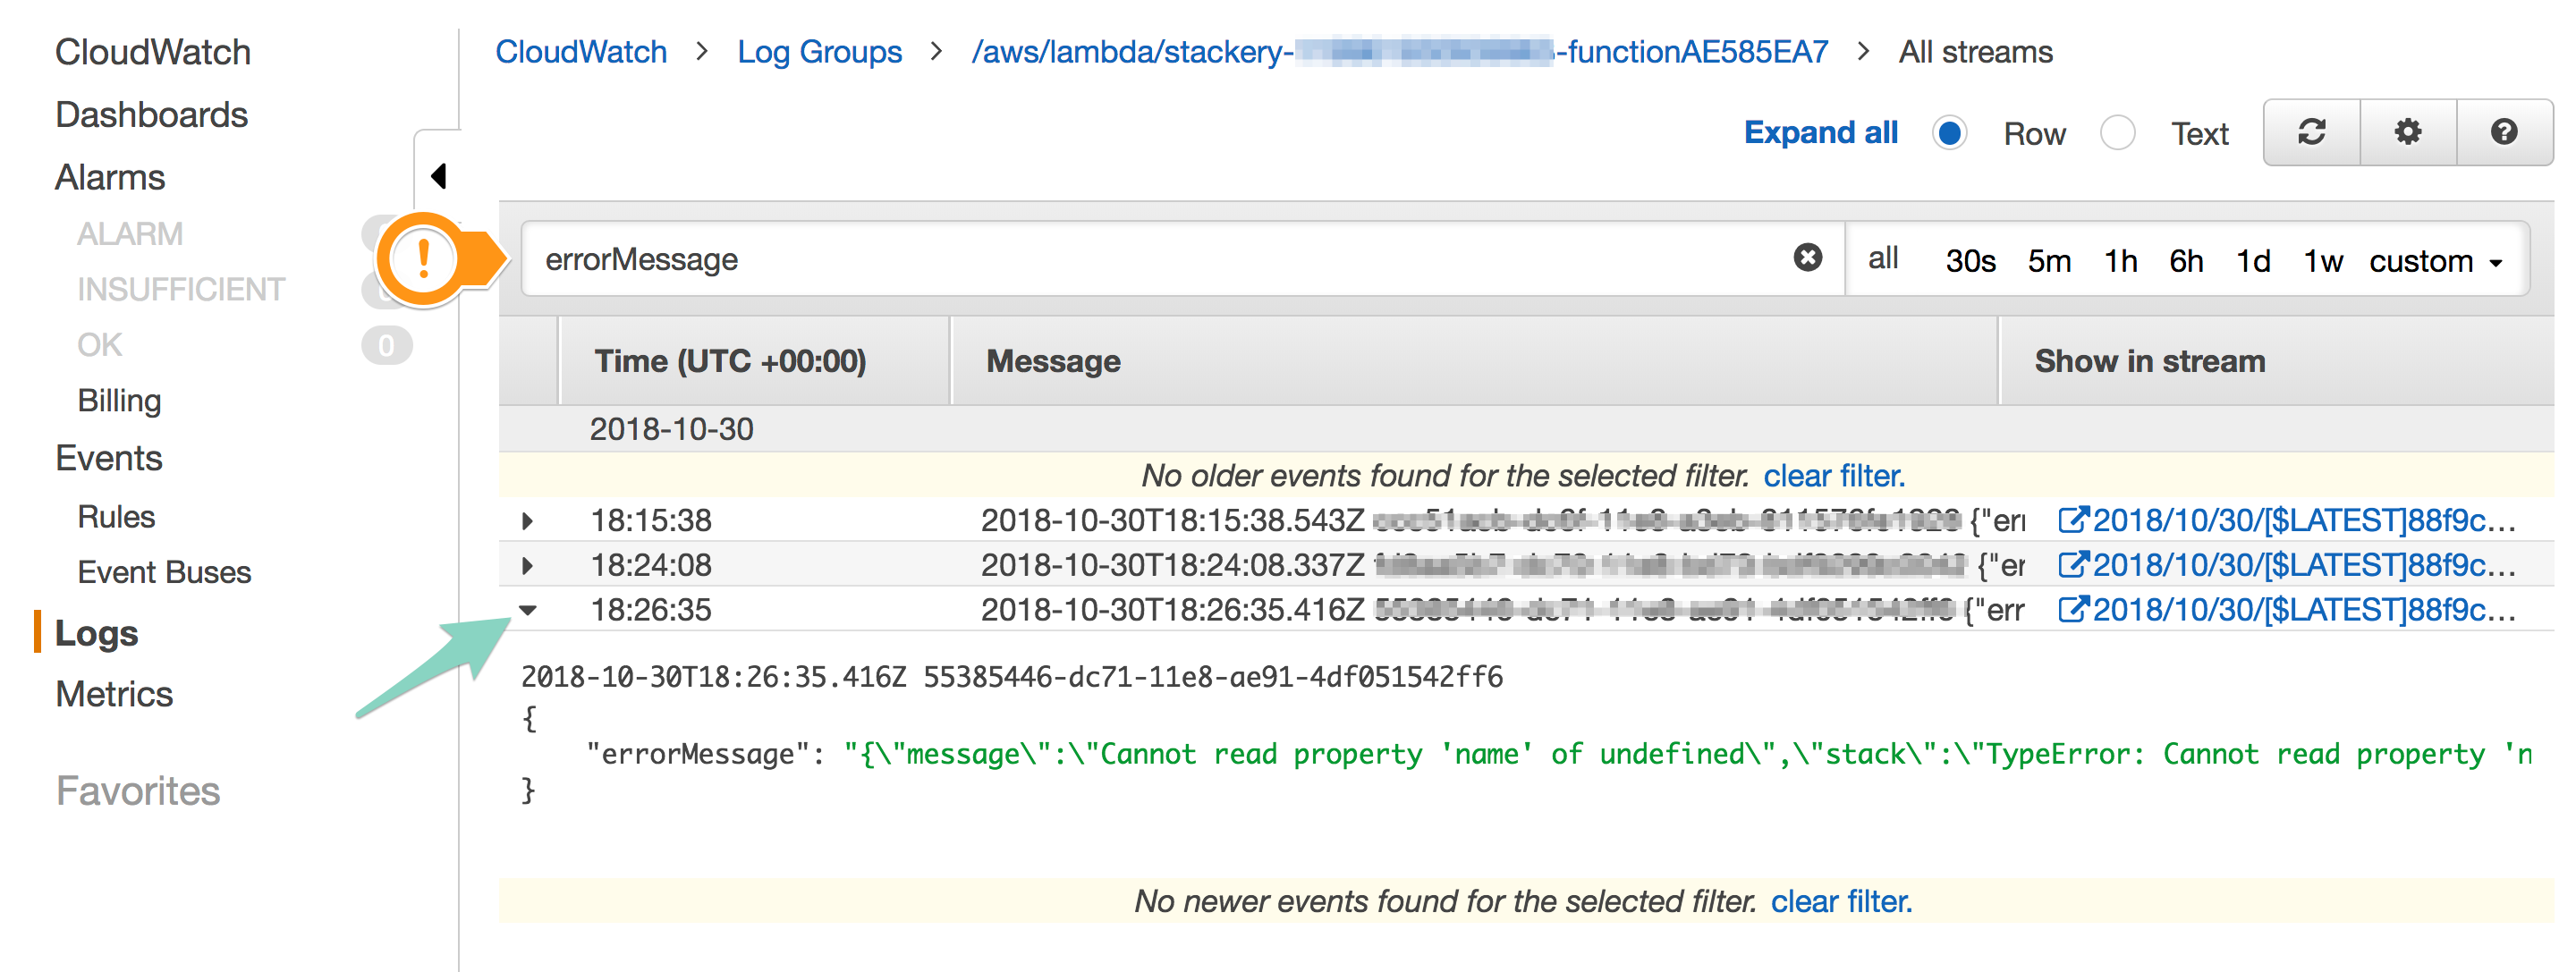
In this error, it turned out there was a value the function had been expecting that did not come through in the ping event from GitHub, but would have in a push event - specifically, the value of pusher.username. The error reads:
{
    "errorMessage": "{\"message\":\"Cannot read property 'name' of undefined\",\"stack\":\"TypeError: Cannot read property 'name' of undefined\\n    at exports.githubWebhookListener (/var/task/index.js:7:27)\\n    at Promise (/var/task/__stackery_entry.js:497:17)\\n    at new WrappedPromise (/var/task/node_modules/async-listener/es6-wrapped-promise.js:13:18)\\n    at ...
}
So now we at least know to start with line 7:27 of function exports.githubWebhookListener at index.js. We'll take out this undefined variable, re-deploy the stack, and make GitHub ping the API again:
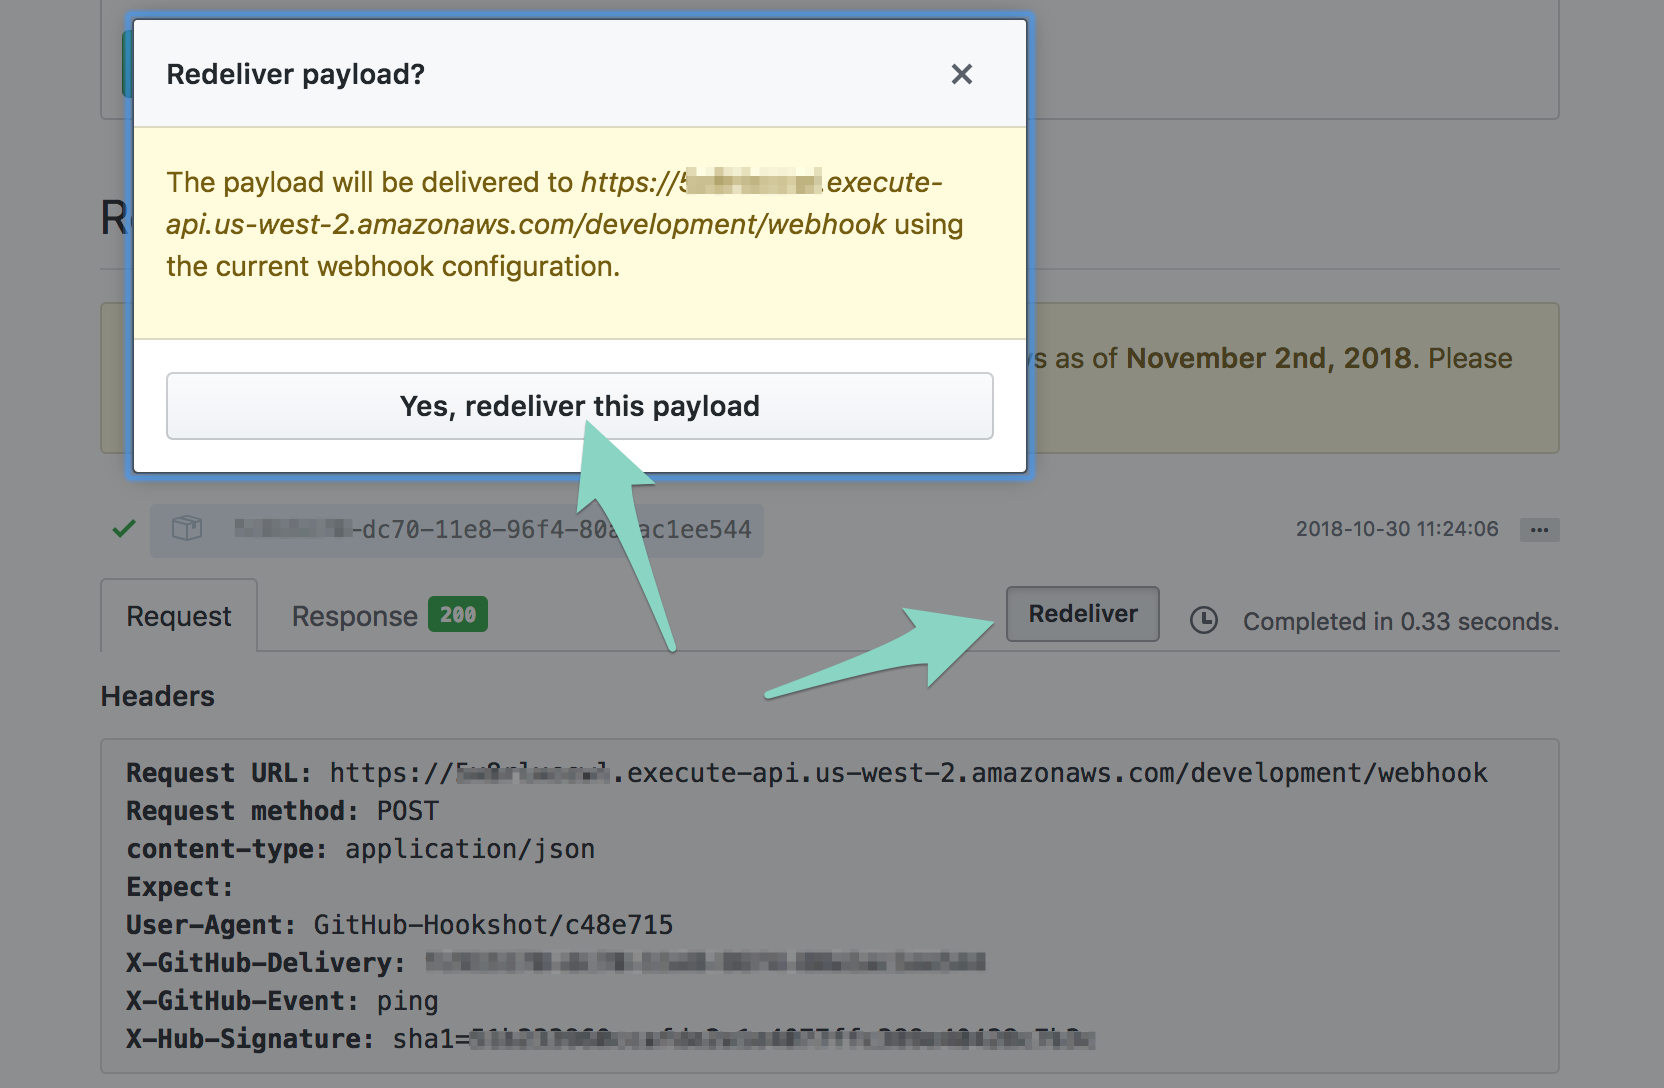
Hopefully, the response will be 200 this time.
A lot of serverless debugging will take place in the CloudWatch console, so it's good to become familiar with it and use
console.log()statements in your functions when needed.
