React Single Page App
This tutorial will guide you through the process of deploying and hosting a single-page React application using the serverless approach.
By the end of the tutorial, you will have deployed into your AWS account:
- An AWS CodeBuild Project to build and deploy your React application
- The Amazon S3 Bucket that will host your static single-page React application
- An Amazon CloudFront distribution that delivers your static web content to users quickly and securely
Setup
Project Repositories
The following repository is referenced throughout this tutorial:
Required Installations
The following software is used in this tutorial:
Deploy Sample App
You can deploy the completed example into your own AWS account using these two Stackery CLI commands:
stackery create will initialize a new repo in your GitHub account, initializing it with the contents of the referenced blueprint repository.
stackery create --stack-name 'react-single-page' \
--git-provider 'github' \
--blueprint-git-url 'https://github.com/stackery/react-single-page'
stackery deploy will deploy the newly created stack into your AWS account.
stackery deploy --stack-name 'react-single-page' \
--env-name 'development' \
--git-ref 'master'
1. What We're Building
A single page application is a website that does not require page reloading when in use. A web application like Gmail utilizes this functionality to improve a user's experience by pre-fetching content from a server, resulting in less wait time. After completing this tutorial, you'll have a serverless single-page application built using Stackery and React. Stackery resources will be used to configure, deploy, and host our entire application which will be built using the component-based, React library.
Another advantage to hosting your single-page application like we do in this tutorial, is having a fully-functioning app running in AWS within its free tier.
As you grow your application, be sure to monitor the cloud resources in your AWS account to ensure you're within your team, or individual, billing and cost limitations.
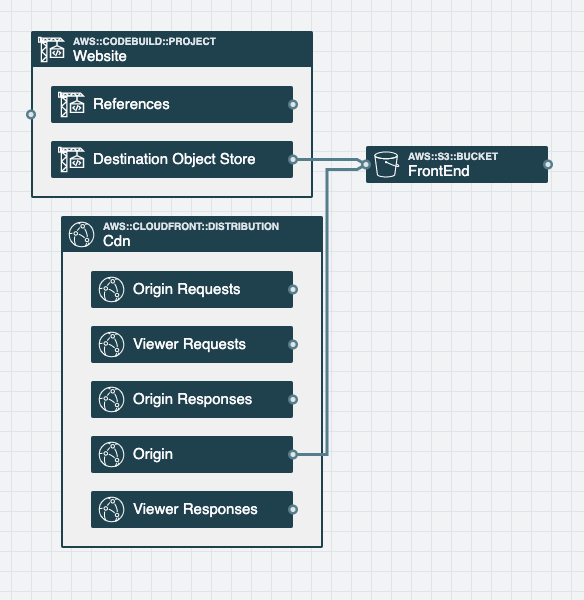
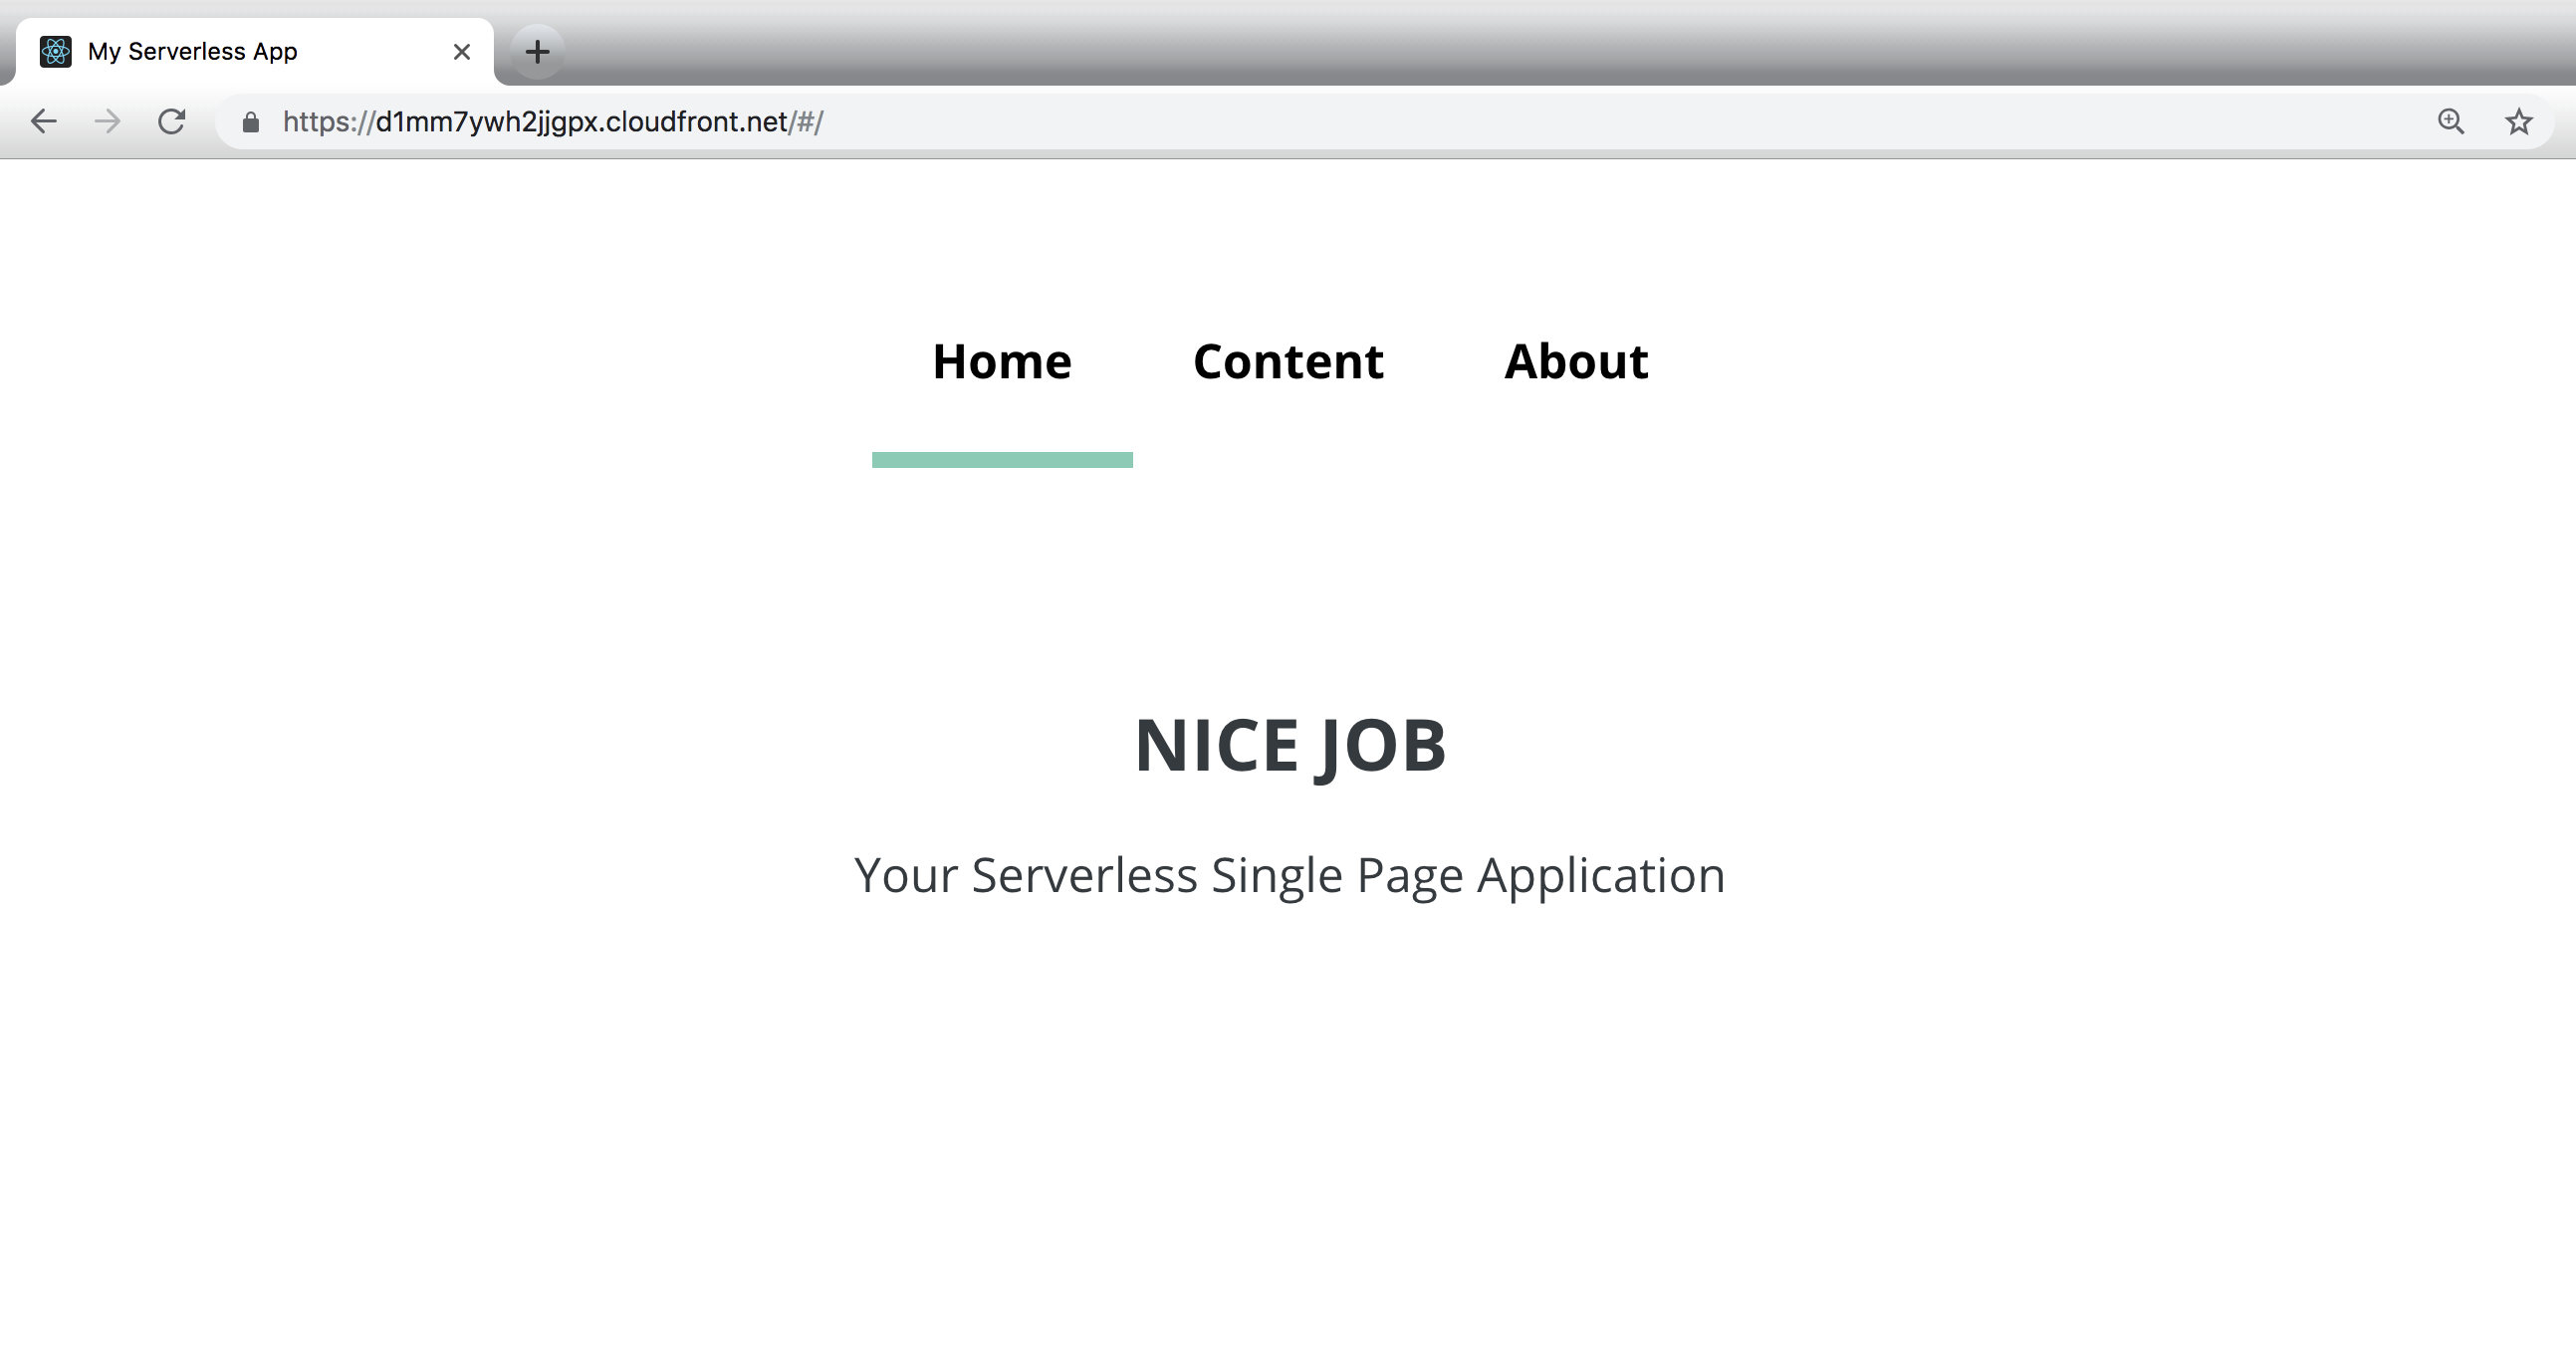
Finished stack
This is an example of the finished stack in the Stackery Editor. Feel free to play around:
Resources used
The following are descriptions of the Stackery resources we'll be working with:
Website Builder : The CodeBuild project used to build the application and publish the application to an S3 Bucket.
Object Store : The S3 Bucket our Website will be publishing to. It will be configured to host a static website (our React app) and be fronted by a CDN resource to speed up global distribution to our users.
CDN : Configured to serve the completed React app we're hosting in our Object Store. It will serve this content from the geographical location closest to our end-users, reducing bandwidth and loading time in the process. Also provides the SSL certificate used to access our site via HTTPS.
We'll get to configuring these resources in later parts; for now, we want to create an empty stack to start with.
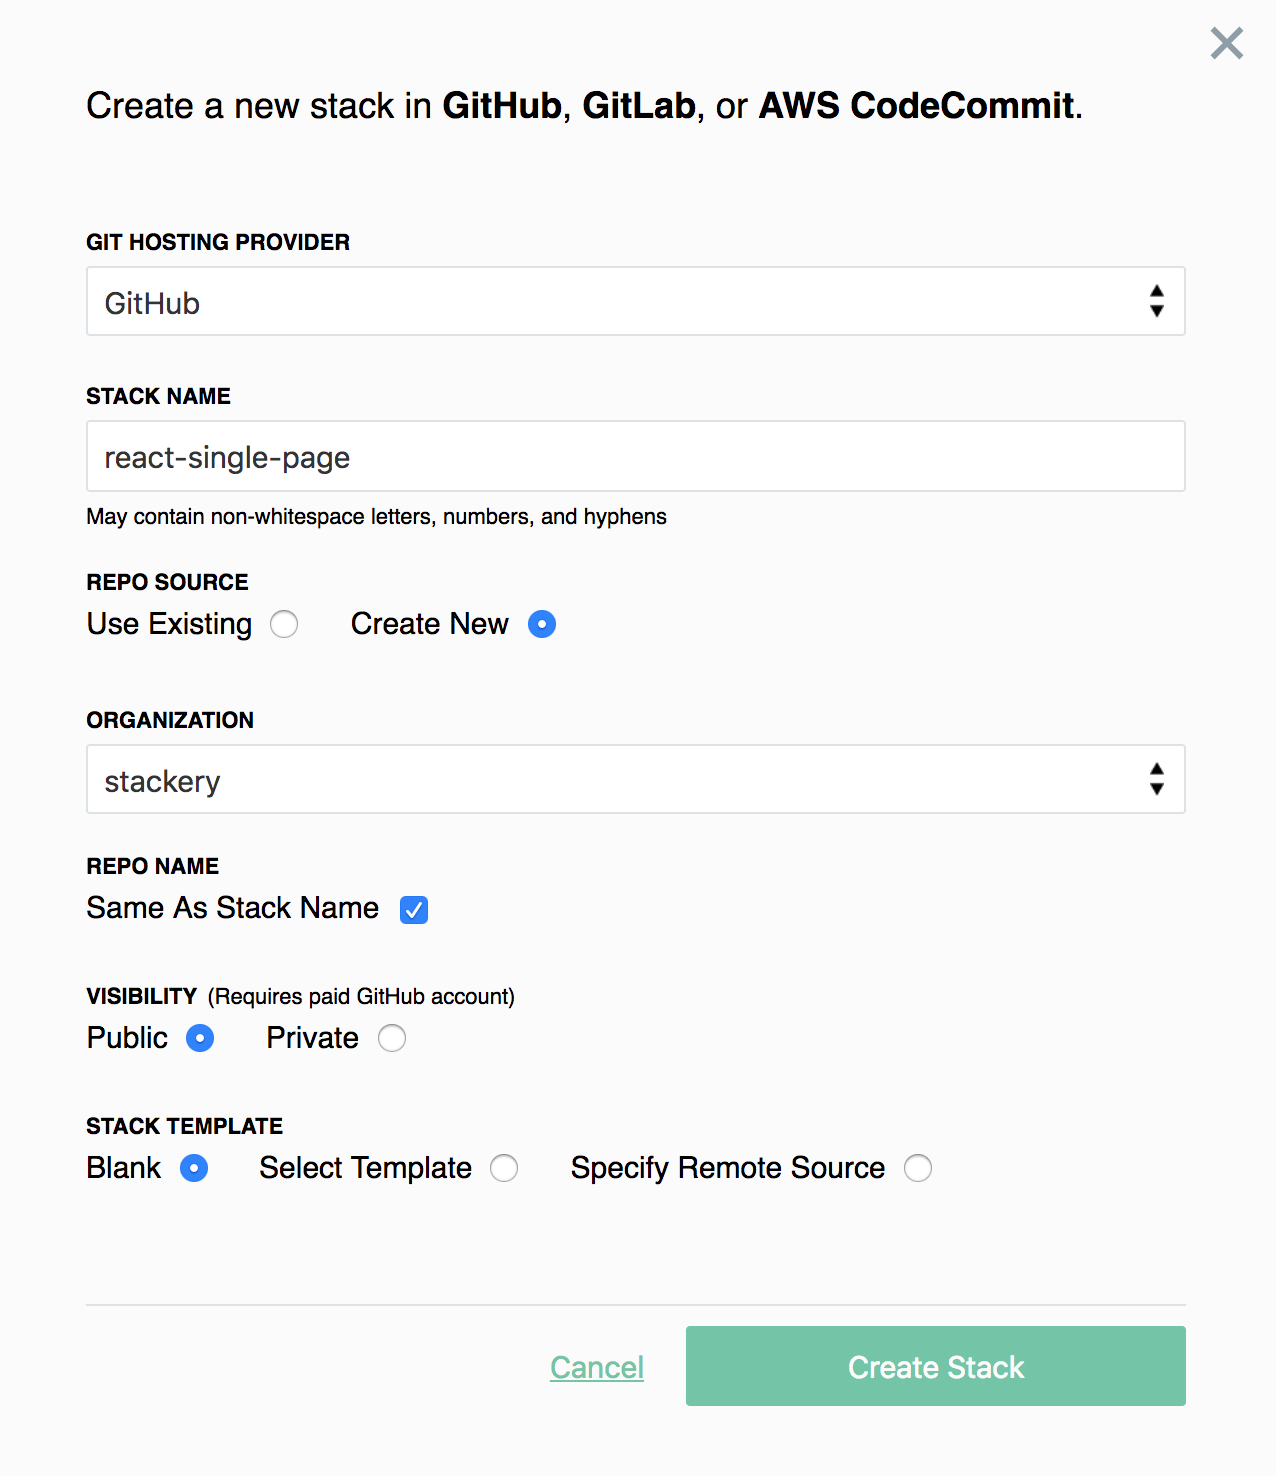
Create a new stack
- Navigate to Stacks
- Select Add a Stack in the top right corner
- Select GitHub for Git Hosting Provider
- Enter
react-single-pagefor Stack Name - Select Create New Repo for the Repo Source
- For Organization, select the Git account you want this repository in
- Keep the Repo Name the same as Stack Name
- Select Public for your repository's visibility (Private repositories require a paid GitHub account)
- For Stack Blueprint choose 'Blank'
- Click Add Stack to create our empty stack
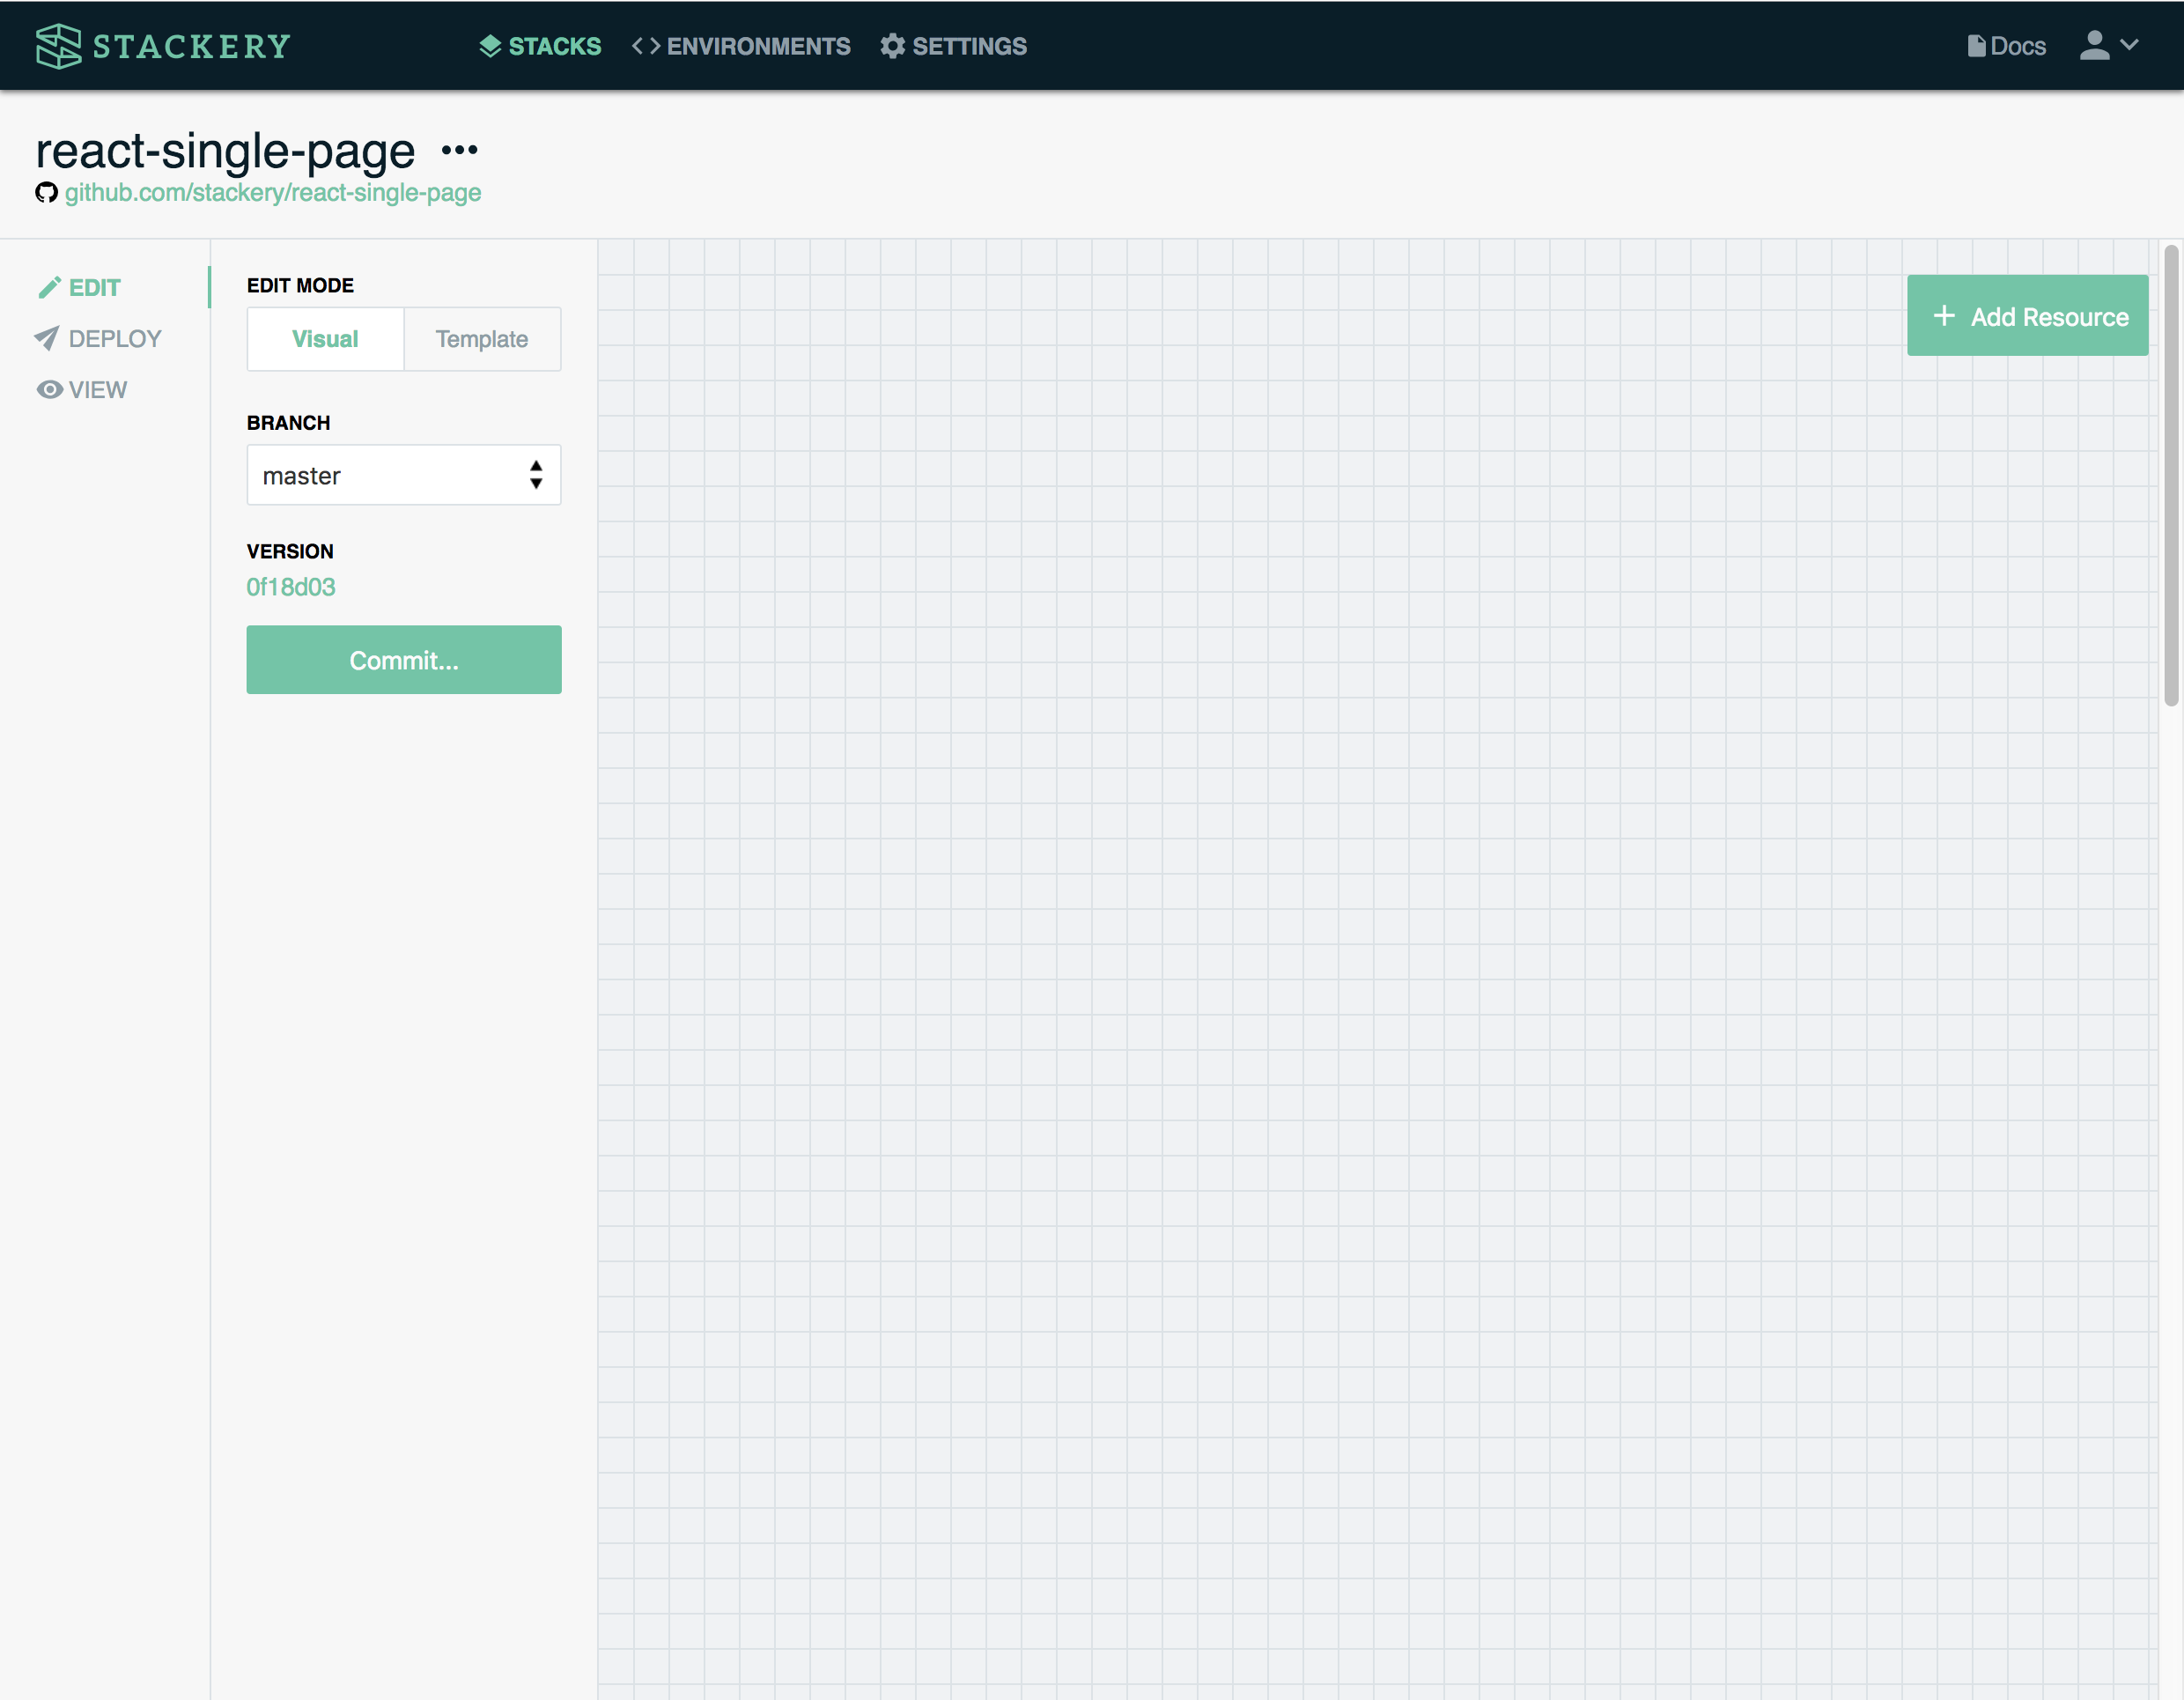
Stackery initializes the following blank stack.
UP NEXT: Adding and configuring our Stackery resources.
2. Configure Website & Object Store
In this section we're configuring the Website Builder that will build and publish our React application, and the Object Store that will host it.
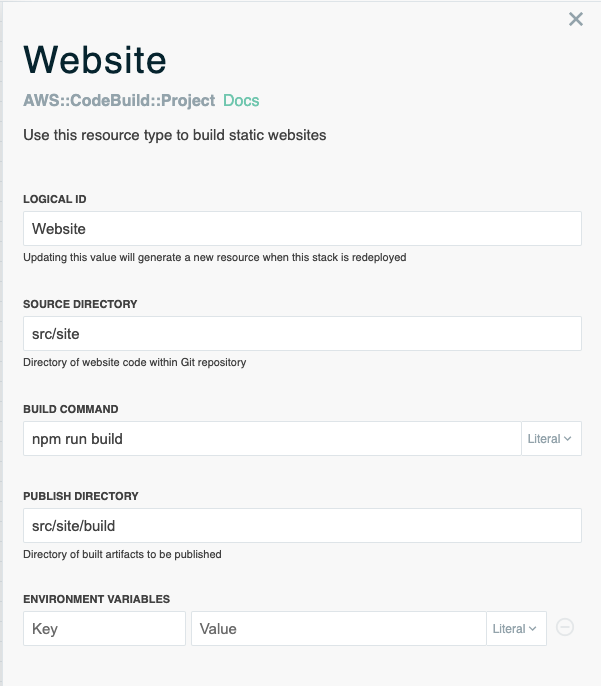
Configuring our Website Builder
- Select Add Resource on the top right to reveal the resource panel
- Select and drag (or single-click) a Website Builder resource to the stack editor
- Double click on the resource to open its configuration panel
- Keep the default settings for Logical Id, Source Directory, and Build Command
- Enter
src/site/buildfor the Publish Directory - Keep default settings for Environment Variables
- Click Save
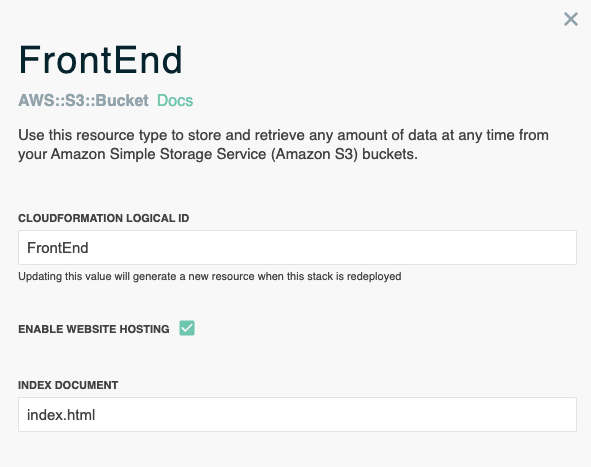
Configuring our Object Store
- Select Add Resource on the top right to reveal the resource panel
- Select and drag (or single-click) an Object Store resource to the stack editor
- Double click on the resource to open its configuration panel
- Enter
FrontEndfor the Cloudformation Logical Id - Select Enable Website Hosting to allow the Object Store to host a static webpage.
- Once website hosting is enabled, an additional input field will display, asking for an Index Document. Enter
index.htmlthen click Save - Navigate to the left and select Commit, use the default commit message or create your own. Click Commit again
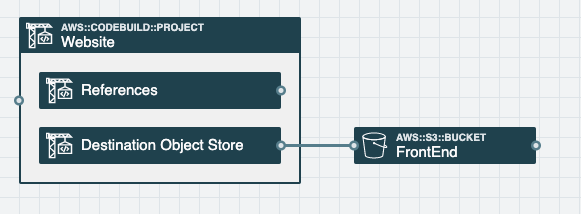
UP NEXT: Reviewing our stack's updated YAML file, and working with create-react-app.
3. Overview & Create React App
In this section, we'll begin working with our stack's template.yaml file locally and using create-react-app to start off our React site.
Template Editor update
For the additional configuring required in template.yaml, you may choose to work locally, adding the necessary YAML in a code editor, or you may choose to work using the Stackery Template Editor provided within the application.
Access the stack's template editor by selecting Template under Edit Mode.
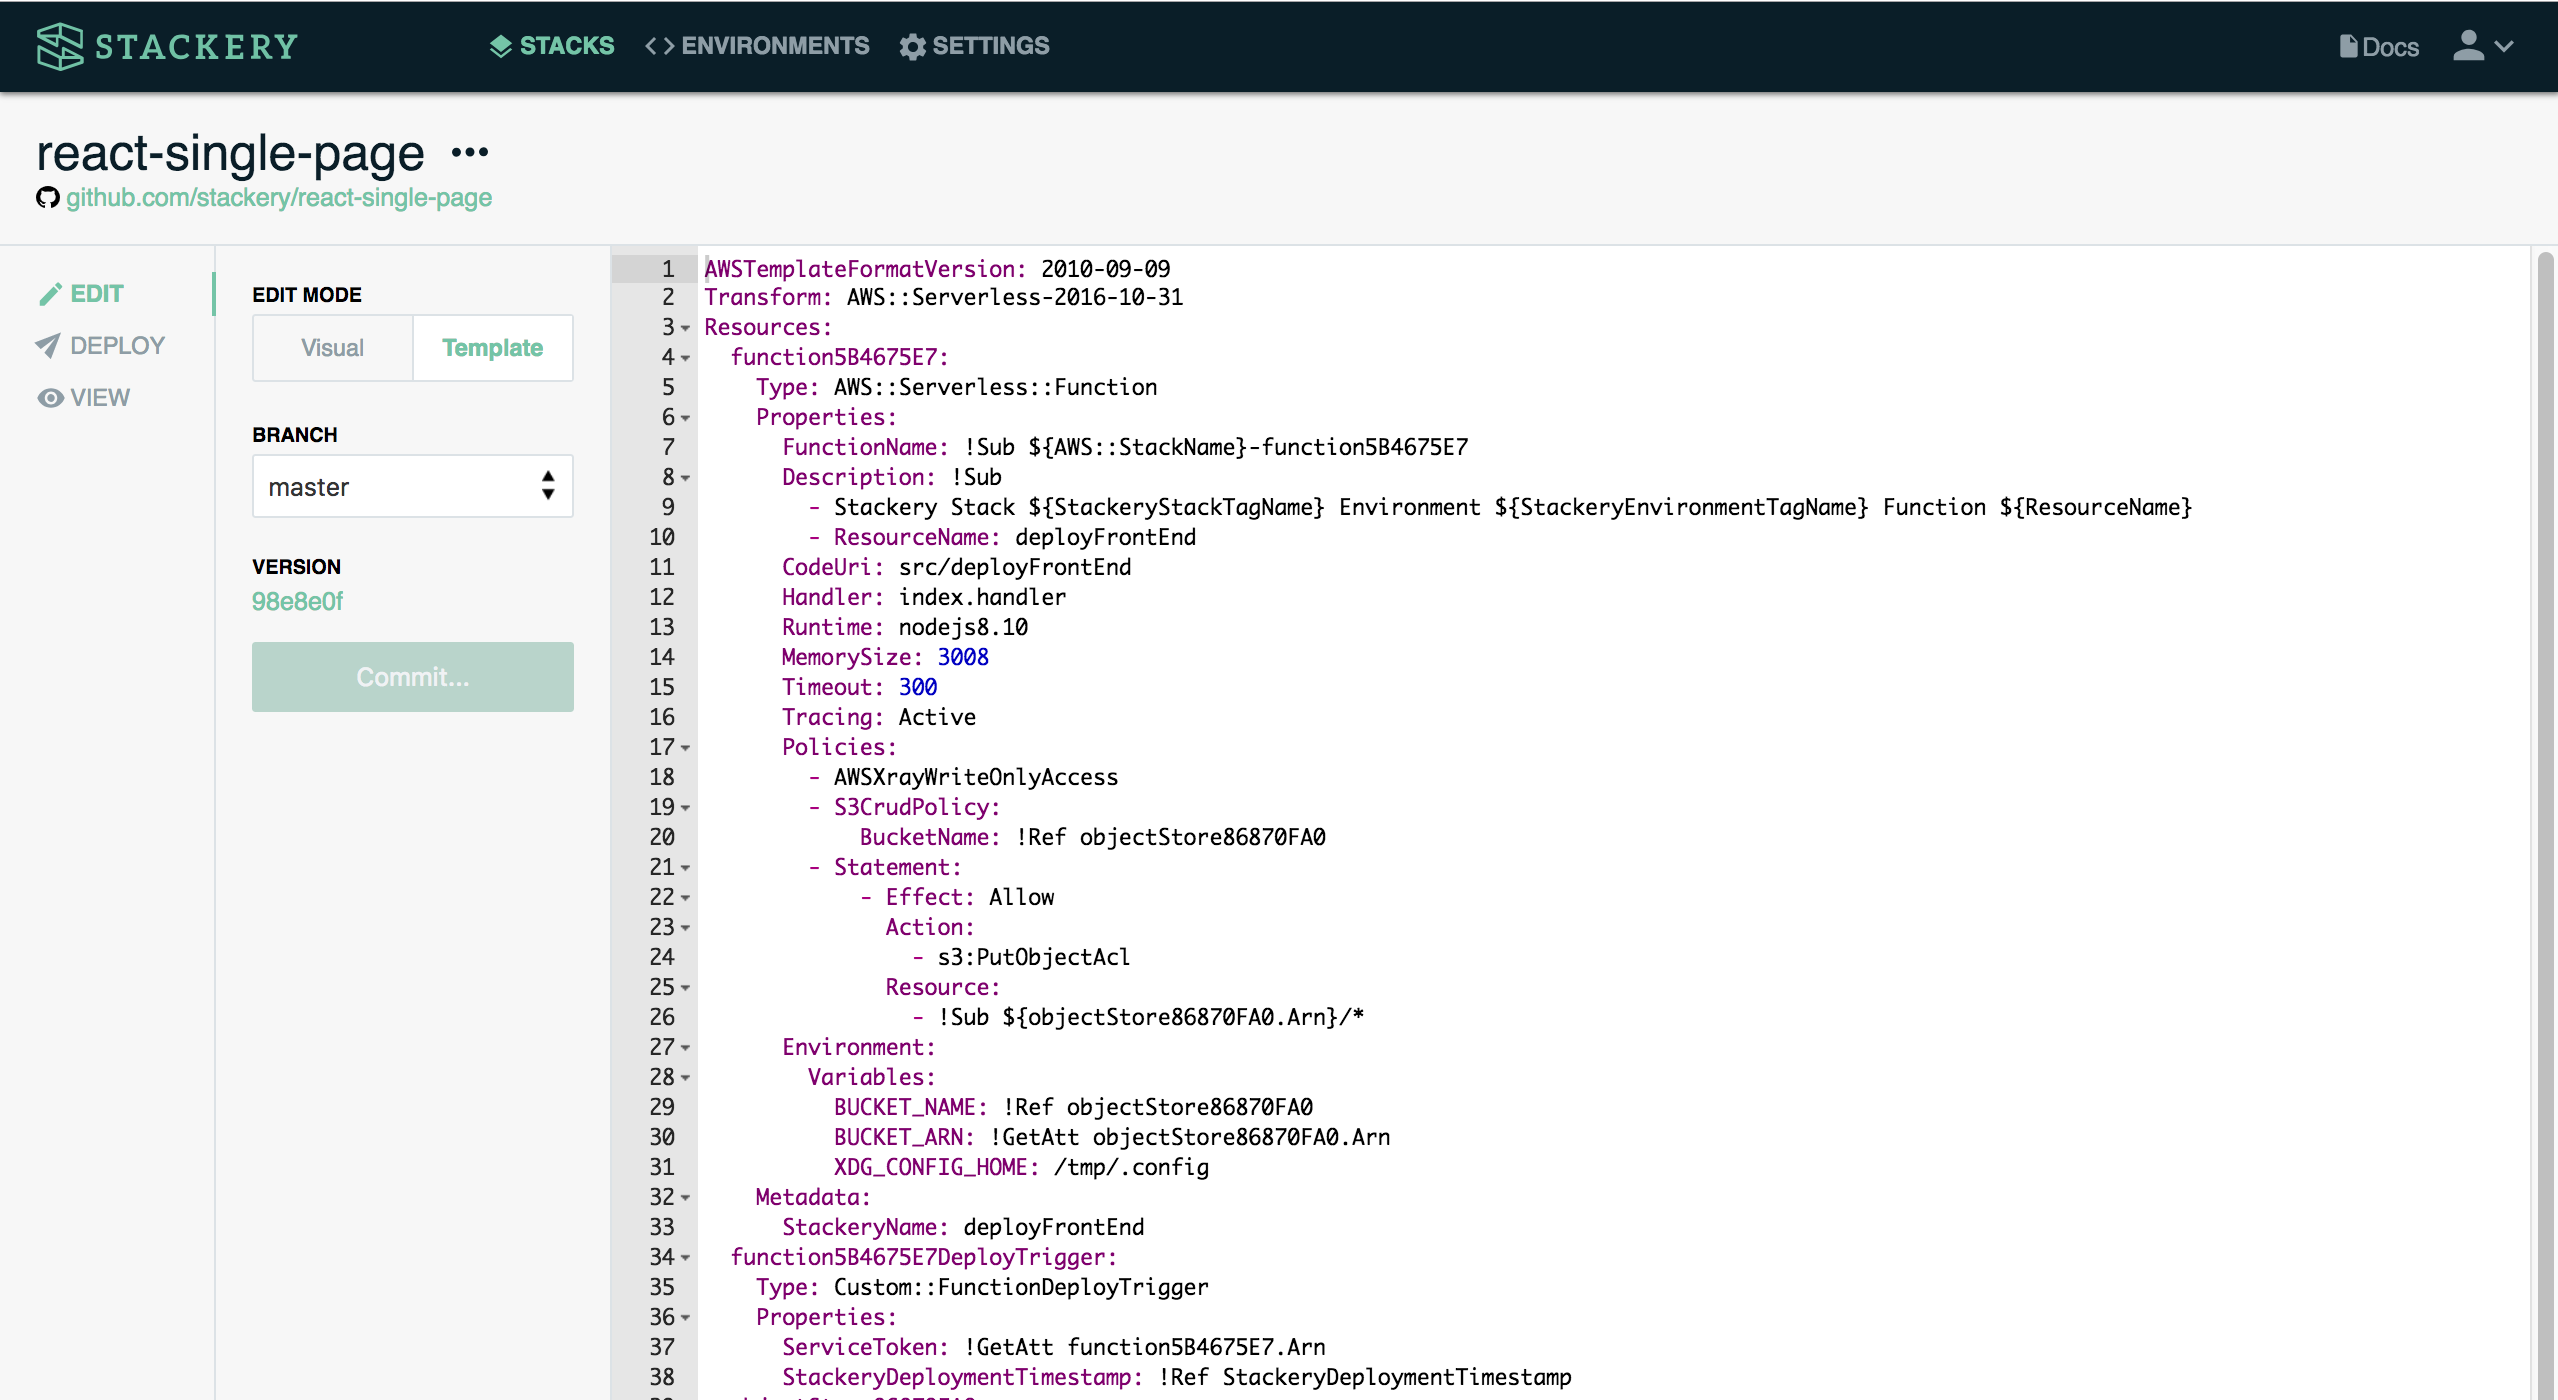
The tutorial assumes all development will be done locally after cloning the project down from the git repository.
If you choose to add configurations to your stack using the template editor provided, be sure to commit and pull changes regularly.
Working with our stack locally
- Navigate to the project repository, copy the URL, and run
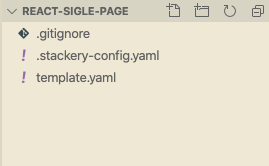
git clone {REPOSITORY-URL}in a terminal window cdinto thereact-single-pagedirectory and open it in a code editor. Familiarize yourself with the current file structure
- Add a new folder to the project root and name it
src - Open the
srcfolder. It will currently be empty, but keep in mind that this is where we will place the source code for the React application - Open
template.yamlin the project root to find the stack's resources we orchestrated using Stackery
Under Resources we first see our configured Website Builder:
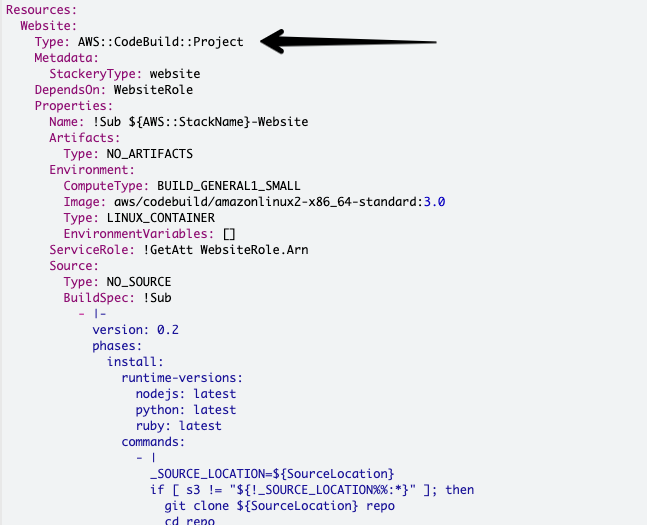
Within the template declaration we see the following additional resources required to allow CodeBuild to communicate with CloudFormation as well as grant the CodeBuild project the necessary permissions:
- WebsiteEvents
- WebsiteEventsPermission
- WebsiteRole
- WebsiteBuildTrigger
This is the resulting YAML produced by Stackery when adding a Website Builder resource. Under the hood, a Custom CloudFormation Resource triggers the CodeBuild job to start a new build on every deploy. Here's is what that Custom Resource looks like in the template.

Using Create-React-App
In the same terminal window, navigate to
srcRun
npx create-react-app siteOnce complete, head back to a code editor and familiarize yourself with the
sitefolder that was just created. We'll dive deeper into our React app's structure in later sectionsHead back to the terminal window,
cdinto thesitedirectory, and runnpm start
A local server will begin running and a browser window will display a default React application.
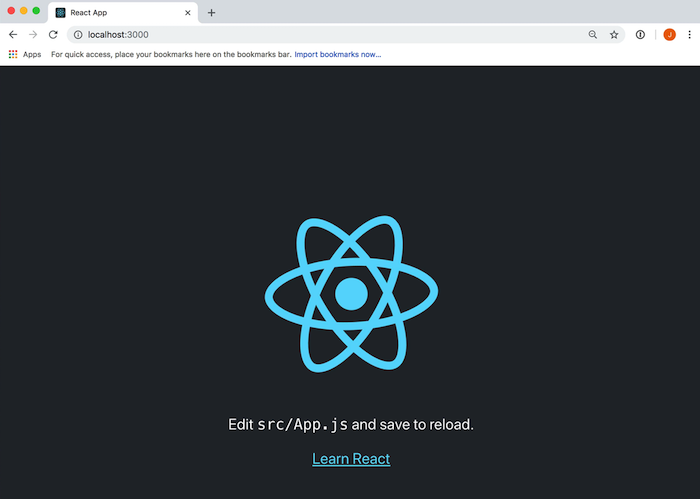
In later sections, we'll run npm start and take advantage of Reacts's auto-reloading feature to edit our site locally, before deploying.
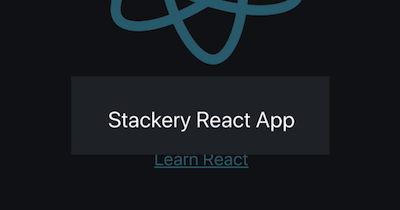
- Test out the auto-reloading by changing the
<p>element inside ofApp.jsfromEdit src/App.js and save to reload.toStackery React App
- Commit and push up our changes to Git
UP NEXT: Our first stack deploy and viewing our React application hosted from an S3 Bucket.
4. Bucket Hosted Single Page App
In this section, we're deploying our stack for the first time and getting to see our initial React application hosted from an S3 bucket.
Prepare and deploy the stack
- In Stackery, we notice our left navigation panel has a remote change alert. Click refresh to pull the changes we made using our code editor in the previous section.
A remote change alert will display whenever there are changes made and pushed to the hosting git repository outside of the current Stackery browser tab. This alert provides you the option to create a new branch and keep the stack in the current session, or to update the stack in the current session with a refresh. If this alert does not show for you, refresh your browser to display any changes.
- Once the stack is refreshed, select Prepare Deployment
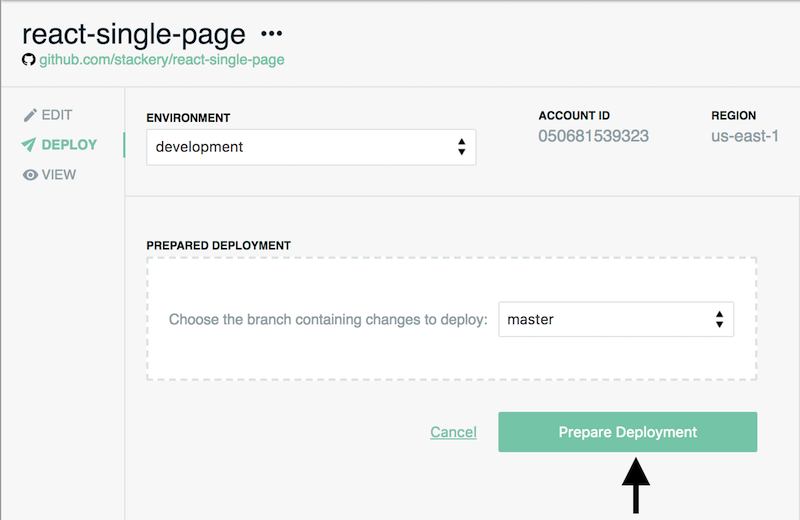
A deployment preparation may take up to 5 minutes.
- Once the deployment has finished preparing, select Deploy. A new browser window will pop up showing the AWS console
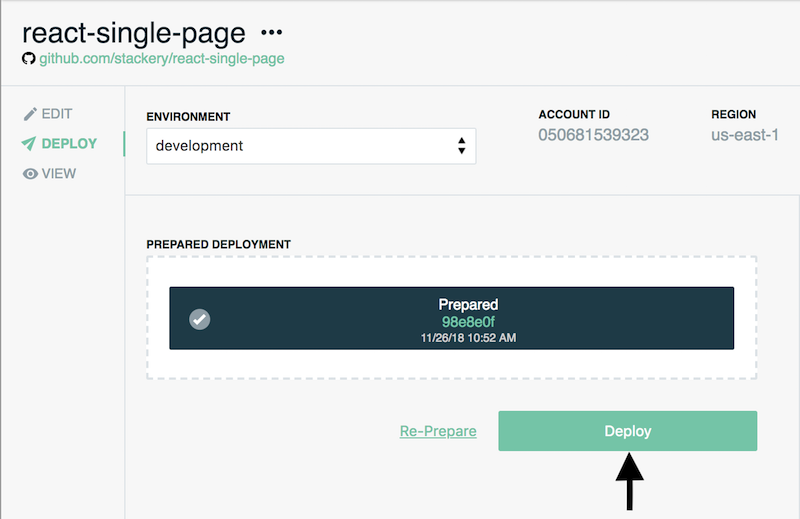
- The AWS console will display the stack change set and any updates to our stack under the Changes tab

- We're satisfied with these proposed changes so we'll click Execute to officially deploy our stack

This current stack deployment may take up to 5-10 minutes. Deployment will continue for this stack even if you close the browser window.
- Back in Stackery, we're presented with a notification indicating our stack has finished deployment. Let's take a look at our deployed resources by navigating to the View tab
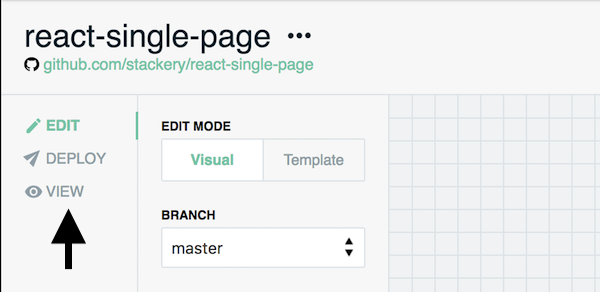
- On the View page, double-click on
FrontEndto reveal the deployed resource properties and select the S3 Bucket'sWebsite Hosting Address
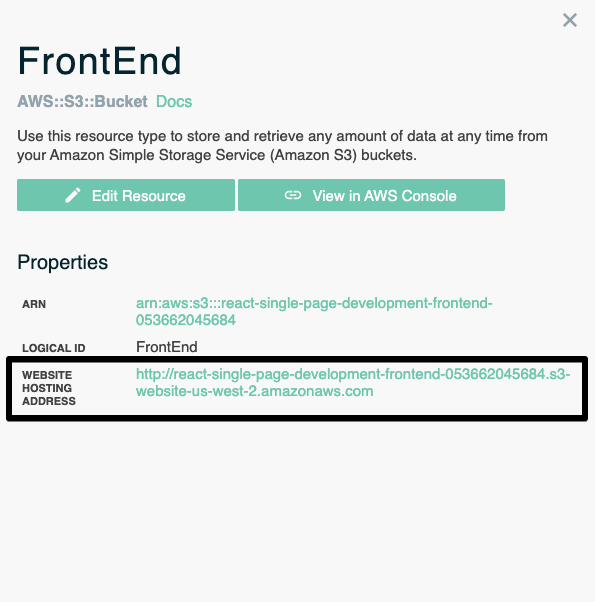
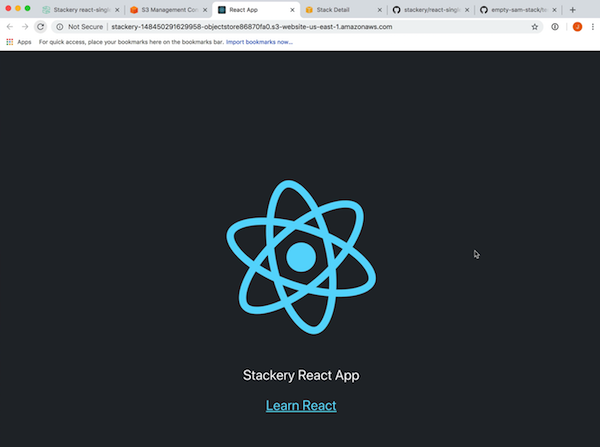
- A new browser window opens with our React app successfully being hosted from our
FrontEndObject Store
UP NEXT: Now that our React site is being hosted from our S3 Bucket, we're going to speed up the delivery of our content to our users by configuring a CDN.
6. Configure CDN
In this section, we're adding a CDN to our current stack to speed up delivery to our end-users.
Configuring our CDN
- Select Add Resource on the top right to reveal the resource panel
- Select and drag (or single-click) a CDN resource to the stack editor
- Click and drag an Integration Wire from the
Originwithin theCdnto the input port (left) ofFrontEnd - Navigate to the left and select Commit, use the default commit message or create your own. Click Commit
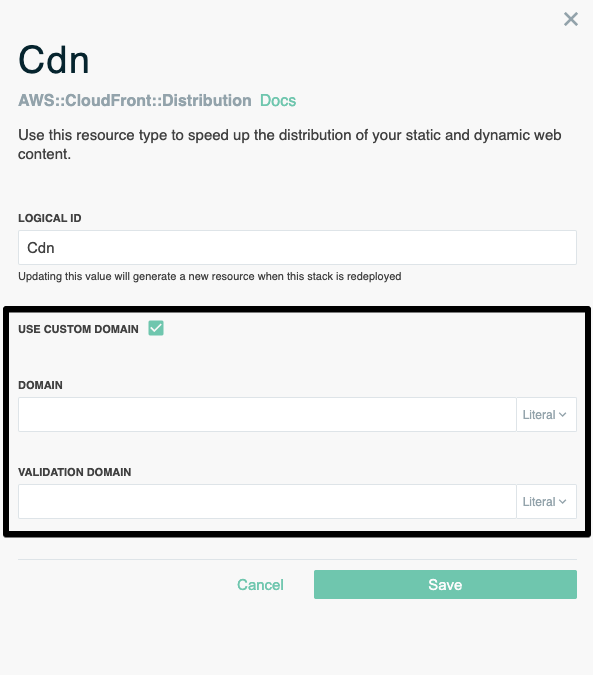
If you plan to use a custom domain for your React website, enabling the
Use Custom Domainproperty in theCdnsettings will prompt you for theDomainyou want to use, as well as theValidation Domainused to validate it.
Cdn Template Walkthrough
- From a terminal window, and inside the project directory, run
git pullto adopt the changes we made with Stackery - There were additions made to our
template.yamlfile that we'll briefly go over

The last resource in template.yaml (before the stack's parameters), is the resulting bucket policy supplied by Stackery when utilizing an integration wire (solid wire).
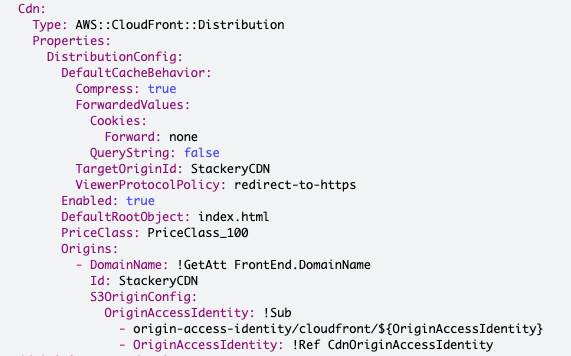
Under our FrontEnd Object Store configurations, we see the CDN that we added Cdn. Towards the bottom of this resource we see an Origins statement. It declares the CDN's source and is another result of connecting Our Cdn with FrontEnd using an integration wire.
- Our
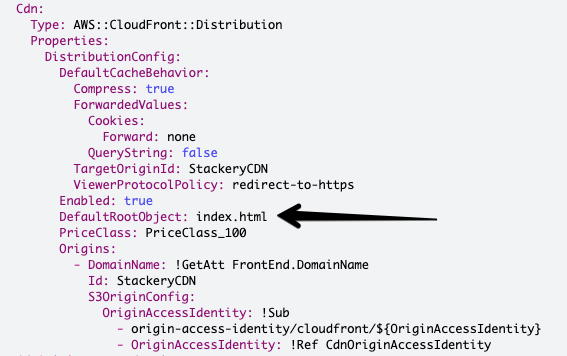
Cdnnow has a DefaultRootObject property, which defines the object from our S3 Bucket to return and serve. In this case theindex.htmlfile fromFrontEnd, our S3 Bucket. If your application's entry point is something else, you'd need to edit this value here.
Prepare and deploy stack
- Head back to Stackery stack editor in the web browser
- Select Prepare Deployment
- Once the deployment has been prepared, select Deploy
- In the browser window that pops up you'll see all stack changes towards the bottom left of the AWS console
- Once the changes have been reviewed, select Execute in the top right corner
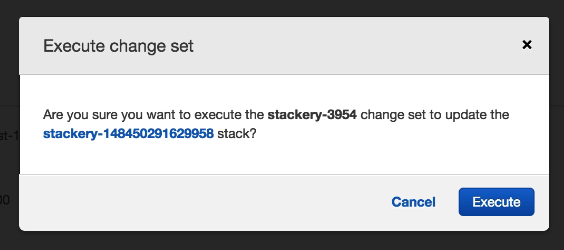
- Confirm this change set execution by selecting Execute in the modal to deploy your stack

The AWS Console navigates to an update stack detail page and you'll see an UPDATE_IN_PROGRESS status in orange. Refresh the page if it does not show initially.

This stack deployment that includes the addition of our CDN may take up to 15 minutes. Deployment will continue for this stack even if you close this browser window.
React app on CloudFront
- Once the stack deployment is complete, navigate back to Stackery and select the View tab at the top left.

- On the Deployments page, double-click on
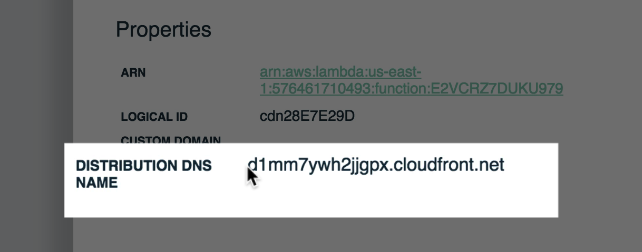
Cdnto reveal the deployed resource properties - Copy the Distribution DNS Name to your clipboard
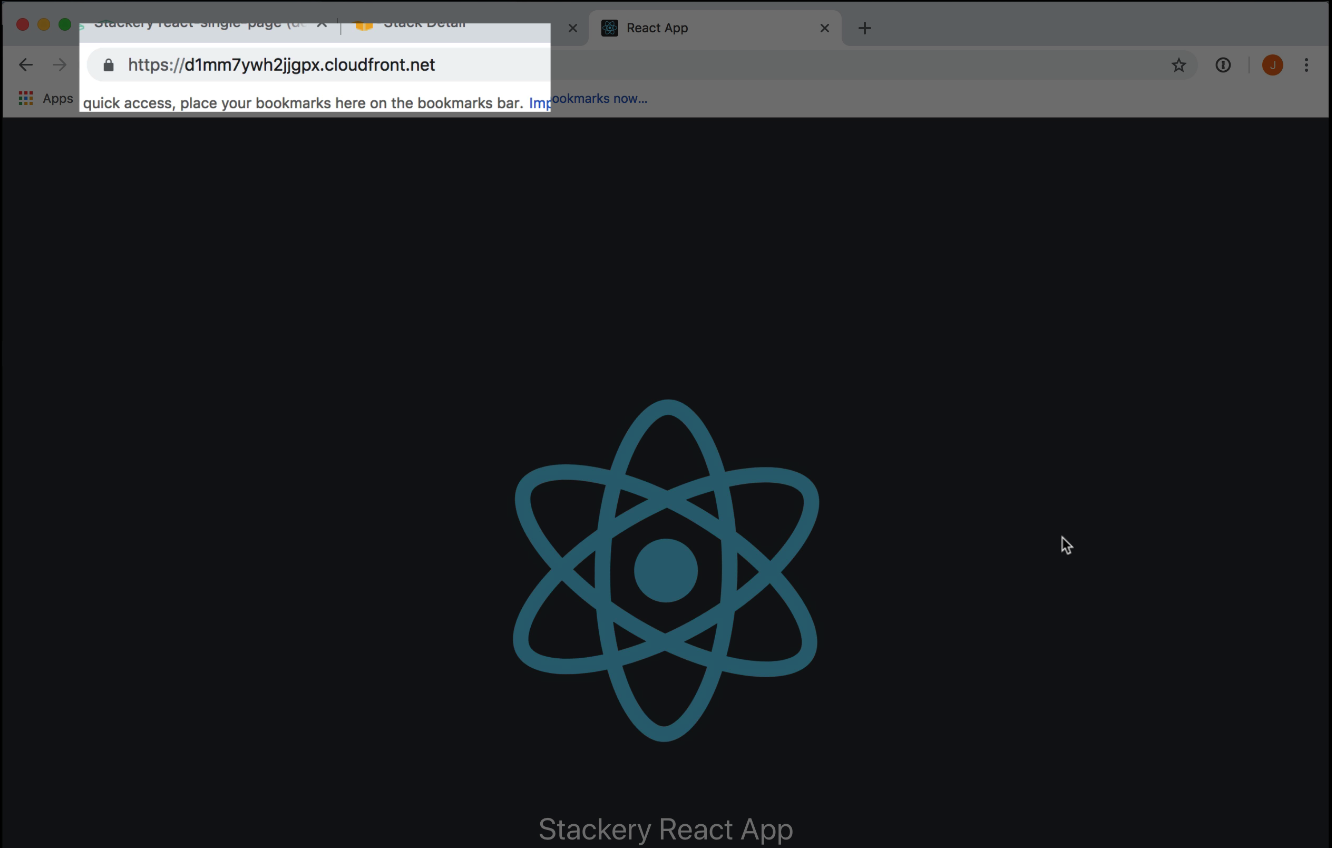
- In a new browser tab, paste and go to the cloudfront.net URL
The browser will load our React application (which can be verified by the Stackery React App title) and is now serving our content from the AWS Edge location closest to us!
UP NEXT: Now that our serverless infrastructure and workflow has been determined with Stackery, the rest of this tutorial consists of a two-part implementation of React and React Router to build out our website's front end.
7. Working with React I
In this section, we're establishing the foundation of our React single page application for you to continue developing after this tutorial. Our serverless infrastructure has been configured and we've established a workflow.
Configure your React app
Install React Router
- In a terminal window,
cdintoreact-front-end - Run
npm i react-router-dom --saveto download React Router - From the same
react-front-enddirectory, runnpm startto start the local server to begin editing
We'll briefly go over our React application's current component tree, starting from App.js and ending with the index.html file that we defined as our S3 Bucket's index document.
React App Overview
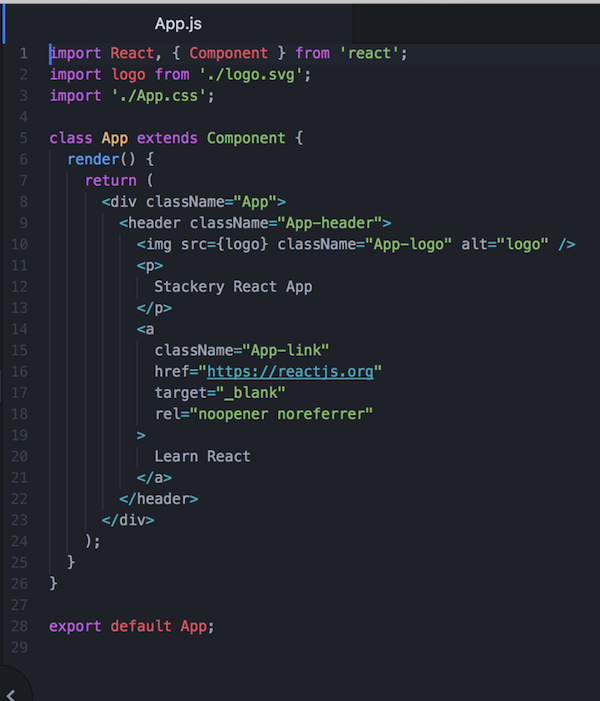
The following is our App.js file located at react-front-end/src/App.js. We've edited the <p> element in a previous section to display Stackery React App.
App.js is our main component and will hold the other components of our app. This is where we'll orchestrate and route the content that makes up our single-page application.
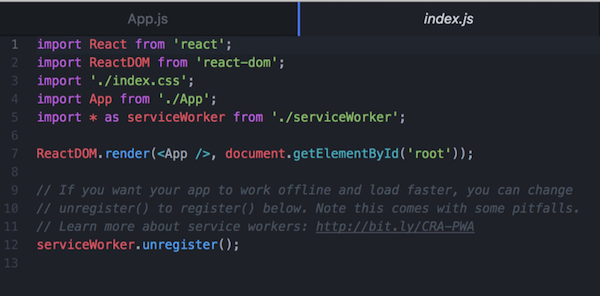
In index.js, located in the same /src folder, we want to highlight line 7 that reads the following:
ReactDOM.render(<App />, document.getElementById('root'));
This line is telling our application to render App.js in the DOM where the id is 'root'.
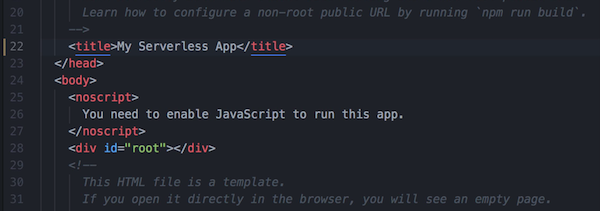
index.html is where our application gets rendered. More specifically, the <div> with the id of 'root'. We'll also update the <title> element with My Serverless App and see our changes take effect immediately.
Now that we have an idea of where to orchestrate our application's components, and where our components will be rendered, let's organize our project.
Components and Images
- In a code editor or terminal window, add a
componentsandimagesdirectory into thesrcfolder ofreact-front-end - Add a new file to the
src/componentsfolder, name itHome.jsand paste the following code in:
import React, { Component } from 'react';
import '../App.css';

class Home extends Component {
  render() {
    return (
      <div className="home">
        <h2>NICE JOB</h2>
        <p>Your Serverless Single Page Application</p>
      </div>
    );
  }
}

export default Home;
At the top of Home.js we're importing the React and Component classes to use in our code, as well as importing the styles we'll define later in App.css.
Next we're constructing our Home component which returns JSX, and will render an <h2> and <p> element.
Finally at the bottom, we're exporting our Home component and will import it into other components whenever we'd like to render it on the DOM.
This is the format of the other two components our React app will render, so add a Content.js and an About.js file to src/components and paste in the following code blocks:
src/components/Content.js
import React, { Component } from "react";
import '../App.css';

class Post extends Component {
  render() {
    return (
      <div className="post">
        <h2>YOUR CONTENT</h2>
        <p>Lorem ipsum dolor sit amet, consectetur adipiscing elit.</p>
      </div>
    );
  }
}

export default Post;
src/components/About.js
import React, { Component } from "react";
import '../App.css';
import stackeryLogo from '../images/stackery-logo.png';
import reactLogo from '../images/react-logo.png';

class About extends Component {
  render() {
    return (
      <div className="about">
        <a target="_blank" href="https://www.stackery.io">
          <img src={stackeryLogo} className="stackery-logo" alt="stackery-logo" />
        </a>
        <p className="plus">+</p>
        <a target="_blank" href="https://reactjs.org/">
          <img src={reactLogo} className="react-logo" alt="react-logo" />
        </a>
      </div>
    );
  }
}

export default About;
Upload any images you'd like to your
src/imagesfolder forAbout.js, or delete the image imports and related JSX all together. Make sure to updateAbout.jsto import and render any images you upload to yoursrc/imagesfolder.
Commit Folder Updates
- In a terminal window, run
git add .andgit committo add the changes we've made toreact-front-end.
UP NEXT: We'll tie in our new components and add routing to our single-page application with react-router.
8. Working With React II
In this section, we wrap up our work with React and initiate our final deploy.
App.js + React Router
- Delete the contents of
App.jsand paste in the following code block. We'll go over the new additions in more detail
import React, { Component } from 'react';
import { Route, NavLink, HashRouter } from 'react-router-dom';
import Home from './components/Home';
import Content from './components/Content';
import About from './components/About';
import './App.css';

class App extends Component {
  render() {
    return (
      <div className="App">
        <HashRouter>
          <div className="container">
            <ul className="nav">
              <li><NavLink exact to="/">Home</NavLink></li>
              <li><NavLink to="/content">Content</NavLink></li>
              <li><NavLink to="/about">About</NavLink></li>
            </ul>
            <div className="pages">
              <Route exact path="/" component={Home}/>
              <Route path="/content" component={Content}/>
              <Route path="/about" component={About}/>
            </div>
          </div>
        </HashRouter>
      </div>
    );
  }
}

export default App;
The import statements at the top now include the components we created in the previous section, as well as the Route, NavLink, and HashRouter components from react-router-dom. We see the react-router-dom components in action within <div className="App"> below.
We're using the <HashRouter /> component to house our <NavLink /> and <Route /> components.
NavLink components represent the links that will render in our HTML.
Route components specify the path each link represents, and which component to render.
As soon as we pasted in the updated App.js, the browser refreshed with our changes but didn't have any styling. Let's add to our App.css file to fix that. Paste in the following and after a refresh your browser will reflect some basic styling.
  body {
    padding: 20px;
    margin: 0;
    background-color: #fff;
  }
  h1, h2, p, ul, li {
    font-family: "Open Sans",sans-serif;
  }
  ul {
    text-align: center;
  }
  ul.nav li {
    display: inline;
    list-style-type: none;
    margin: 0;
  }
  ul.nav {
    padding: 0;
  }
  ul.nav li a {
    color: black;
    font-weight: bold;
    text-decoration: none;
    padding: 20px;
    display: inline-block;
  }
  ul.nav li a:hover {
    color:#79ccb5;
  }
  .pages {
    text-align: center;
    background-color: #fff;
    padding: 20px;
  }
  .pages h2 {
    padding: 0;
    margin: 0;
  }
  .home, .stackery, .about{
    width: 800px;
    margin: 0 auto;
    margin-top: 20px;
    padding: 20px;
    color: #343a40;
  }
  .active {
    border-bottom: 5px solid #79ccb5;
  }
  .stackery-logo, .react-logo{
    width: 250px;
  }
  .plus{
    font-size: 3rem;
  }
Another look at our browser and we'll see our completed React single-page application. Clicking any of the links at the top will render its component below, all without having to reload the browser. Also take note of the URL paths as a result of selecting each link - we're seeing our react router components at work!
Commit React App Changes
- In a terminal window,
cdback to thereact-single-pageproject directory - Run
git add .followed bygit commit - "final commit message" - Run
git pushto push all the React app changes we've made to your git repository
Now that we're satisfied with the functionality and look of our React site, let's head back to the Stackery Dashboard one last time for the last deploy.
Final deploy
- In Stackery, navigate to the Edit tab in our side panel (refresh if necessary), and select Prepare Deployment
- Once our deployment is prepared, select Deploy at the bottom left of our side panel
- In the AWS console that pops up, there's another change set request presented for review, select Execute in the top right corner to deploy our stack
- Once the deploy is complete, we'll head back into Stackery to our stack's View tab
- Double-click on
Our CDNto open the deployed resource properties, copy the Distribution DNS Name and paste it in a new tab

The URL is the default CloudFront domain, but you'll notice the #/{Path Name} that gets added to the end of it and updates whenever you click on a navigation link. Our site is now live, gets delivered quickly to our users with our CDN, and dynamically renders content with the help of React Router.
There you have it! Your completed, serverless single-page application built using Stackery and React!
