Visual Studio Code
Stackery VS Code Extension
Teams can improve their development workflow with the use of Stackery Serverless Tools on Visual Studio Code. This extension brings the Stackery visual editing capabilities for AWS CloudFormation and AWS SAM into VS Code so that developers can configure their serverless infrastructure-as-code templates from the comfort of their IDE.
This information is also available on the Stackery VS Code Extension page on the Visual Studio Code Marketplace.
Editing with the Stackery VS Code Extension is only supported for AWS SAM and CloudFormation templates.
Installation
- Open the extension palette (
Cmd+Shift+XorCtrl+Shift+X) - Search for, and select Stackery Serverless Tools
- Select Install
Features
- Visual Editing of infrastructure-as-code templates, including:
- AWS CloudFormation templates
- AWS SAM (Serverless Application Model)
- Visualization of stack architecture
- Integration with the Stackery CLI for deployments and cloudlocal function development
Prerequisites
To use the Stackery VS Code Extension you'll need:
- A free Stackery developer account.
- One or more AWS Accounts to deploy your serverless applications into.
Usage
The Stackery extension allows you to visualize and configure the AWS resources defined in your template.yaml template file. Configuring a resource using the Stackery visual editor renders the appropriate YAML in the template.yaml file.
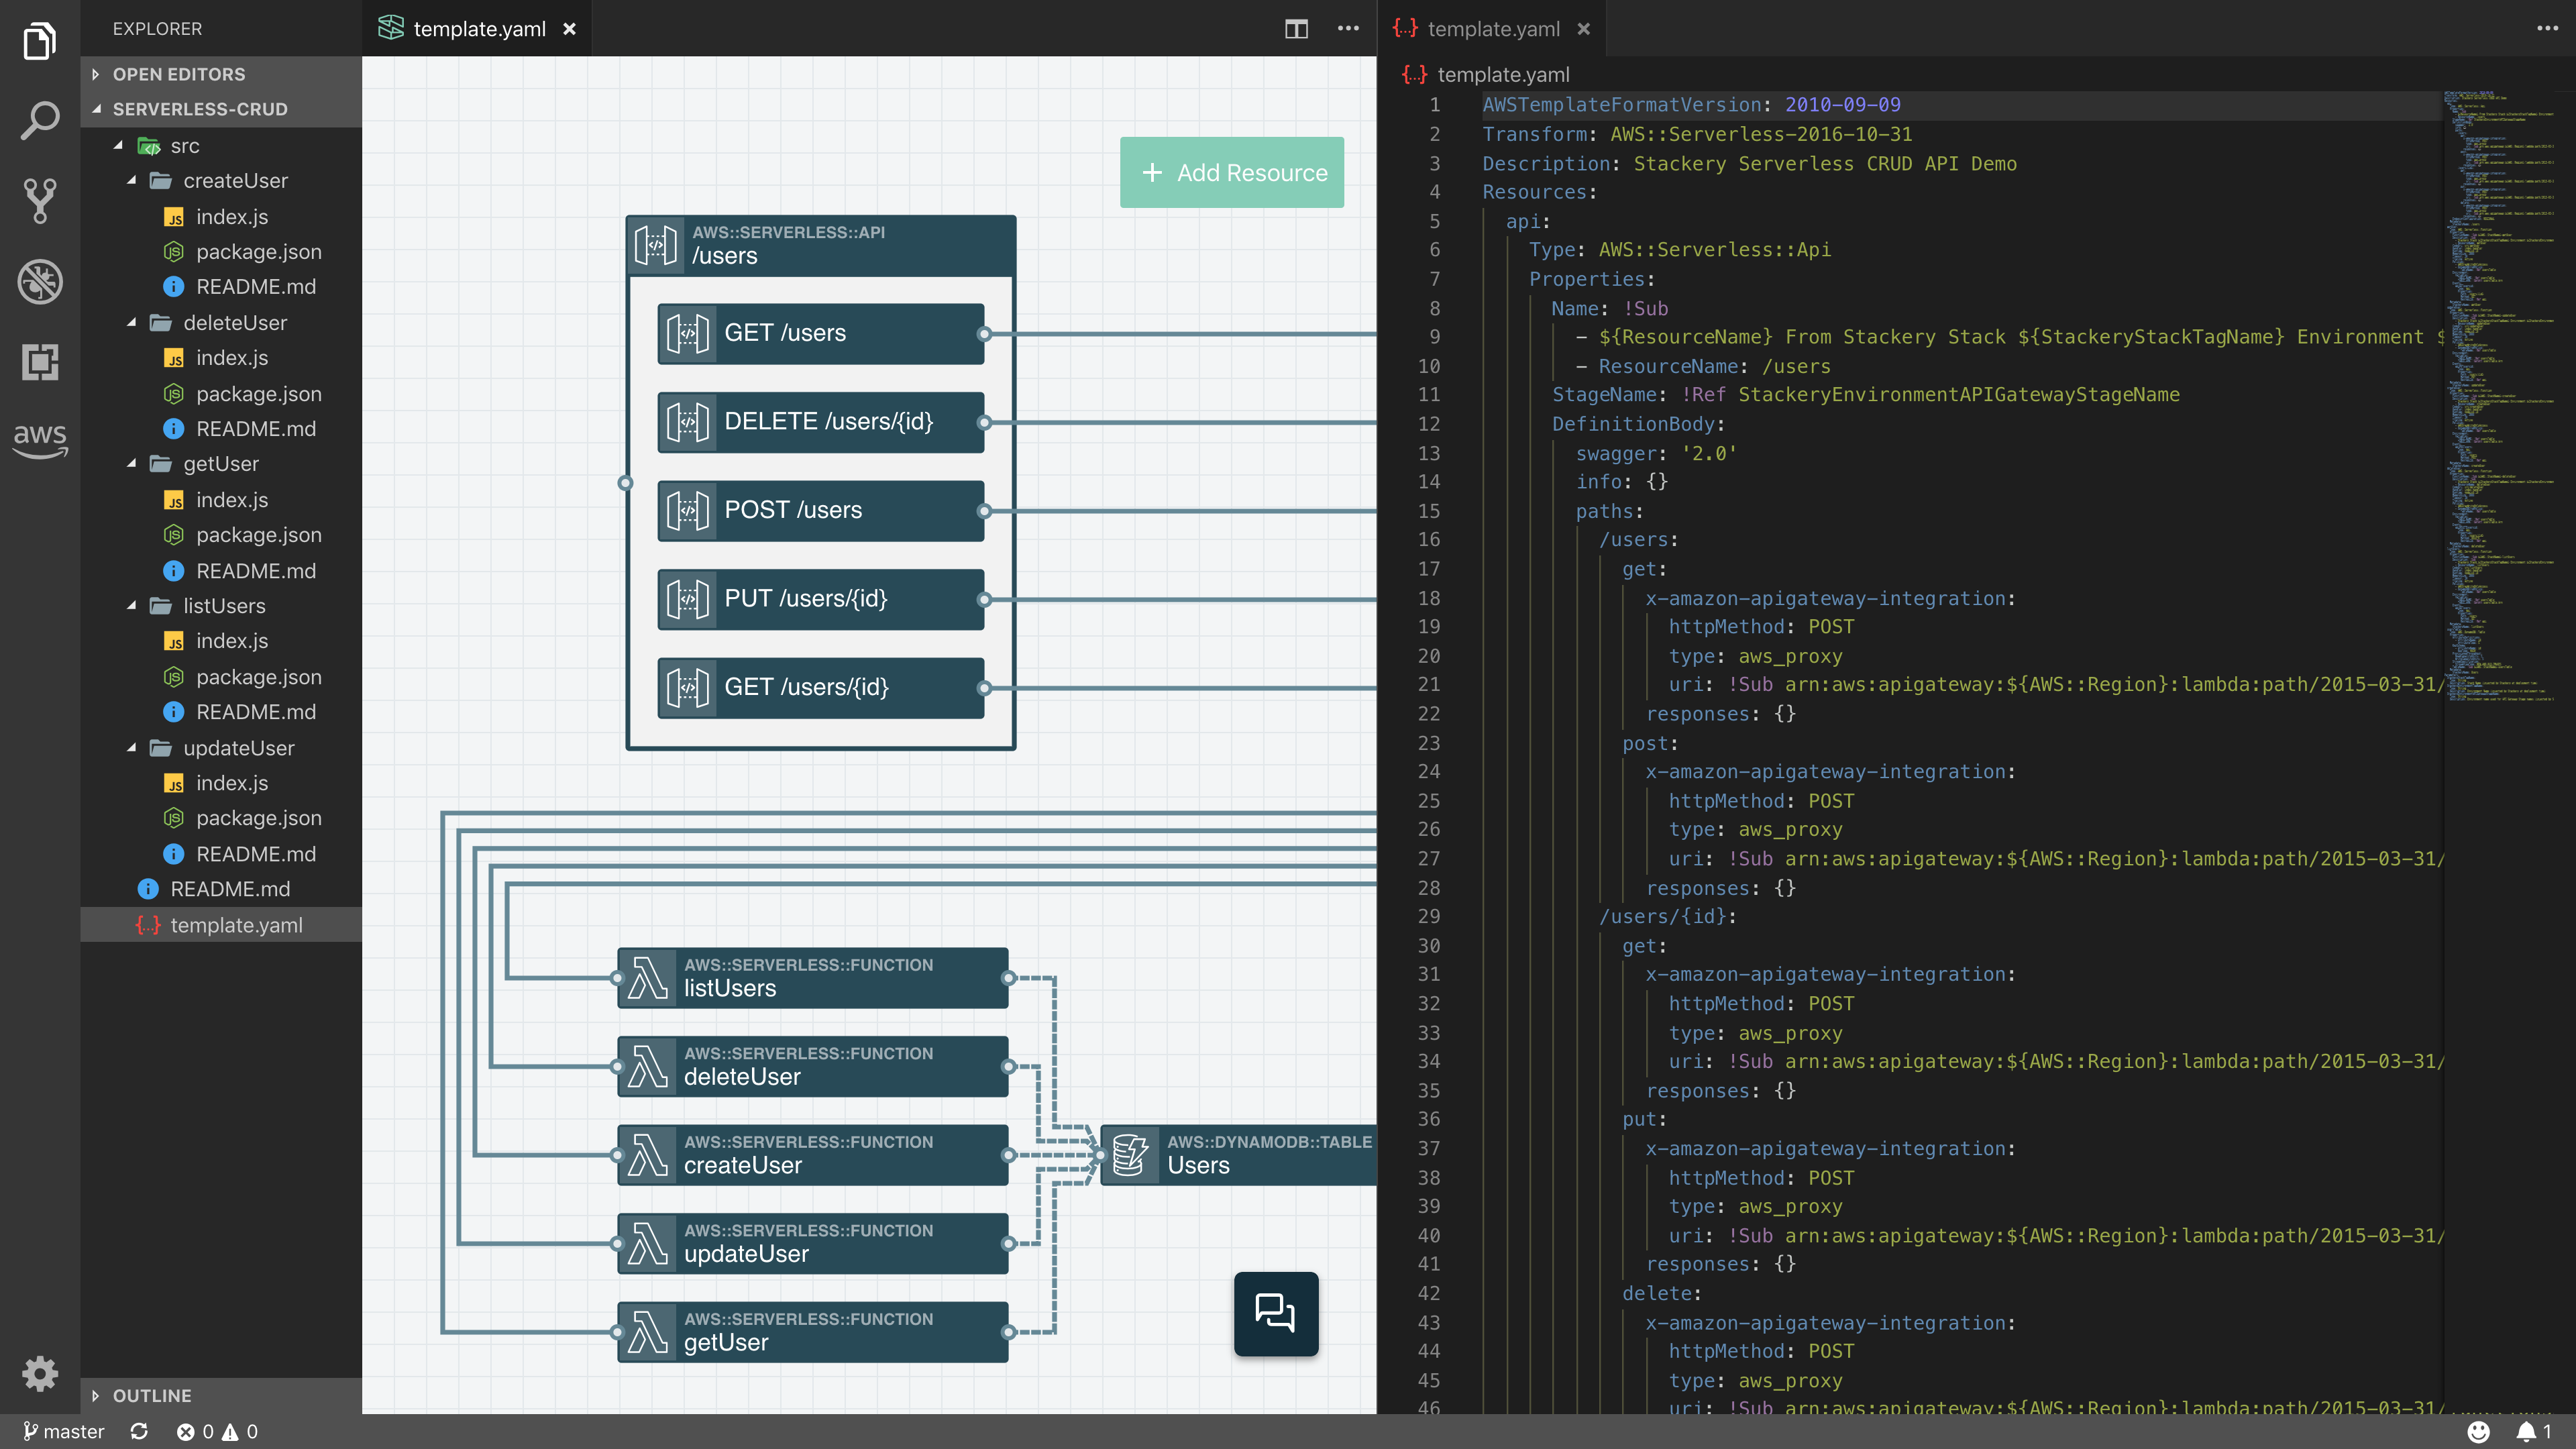
Visual Editing
There are two ways to start using the Stackery visual editor to configure your stack resources:
Right-click on
template.yamlto access the context menu, and select Open in Stackery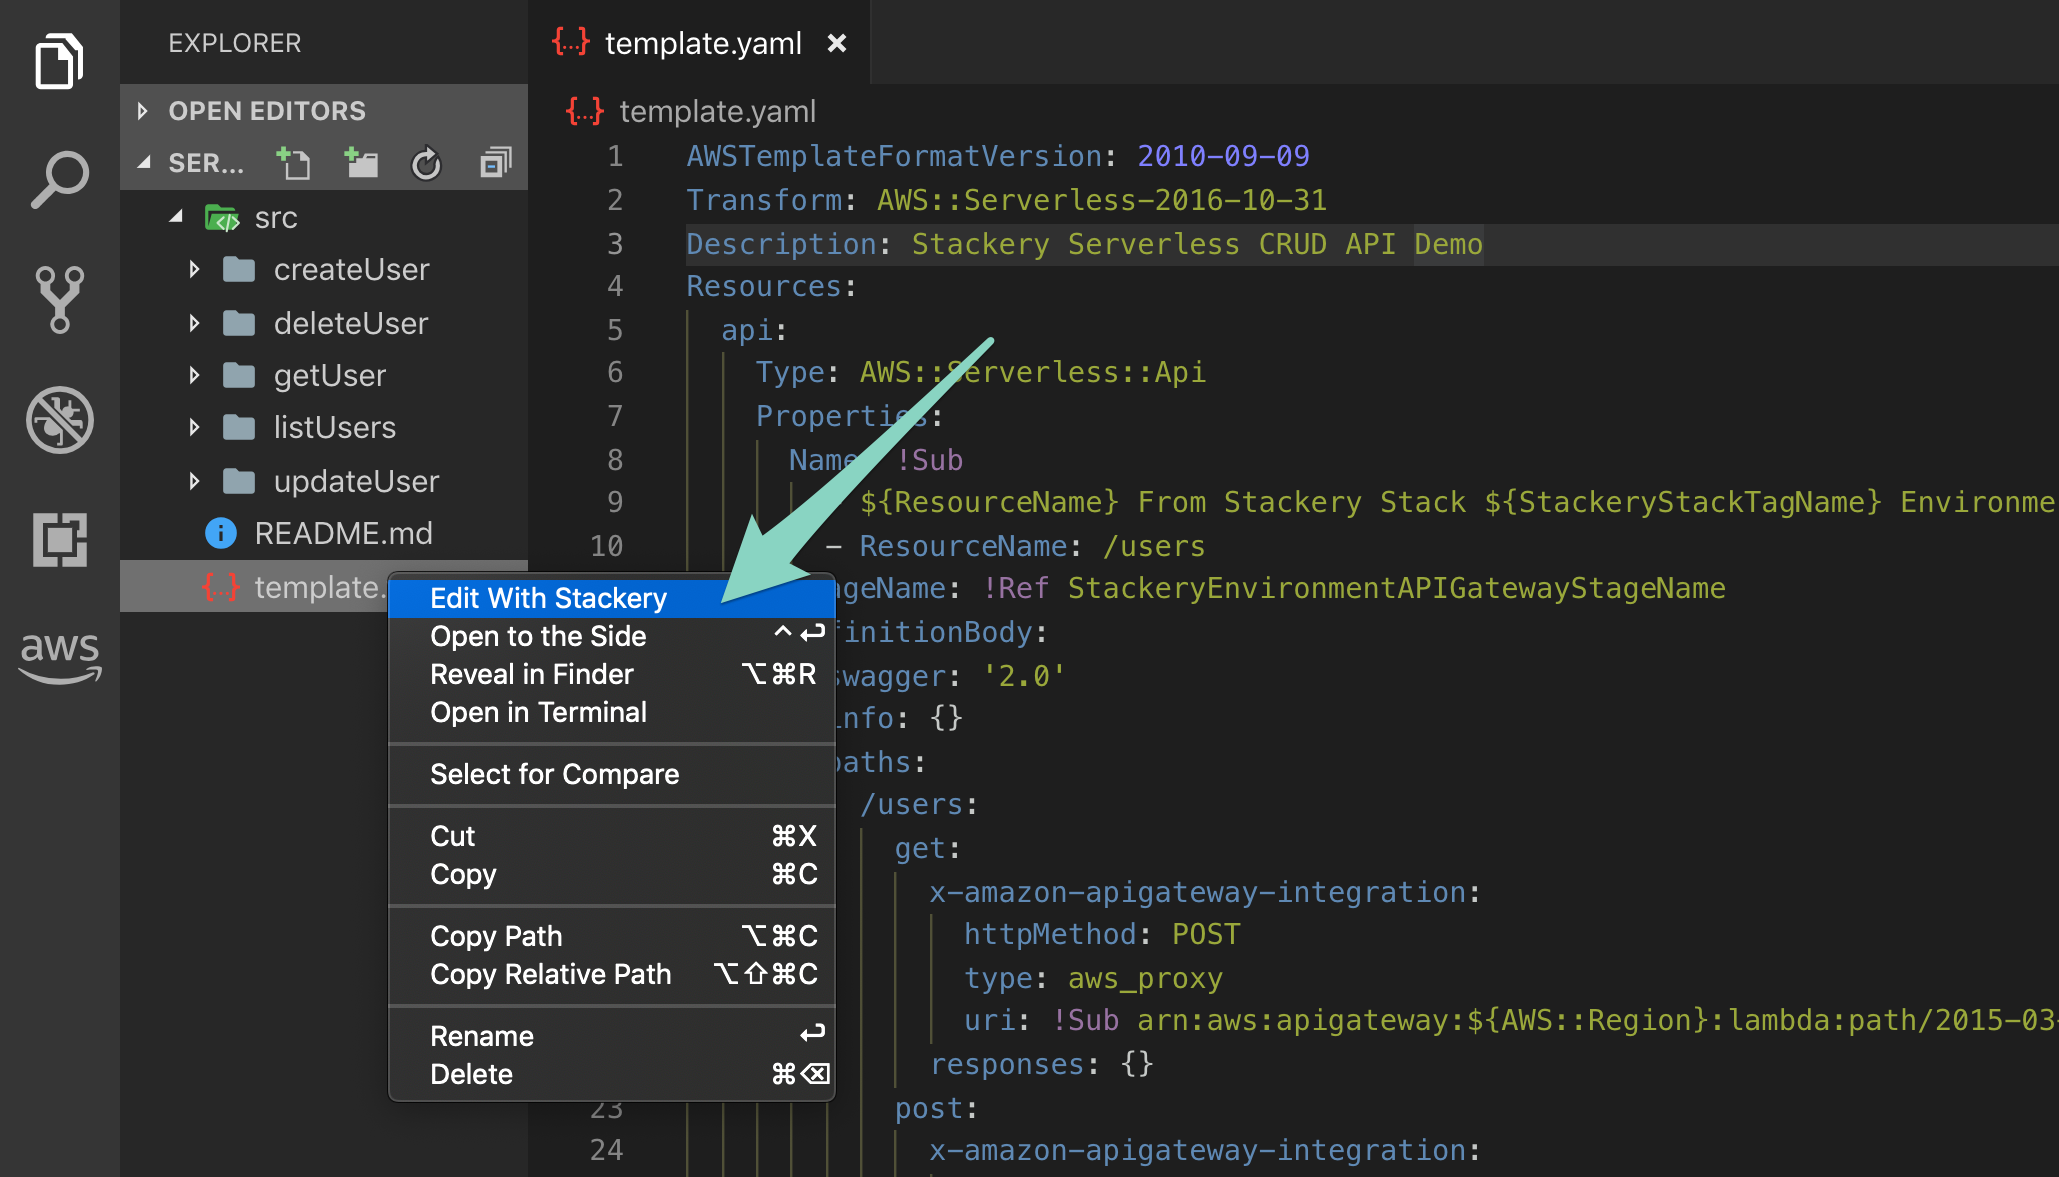
or
While in the
template.yamlfile, select the Stackery logo on the top-right corner of the window
Configure resources
To configure stack resources:
- Select
Add Resourcein the top-right corner of the visual editor - Choose from a list of available resources
- Drag (or double-click) a resource onto the visual editor
- Double-click the resource to open its configuration panel
For details on configurable properties of each resource, visit the Stackery Cloud Resources Reference
Event subscription
Subscribe compute resources to events emitted by other resources using a event subscription wire (solid wire), e.g. an Edge Function triggered by a CDN lifecycle event.
Service discovery
Connect a compute resource (Function, Edge Function, or Docker Task) to another resource using a service discovery wire (dashed wire) to populate the IAM policies and environment variables required for it to interact with that resource, e.g. a Function accessing an Object Store.
Logging out
If you want to log out of your Stackery session or to switch accounts, close your current editor tab, then hit Cmd+Shift+P (Ctrl+Shift+P on Windows) and search and select 'Stackery: Log out of Stackery Editor'. The next time you open the editor, you will be prompted to log in again.
Workflow Example
Let's try an example of visually editing an existing stack in VS Code. In this example, we'll use a simple serverless CRUD stack in NodeJS, but you can use one of your own existing stacks or initialize a new one in the Stackery CLI with this command:
stackery init -n simple-serverless-crud
Open VS Code, and install the Stackery Serverless Tools extension from the Extensions Marketplace if you have not already done so
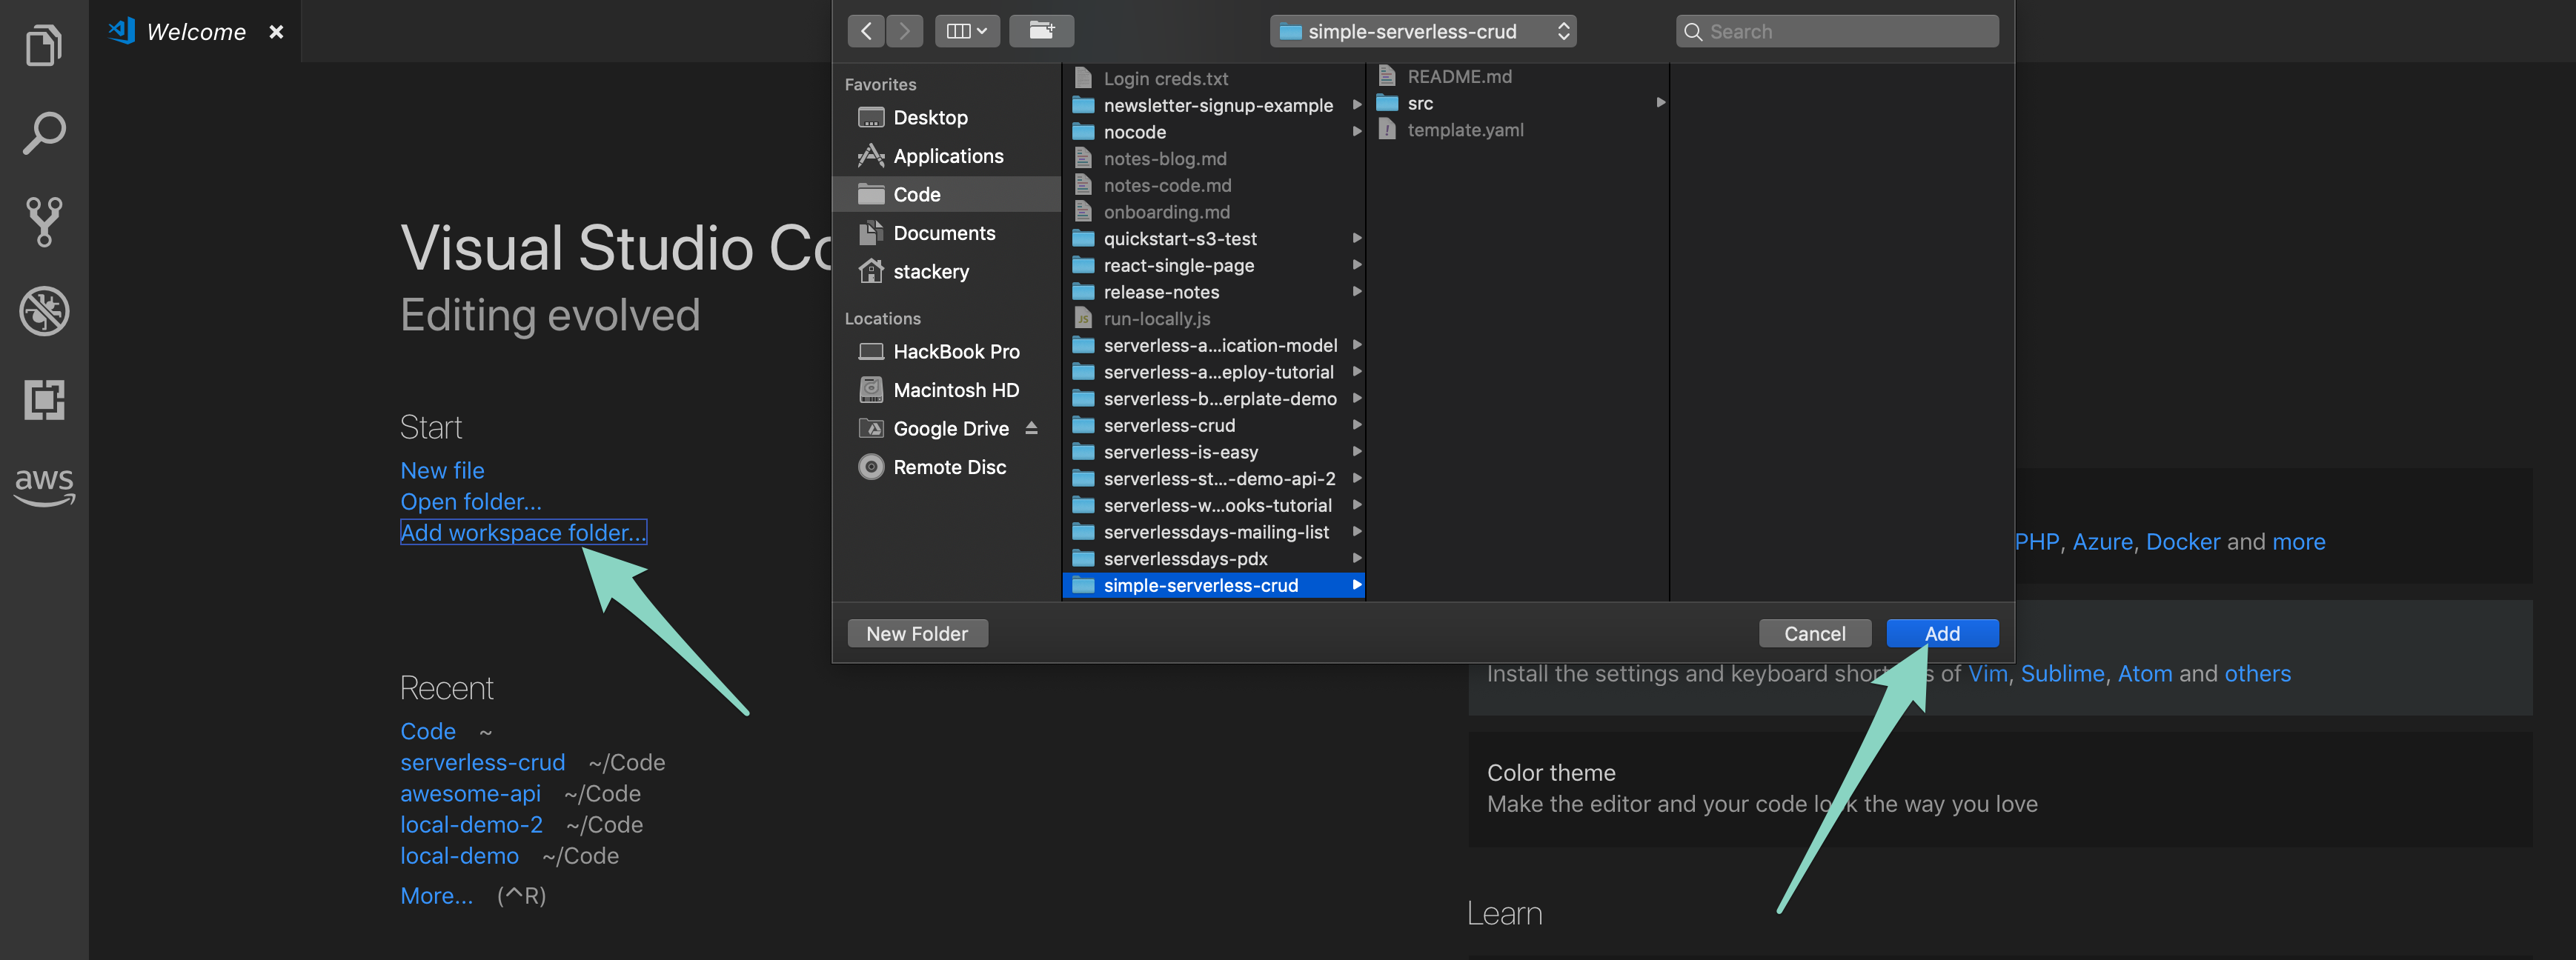
In VS Code, select Add workspace folder from the menu or welcome screen and choose the stack you want to edit
Open the
template.yamlfile from the sidebarClick the Stackery icon in the top right corner
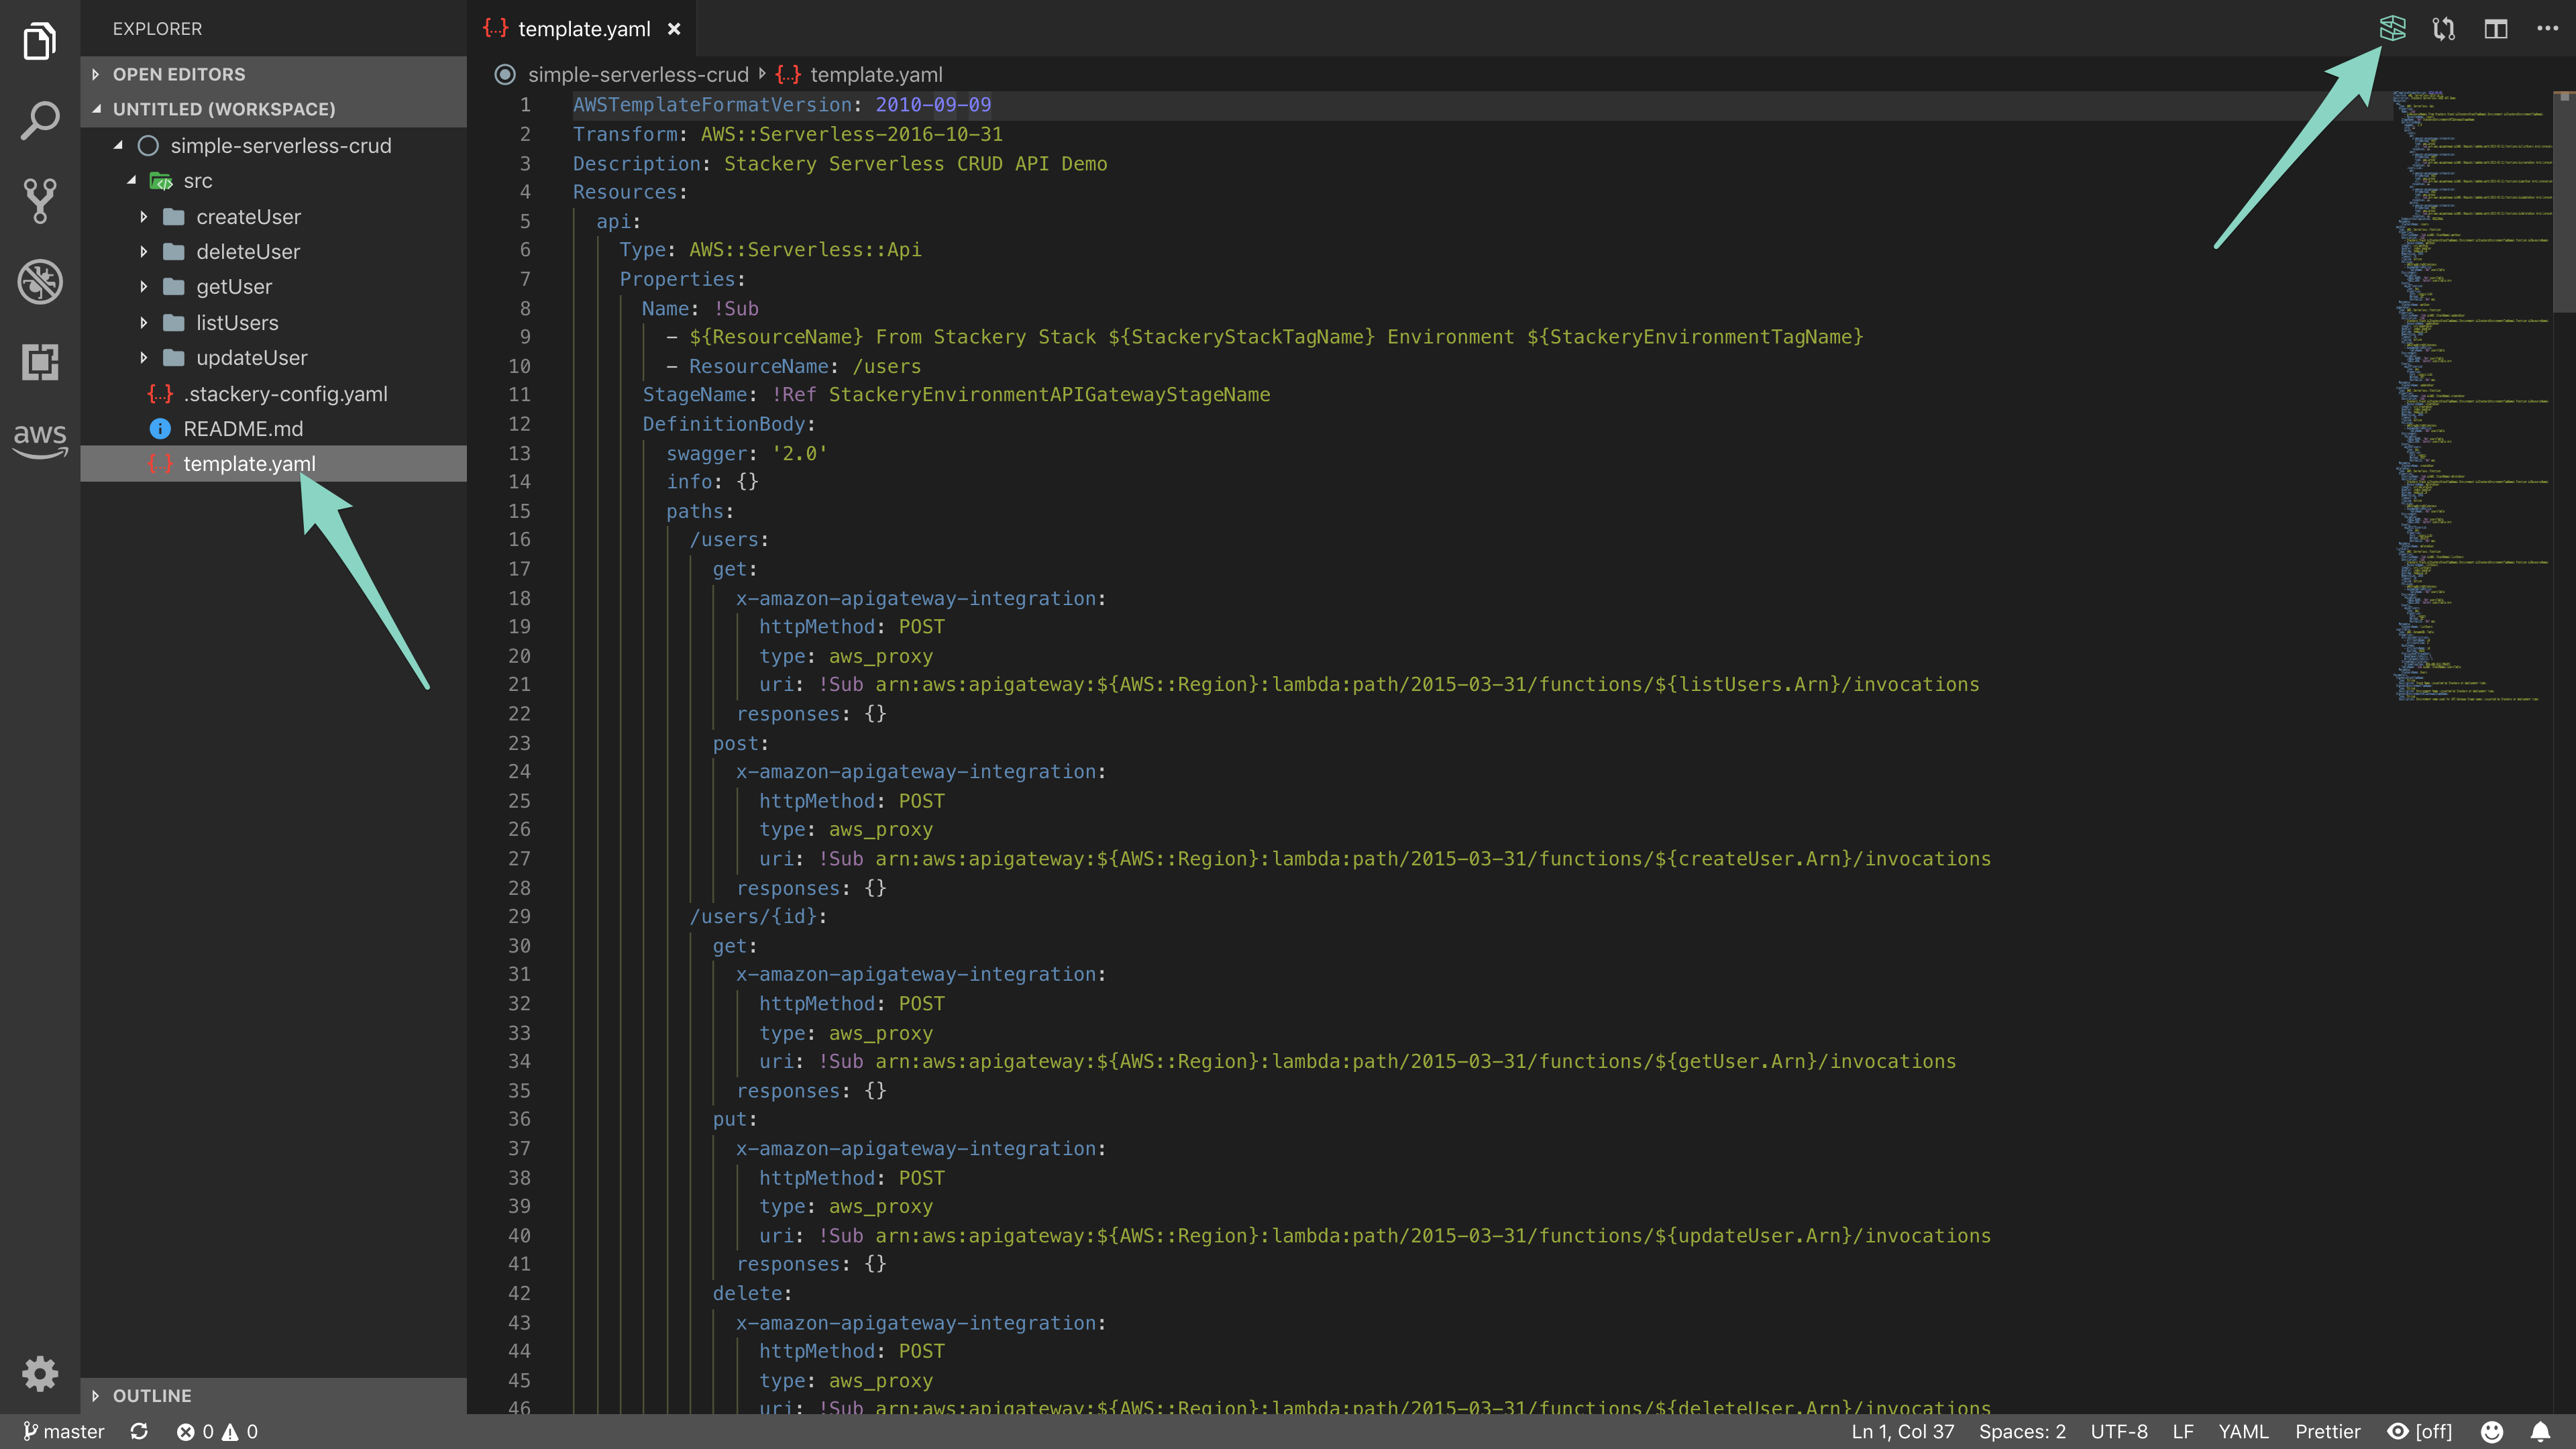
The first time you use the Stackery extension in a new workspace in VS Code, you will be prompted to log in to Stackery. Use the same username and password you would use in the app

(Optional) Pull your template to the side of the visual editor if you want a side-by-side view

Click the Add Resource button in the top right of the visual editor
Click the Function resource to add it to the editor (you will see the relevant code added to the
template.yamlfile as you use the visual editor)Click the Object Store resource to add it to the editor
(Optional) Name your function and object store by double-clicking the new resources, filling in the relevant fields, and clicking the green Save button
Right-click on your stack's root directory, and select Open in Terminal
In the terminal,
git add,commit, andpushyour changes to your Git repository. You will see your changes reflected in the Stackery app if it's open in your browser
The video below shows steps 4-13:
Troubleshooting
Missing Stackery CLI or CLI out of date
In order to use the Stackery VS Code extension, you need to have the Stackery CLI installed and updated to at least version 2.8.0. Check your version by entering stackery version in your the terminal or shell. If you need to update, run stackery update, then try the extension again.
Template file is not being updated
Before using the VS Code extension, make sure that your template.yaml file is part of a workspace in VS Code. Follow the instructions in the Workflow Example above to open a workspace.
Canvas not responding to typing
There is currently a known focusing bug in VS Code that may cause problems with switching from the template view to the editor view in the Stackery Serverless Tools extension. If at any point you are unable to type or interact with the canvas while using the extension, double-click on the canvas tab to restore focus, then try again.
Next Steps
Once your VS Code development environment is set up, it's easy to integrate with Stackery's other features, such as cloudlocal development and the CLI tool. Read the docs below to get started:
