Stackery Quickstart Java
With Stackery, you can get up and running and deploy your first serverless stack in just a few minutes. Start here to set up your account and learn how to use the Stackery Dashboard and CLI by building a simple web app.
If you're completely new to serverless architecture, read our Introduction to Stackery first.
Introduction
This guide will walk you through the steps of creating and deploying an AWS Serverless Application Model (SAM) service that writes to and fetches data from a table. In the process, you'll set up your Stackery account, connect it to Git and AWS, and get up and running with the Stackery CLI for cloudlocal development.
By the end of the tutorial, you will have:
- Created a Stackery account
- Integrated your Stackery account with your AWS and (optional) Git accounts
- Written simple Lambda functions to write and retrieve data from a DynamoDB table
- Created an API Gateway to serve your backend API
- Created an environment to deploy into
- Tested your function code locally against deployed cloud resources
- Deployed a working serverless application
After completing this Quickstart, your Stackery cloudlocal development environment will be set up and you'll be ready to move onto developing your own serverless projects.
Tutorial Updates
As we continue to develop Stackery, there may be improvements made to the design of the application. You may notice some differences between current versions and versions used to record our video guides. Rest assured, the overall functionality of Stackery remains the same.
For the most up-to-date visuals and instructions, please refer to the written version of the tutorial.
Setup
The following software is required to complete this Quickstart. Please install it if you don't already have it on your local machine:
- Java + Gradle
- The AWS CLI (make sure you have a
~/.aws/credentialsfile on the machine you'll be working on) - The AWS SAM CLI
- Docker Desktop Community Edition (for local development):
Quickstart Video (9 minutes)
The video contains the same information as the written tutorial below.
What We're Building
This Quickstart is meant to get you familiar with building serverless architecture with Stackery, so the app we will be building is fairly simple. We will be building a backend API for a list app, which can then be expanded with a simple frontend and user authentication in further tutorials. But let's keep it simple to start!
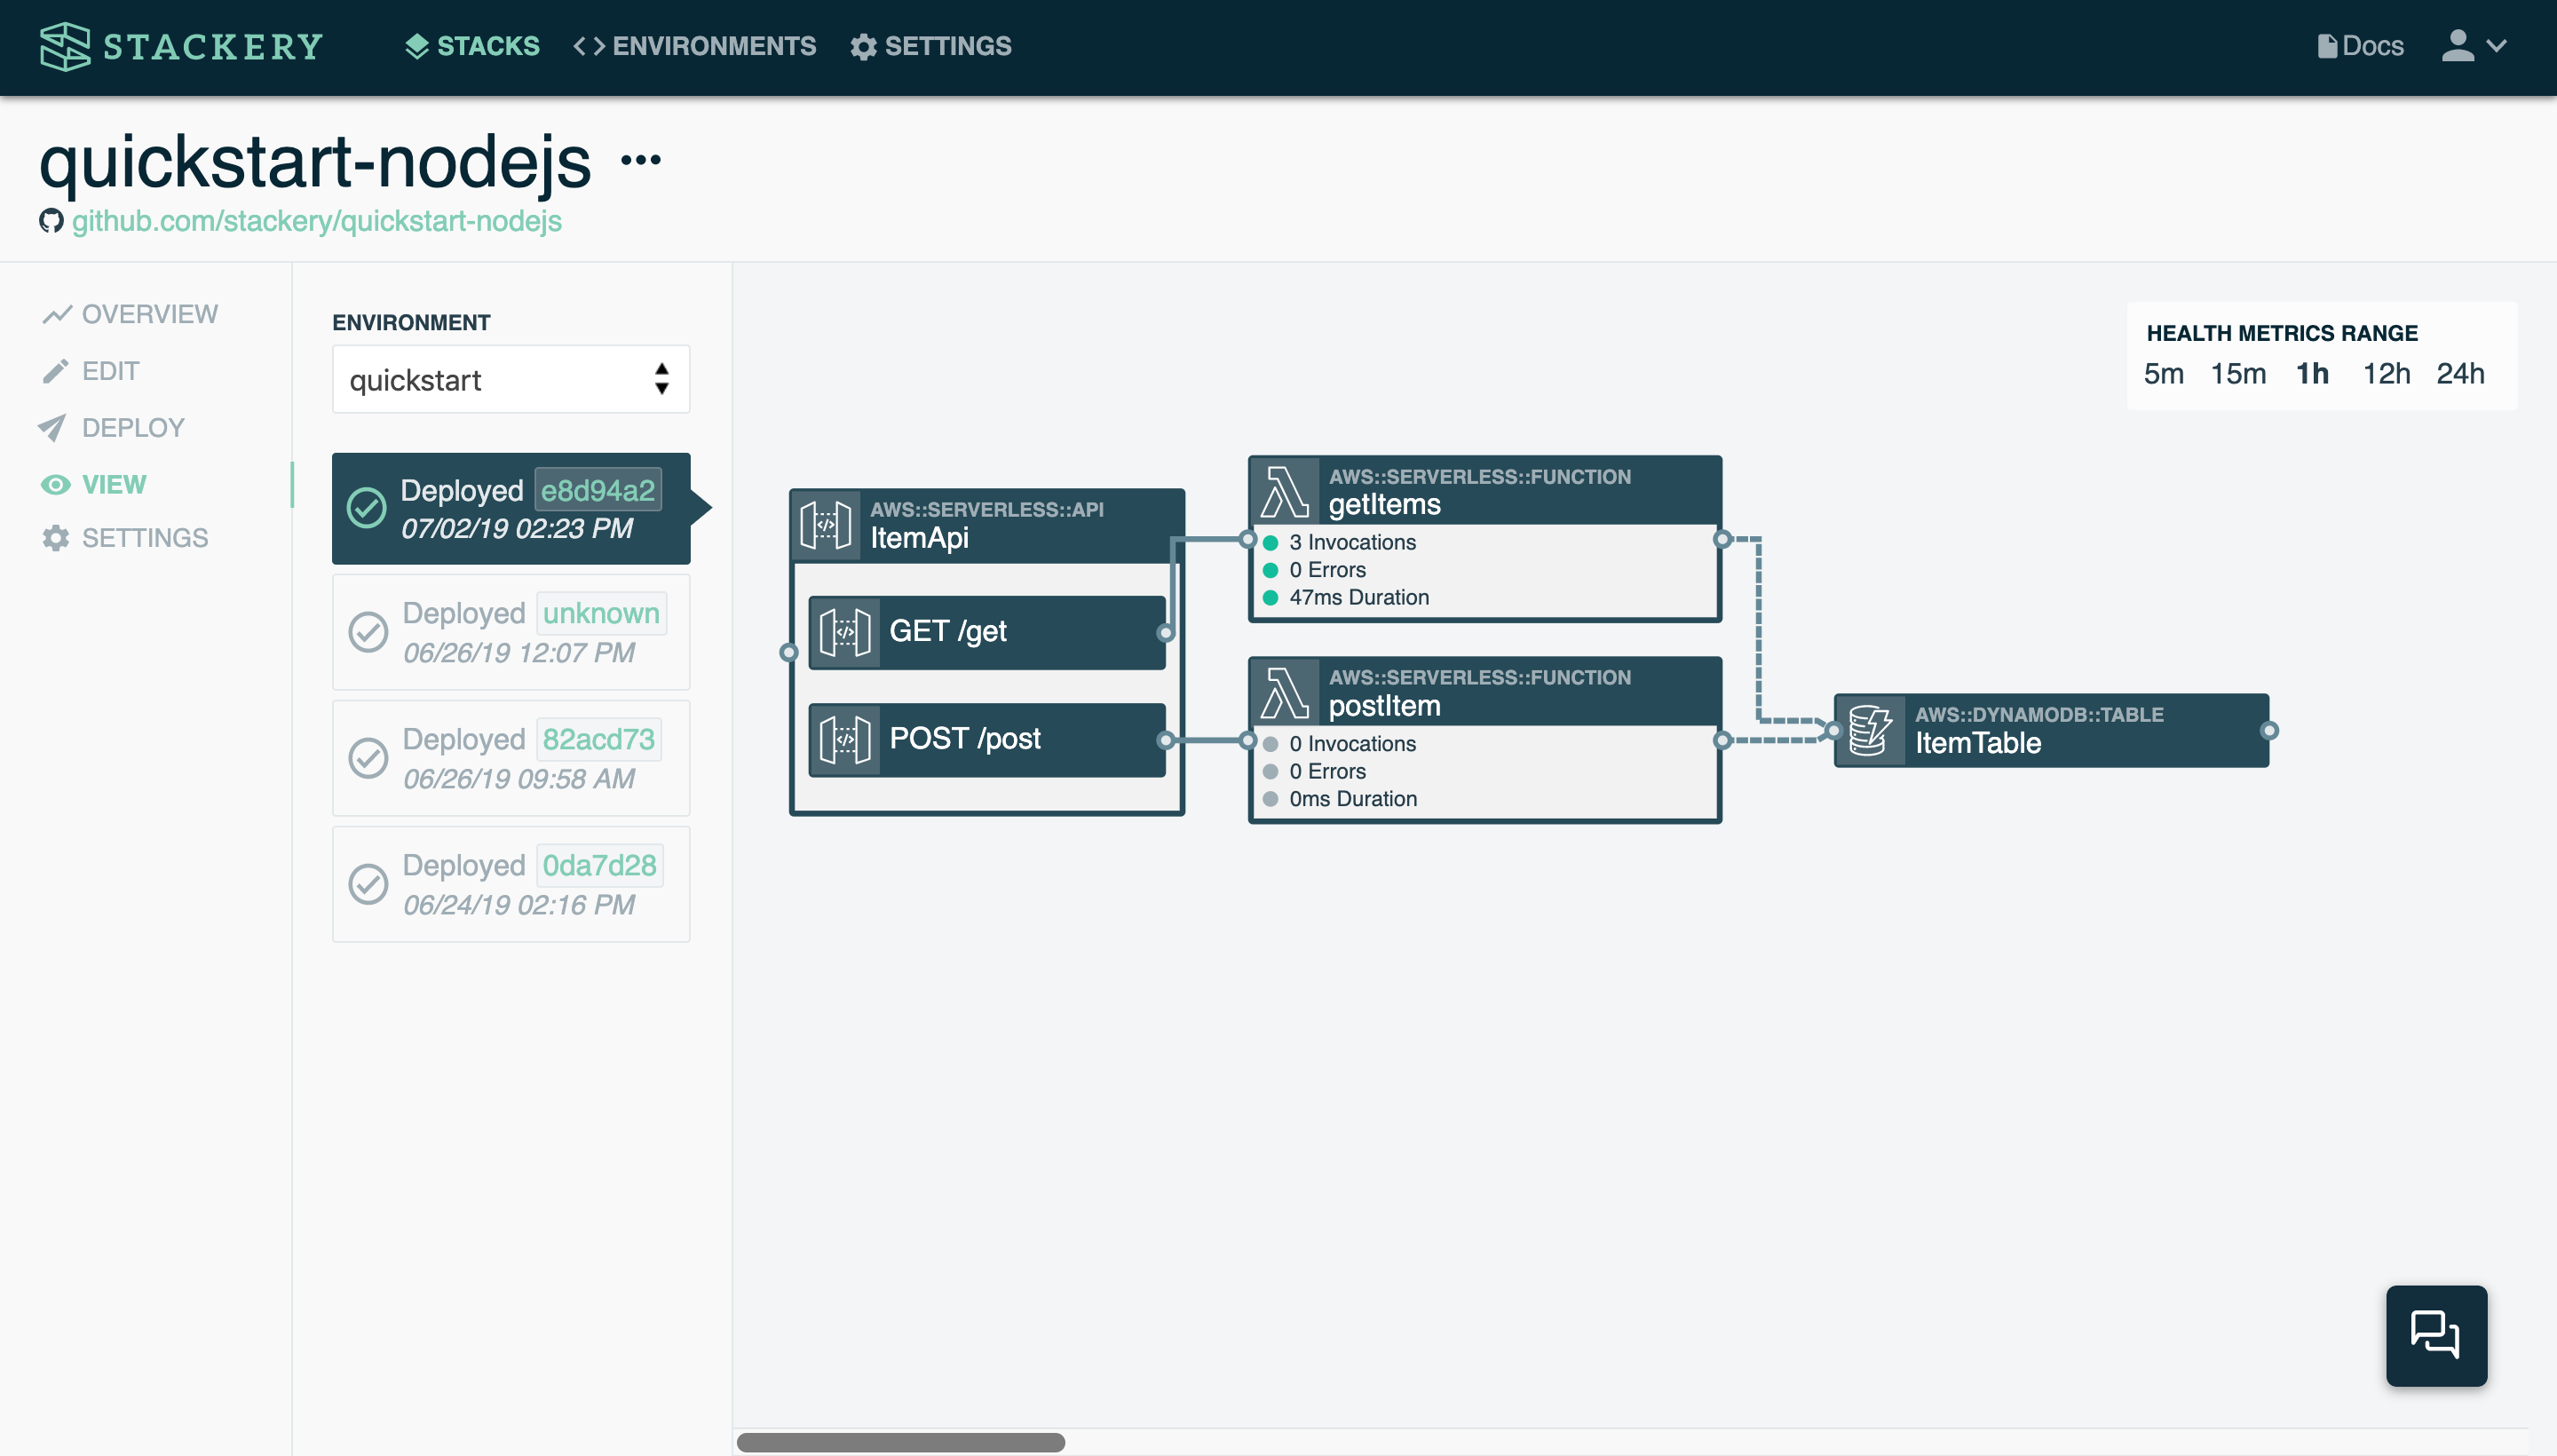
At the end of the tutorial, you will have built a simple list web app:

The following are descriptions of the Stackery resources we'll be working with:
Rest API : An API Gateway with GET and POST endpoints
Function : Two Lambda functions will POST and GET items to and from the table
Table : A DynamoDB table that will store our items
1. Create a Stackery Account
Head over to the Stackery Sign Up Page and create an account. (If you already have a Stackery account, skip to the next step).
If you were invited by a team member, follow the link in your email to create an account.
Once your account is created, you will be automatically signed in and redirected to the Stackery Setup. If you plan to complete the Quickstart, you can skip the setup and go to the next step).
(Optional) Complete the in-app setup
You can complete the in-app setup if you'd like, though we will be linking your AWS account in a later step as well.
2. Set up Your Stack
Now you're ready to create and deploy your serverless web app!
Install the Stackery CLI
We will be using the Stackery CLI to create, deploy, and run your stack locally.
In your bash terminal or shell, enter the appropriate command for your operating system to download and install Stackery on your machine.
Using Homebrew, run the following commands:
brew tap stackery/tap
brew install stackery-cli
curl -Ls --compressed https://ga.cli.stackery.io/linux/stackery > /usr/local/bin/stackery \
&& chmod a+x /usr/local/bin/stackery
Download https://ga.cli.stackery.io/windows/stackery.exe

Move stackery.exe to your preferred installation location.
Connect your Stackery account
To finish setting up the Stackery CLI on your computer, enter:
stackery login
This will prompt you for the email address and password you entered on the Stackery Sign Up Page.
Create a new stack with stackery init
You can create a new stack in the Stackery Dashboard or the CLI, but in this case we will be using the CLI to get started.
In your terminal or bash, enter:
stackery init -n stackery-quickstart
This will initialize a blank stack called stackery-quickstart in a directory of the same name. In it, you'll find a blank template.yaml and a .stackery-config.yaml configuration file.
You are now ready to build your new stack locally. In the terminal, enter:
stackery edit
A blank canvas will open in your browser (you may have to log in with your Stackery account first). You will use it to architect your serverless app in the next step.
Add resources to your stack
In the next few steps, we'll demonstrate how to visually add and integrate resources in Stackery.
Configure an API Gateway to serve your backend
- Click Add Resource in the top-right corner of the editor. When clicked, a panel opens, showing all of the cloud resource types currently supported by Stackery
- Choose Rest Api from the list, and click or drag and drop it anywhere onto your editor canvas
- Double-click on the resource node you just dragged in, and an editor panel with options will open up
- In the editor panel, you can name your API and choose the methods you will use. For Logical ID, enter
QuickstartApi - Under Routes, give the the
GETroute a path of/itemsand add aPOSTroute below it with a path of/newItem - Click Enable CORS
- Click the Save button at the bottom to save your API resource
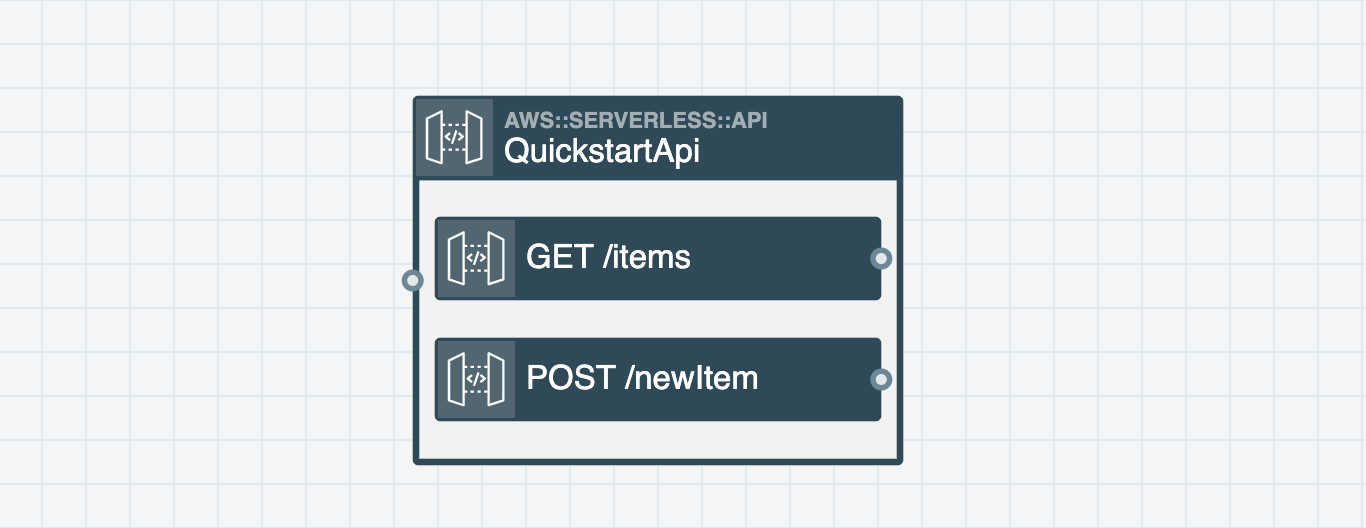
Your Rest API should look like this:

Add Lambda functions
- Click the Add Resource button in the top right
- Click Function twice to add two functions to the canvas
- Double-click the first Function to open the editing panel
- Enter
newItemfor the function Logical ID - Choose
java8for the Runtime - Change the Source Path to
src/newItem - Leave the other values as they are
- Scroll down and click Save at the bottom to save your function
- Double-click the second Function to open the editing panel
- Enter
getItemsfor the function Logical ID - Choose
java8for the Runtime - Change the Source Path to
src/getItems - Leave the other values as they are
- Click Save at the bottom to save your function
- Draw an event subscription wire from the left side of the
GET /getroute in theQuickstartApito the right side of thegetItemsfunction - Draw an event subscription wire from the left side of the
POST /postroute in theQuickstartApito the right side of thenewItemfunction
An Event Subscription Wire is a solid line that represents an event subscription or integration between Cloud Resources.
You have just linked your functions to your API endpoints. Your stack should now look like this:

Add a DynamoDB table
Next you need to add a table to your stack:
- Click the Add Resource button in the top right
- Select Table and click or drag and drop it onto the canvas
- Double-click the Table to open the editing panel
- Enter
Itemsfor the table Logical ID - Leave the other values as they are
- Click Save at the bottom to save your table
- Draw a service discovery wire from the right side of the
getItemsfunction to the left side of theItemstable - Draw a service discovery wire from the right side of the
newItemfunction to the left side of theItemstable
A Service Discovery Wire is a dashed line that connects a Compute Resource (Function or Docker Task) to another Cloud Resource Node.
Your stack should now look like this:

If you have your stack's template.yaml file open, you'll notice it was automatically populated with the CloudFormation configuration, permissions, and roles for all of the resources we just added. In addition, a src directory was created that includes basic scaffolding code for the getItems and newItem functions. You can now save those files and (optionally) commit them to your Git provider.
In the next step, we'll deploy the app to begin local development.
3. Deploy your initial stack
You can deploy stacks via the Stackery Dashboard or the Stackery CLI.
Your newly created stack is now ready to be initially deployed to AWS Cloudformation. To do so, you first need to link your AWS account and create an environment to deploy to. In this Quickstart, we'll create a test environment called test. It's typical to have several environments such as development, staging, and production when working on a production application.
Set up your deployment
Still in your stack's root directory, enter:
stackery deploy --interactive-setup --use-container
This will guide you through linking your AWS account and creating a deployment environment.
You only need to use the
--interactive-setupflag if you need to link a new AWS account and/or create a new environment while deploying your stack for the first time. Otherwise, you can just use the normalstackery deploycommand with flags.
The deployment process itself will take a few minutes, after which you will have deployed a serverless app!
But that's just the start of the serverless development workflow. Next we will set up your cloudlocal editing environment.
4. Iterate locally
The next step is to write your function code. You will then test your function code against the DynamoDB table you just deployed.
Add the newItem function code
When you added the newItem and getItems functions, directories and files for those functions were scaffolded in the src/ directory. Open stackery-quickstart/src/newItem/src/main/java/Handler.java in your favorite text editor or IDE. If you use VS code, you can enter the following in your terminal:
code src/newItem/src/main/java/Handler.java
Replace the boilerplate code with the following and save newItem/src/main/java/Handler.java:
import java.util.HashMap;
import com.amazonaws.AmazonServiceException;
import com.amazonaws.services.dynamodbv2.AmazonDynamoDB;
import com.amazonaws.services.dynamodbv2.AmazonDynamoDBClientBuilder;
import com.amazonaws.services.dynamodbv2.model.AttributeValue;
import com.amazonaws.services.dynamodbv2.model.ResourceNotFoundException;

public class Handler {
    public Object handler(Object event) {
        String tableName = System.getenv("TABLE_NAME"); // get the table name from the automatically populated environment variables

        HashMap<String,AttributeValue> item_values =
            new HashMap<String,AttributeValue>();

        item_values.put("id", new AttributeValue("1")); // modify with each invoke so the id does not repeat
        item_values.put("content", new AttributeValue("This is my content")); // modify content here

        final AmazonDynamoDB ddb = AmazonDynamoDBClientBuilder.defaultClient();

        try {
            // Write a new item to the Items table
            ddb.putItem(tableName, item_values);
            System.out.format("Adding item \"%s\" to table  \"%s\".\n", item_values, tableName);
        } catch (ResourceNotFoundException e) {
            System.err.format("Error: The table \"%s\" can't be found.\n", tableName);
            System.err.println("Be sure that it exists and that you've typed its name correctly!");
            System.exit(1);
        } catch (AmazonServiceException e) {
            System.err.println(e.getMessage());
            System.exit(1);
        }
        return "Item added to table, done!";
    }
}
In the function code above, we're using the AWS SDK for Java to connect to our DynamoDB table and then write items to it. The item contents are specified in the item_values HashMap. We then return an error or a success response.
Iterate newItem locally against the cloud
Next we will locally invoke our newItem function to write items to the deployed Items.
Make sure you saved newItem/src/main/java/Handler.java, then open a terminal and cd to the src/newItem/ directory. Enter the following:
stackery local invoke -e test --aws-profile <your-aws-profile-name> --build --use-container
Note the --build and --use-container flags. Build is a compiled-language specific flag, while the Java runtime requires the use of a container when invoking or deploying locally.
After running it once, change the contents of lines 15 and 16:
item_values.put("id", new AttributeValue("2")); // modify with each invoke so the id does not repeat
item_values.put("content", new AttributeValue("Some more content")); // modify content here
Then save the file and run the stackery local invoke command every time you change your code. Try running it 3-5 times with different input.
After each invoke, your output should look similar to this:

Add the getItems function code
Now that we've written some items to our table, let's see if we can get a list of what's in there. Open stackery-quickstart/src/getItems/src/main/java/Handler.java in your favorite text editor or IDE and replace the boilerplate code with the following:
import java.util.HashMap;
import java.util.Iterator;
import com.amazonaws.AmazonServiceException;
import com.amazonaws.services.dynamodbv2.document.DynamoDB;
import com.amazonaws.services.dynamodbv2.document.Table;
import com.amazonaws.services.dynamodbv2.AmazonDynamoDB;
import com.amazonaws.services.dynamodbv2.AmazonDynamoDBClientBuilder;
import com.amazonaws.services.dynamodbv2.model.ResourceNotFoundException;
import com.amazonaws.services.dynamodbv2.document.ScanOutcome;
import com.amazonaws.services.dynamodbv2.document.Item;
import com.amazonaws.services.dynamodbv2.document.ItemCollection;

public class Handler {
    public Object handler(Object event) {
        String tableName = System.getenv("TABLE_NAME"); // get the table name from the automatically populated environment variables

        final AmazonDynamoDB ddb = AmazonDynamoDBClientBuilder.defaultClient();
        DynamoDB dynamoDB = new DynamoDB(ddb);
        Table table = dynamoDB.getTable(tableName);

        try {
            // Use dynamodb to get items from the Items table
            ItemCollection<ScanOutcome> items = table.scan();

            Iterator<Item> iter = items.iterator();
            while (iter.hasNext()) {
                Item item = iter.next();
                System.out.println(item.toString());
            }
        } catch (ResourceNotFoundException e) {
            System.err.format("Error: The table \"%s\" can't be found.\n", tableName);
            System.err.println("Be sure that it exists and that you've typed its name correctly!");
            System.exit(1);
        } catch (AmazonServiceException e) {
            System.err.println(e.getMessage());
            System.exit(1);
        }
        return "Done!";
    }
}
The function code above uses the AWS SDK to access the designated DynamoDB table and System.out.println all of its contents.
Save getItems/src/main/java/Handler.java, then open a terminal and cd to the getItems/ directory. Enter the following:
stackery local invoke -e test --aws-profile <your-aws-profile-name> --build --use-container
Your output should look similar to this:

Note that the items are not in order - that's due to the asynchronous nature of the function code. You could add function logic to order the items in the future.
5. Final deploy
We just tested our functions locally, and they're passing with flying colors, so it's time to deploy our finished version.
In this example, we will deploy again into the
testenvironment, but if you were working on a production application using Stackery, this is the point when you would deploy your app into aproductionenvironment.
Deploy using the CLI
Open your terminal and cd to the root directory of your stack, then enter:
stackery deploy -e test --strategy local --aws-profile <your-aws-profile-name> --use-container
We're using the
--strategyflag and setting it to local if the stack is not part of a Git repository. If you have linked Git to your Stackery account, you can replace--strategy localwith-r master(or whatever branch you want to deploy).
Once again, the deployment process will take a few minutes. You will be notified in the terminal when it is completed.
View your stack
It's time to view your deployed stack in the Stackery Dashboard! Open the Stackery app in your browser, log in if needed, then navigate to Stacks.
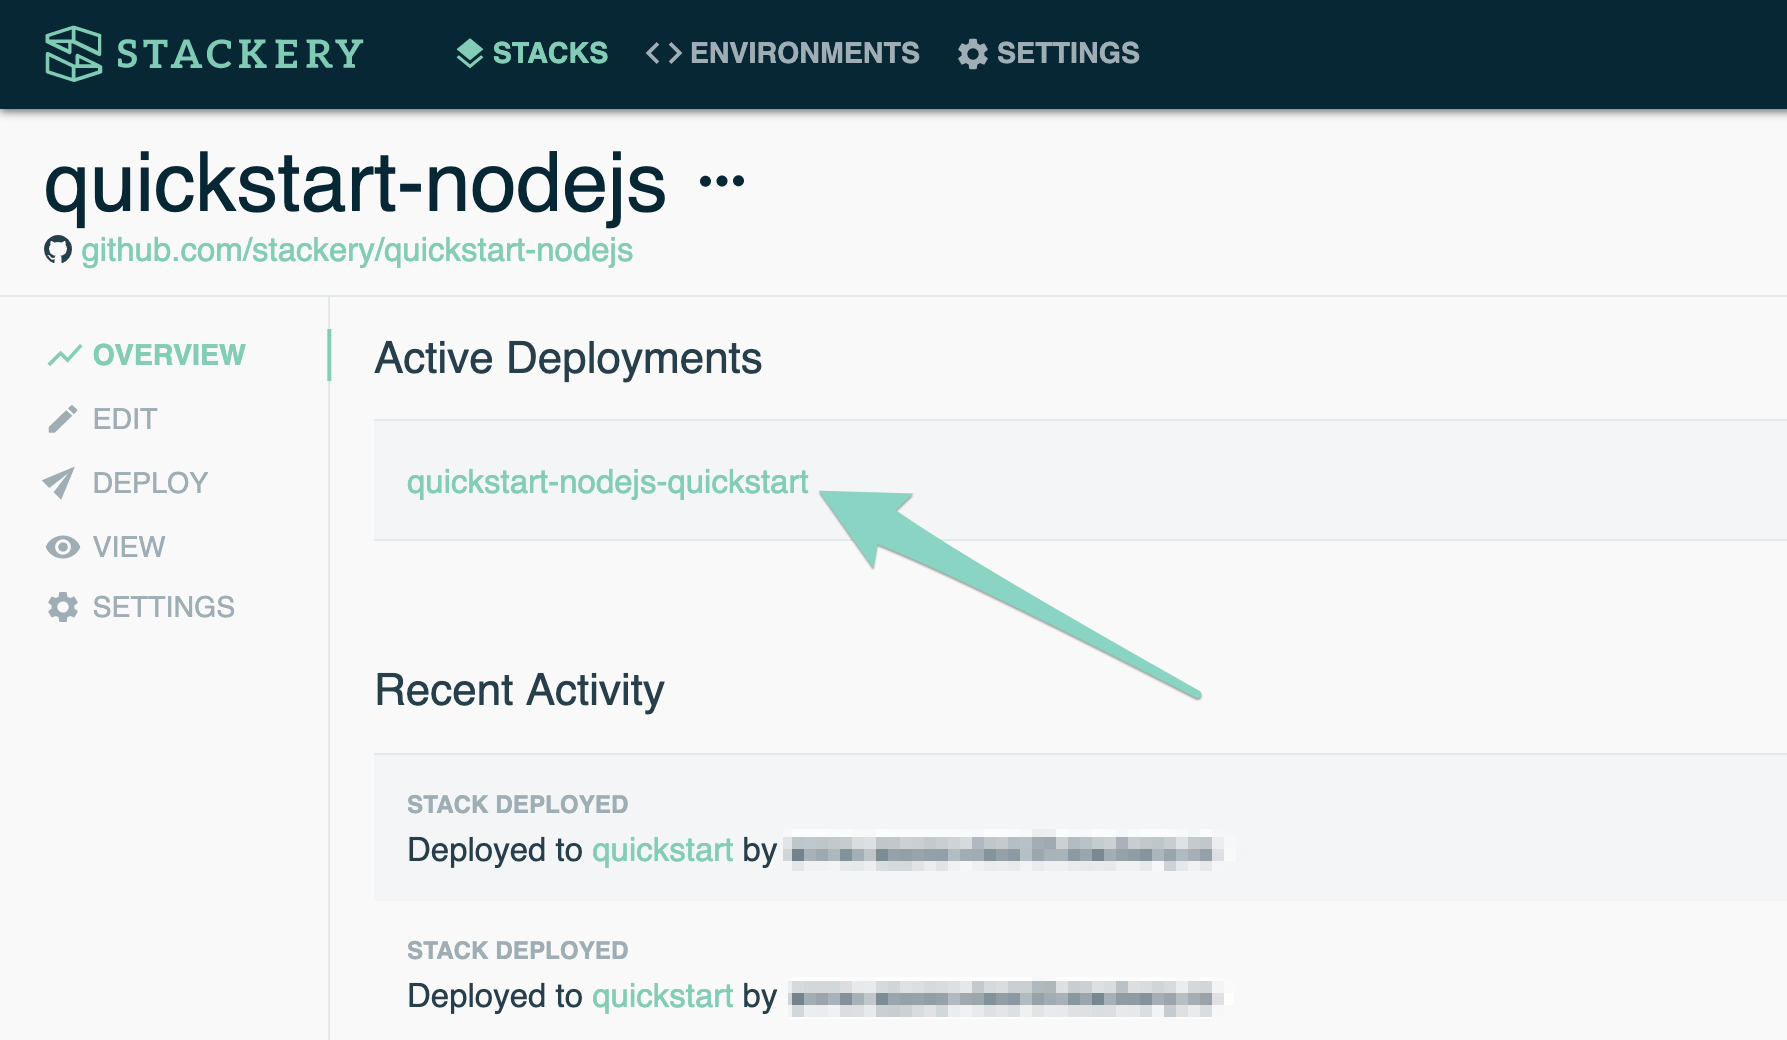
Select stackery-quickstart from your list of stacks. You will land in the Overview tab for that stack:

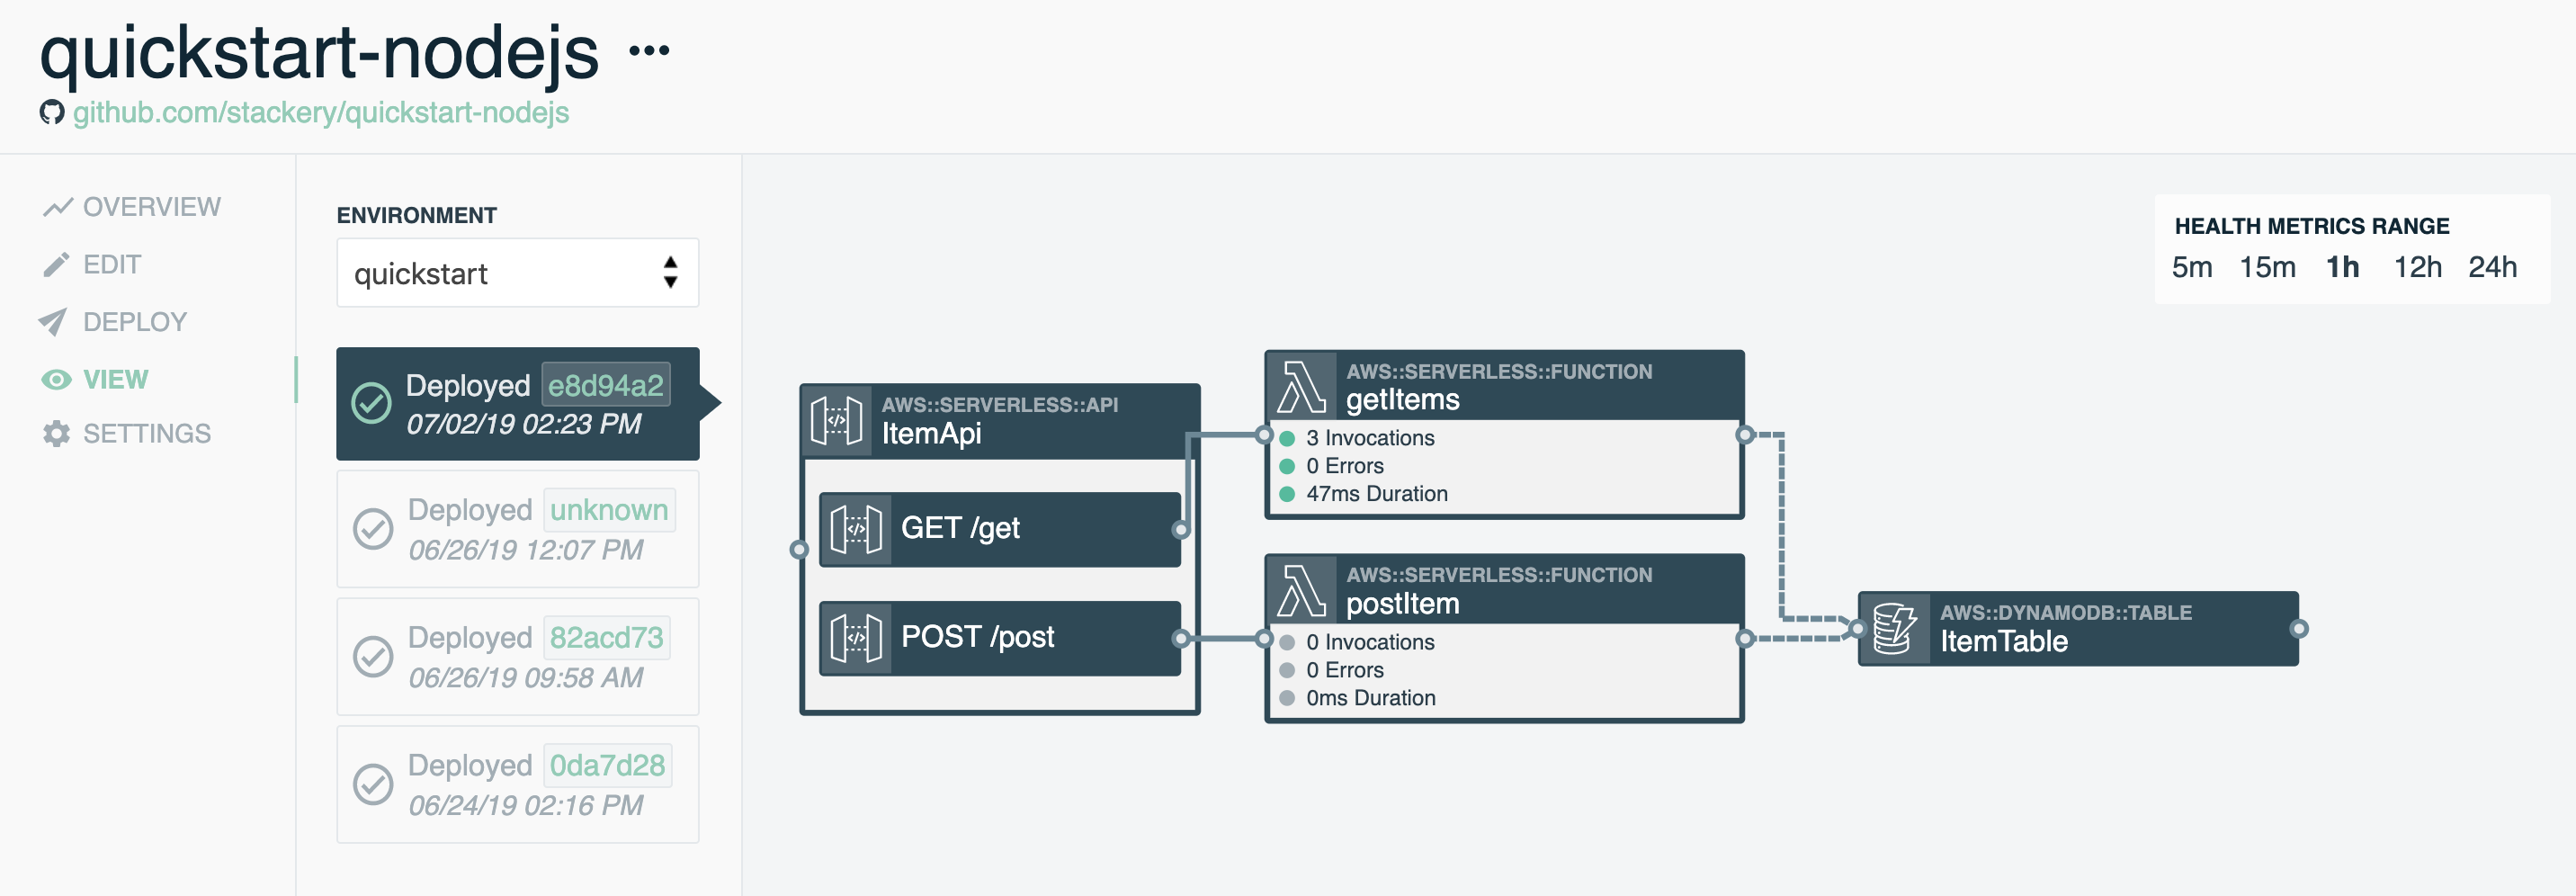
Click stackery-quickstart-test under Active Deployments, and you will be taken to the View tab:

There, you can double-click on each function to find a link to view it in the AWS Console, view your API endpoints, and see your Items in the console as well. When you do so, you should see all of the items that were added locally:

That's it! You can expand on this tutorial by adding a frontend and user authentication to your list API, which you can find in our tutorials section, or you can start building your own serverless apps with Stackery!
Project Repositories
All of the code for this sample stack is available in the following repository:
Next Steps
Now that you've got the basics down, the Quickstart API Frontend tutorial builds on this stack and adds a frontend to access the data in your table.
